30
Setting up Motion Recording
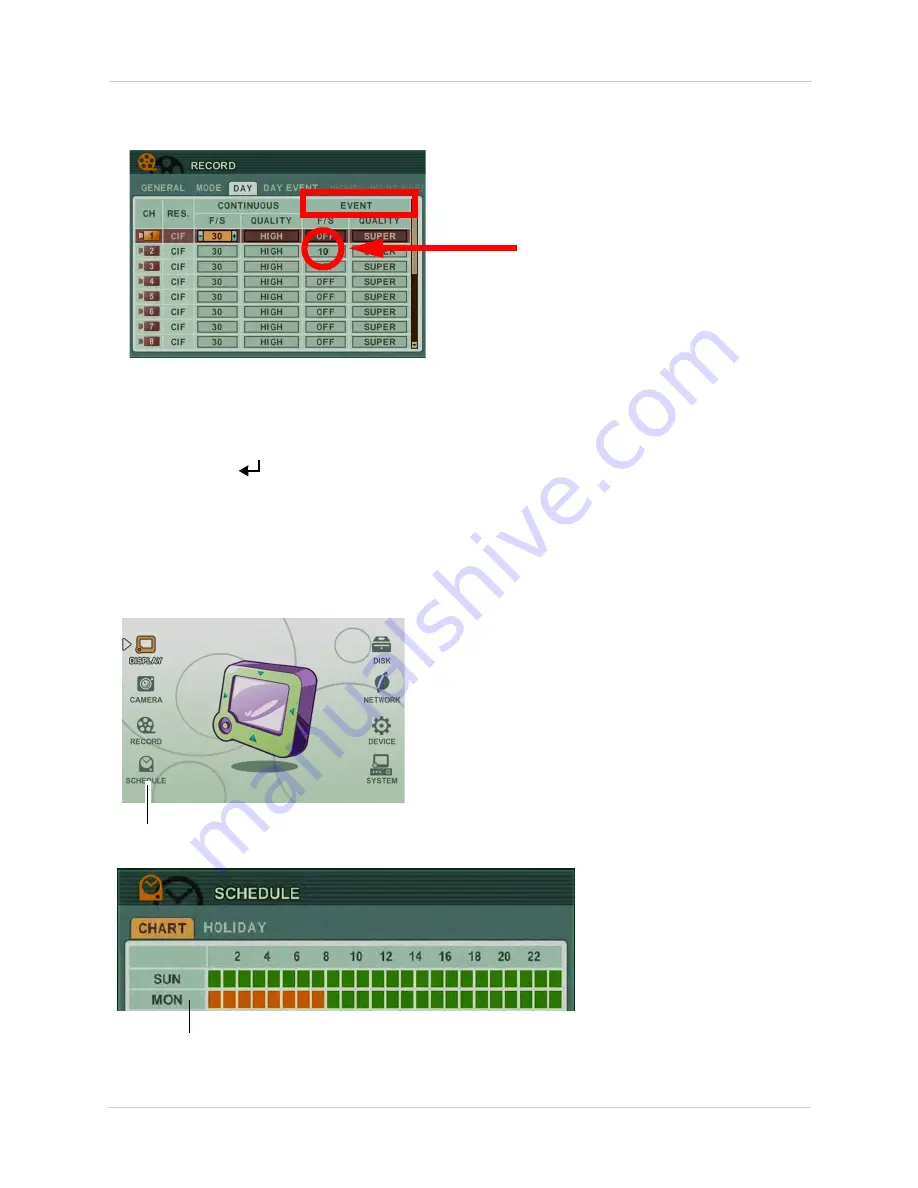
8. Below EVENT, enter the frame rate for motion recording on this camera under
F/S
. Repeat
for any other cameras that you wish to enable motion recording.
NOTE:
If you want to disable continuous recording, under CONTINUOUS, under F/S, select
OFF
.
This causes the system to record only when the cameras detect motion.
9. Under
QUALITY
, enter the desired video quality when the camera detects motion.
10. Click
ENTER
(
)
to save your settings.
Step 2: Configure Schedule settings (optional)
NOTE:
By default, Day recording settings are used 24/7. If you would like to create a custom
schedule, click on
RECORD>GENERAL,
and under
SCHEDULED USE
,
select
ON
.
1. Click
SCHEDULE
.
SCHEDULE
2. Double-click the days that you wish to configure the Day and Night recording schedule.
Double-click on the day to configure.
3. Configure the following:
Summary of Contents for DH200+R Series
Page 12: ...xii...
Page 119: ...107 iSMS Client Remote Viewing on the Mac PTZ Controls cont d...
Page 174: ......
Page 175: ......


