2
BASIC SETUP
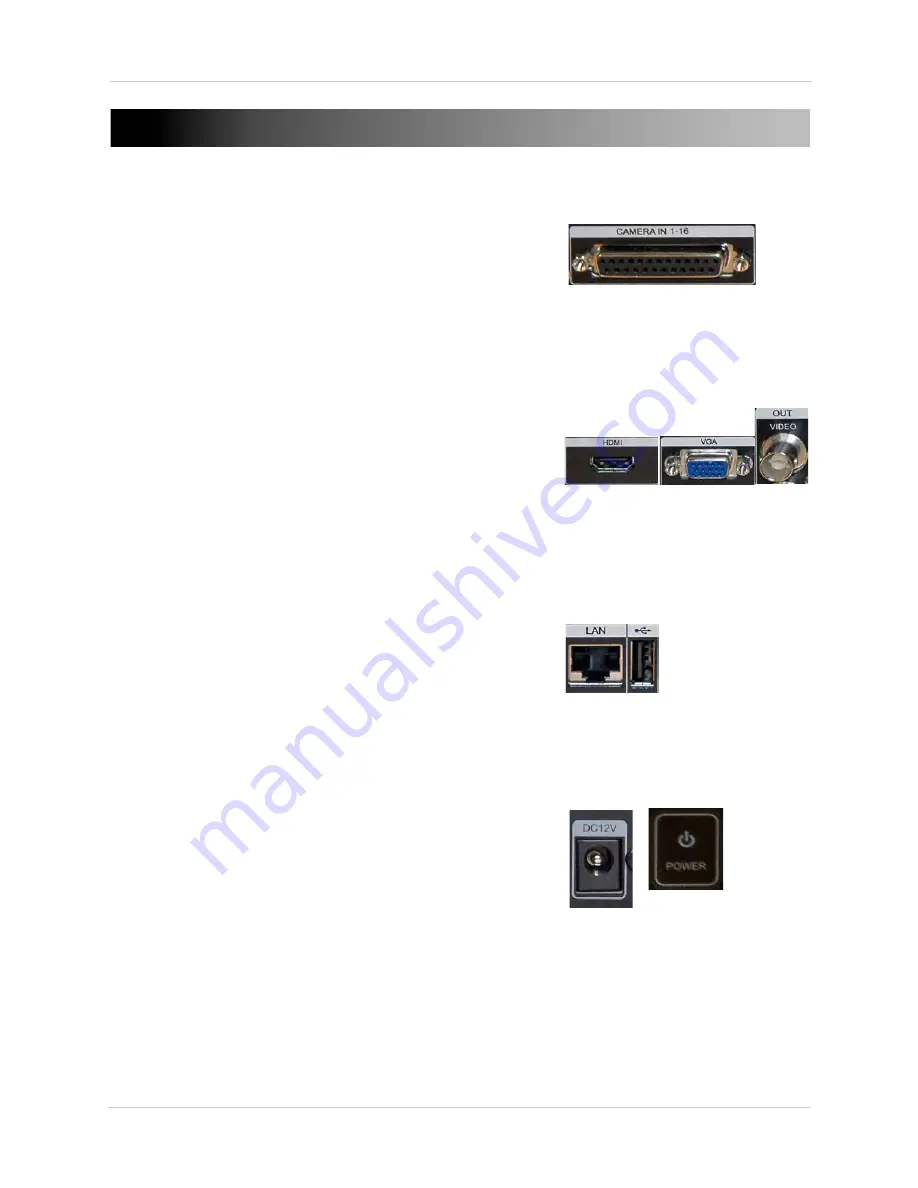
1. Connect the cameras
a. Connect the Octopus cable to the
CAMERA IN 1~16
port on the rear panel and connect BNC cameras to
the Octopus cable.
2. Connect a monitor
a. Connect a VGA cable (not included) from the
VGA
port
on the rear panel to the VGA port on your monitor,
OR
b. Connect a HDMI cable (not included) from the
HDMI
port to the HDMI port on your monitor,
OR
c. Connect a BNC terminated cable from the
VIDEO OUT
port to a TV or CCTV monitor.
d. If you are using a touch screen monitor (not included),
connect a USB cable (not included) from a
USB
port on
the front or rear panel of the system to the monitor.
e. Power on the monitor.
3. Connect the mouse
a. Connect the mouse to the
USB
port on the front or
rear panel.
4. Connect the Ethernet cable
a. Connect an Ethernet cable (not included) to the
LAN
port.
5. Connect the power cable
a. Connect the power supply to the
DC12V
port on the
rear panel of the system.
b. Press the
POWER
button on the front panel.
Connect the Octopus cable to the system and
connect the cameras to the Octopus cable
Connect to a VGA, HDMI or Video Out
(USB port shown below)
Connect an Ethernet cable and mouse
Connect the power cable and press the
power button
Summary of Contents for DH200+R Series
Page 12: ...xii...
Page 119: ...107 iSMS Client Remote Viewing on the Mac PTZ Controls cont d...
Page 174: ......
Page 175: ......


