37
Using the Main Menu
RECORD
Configure recording parameters for
each channel.
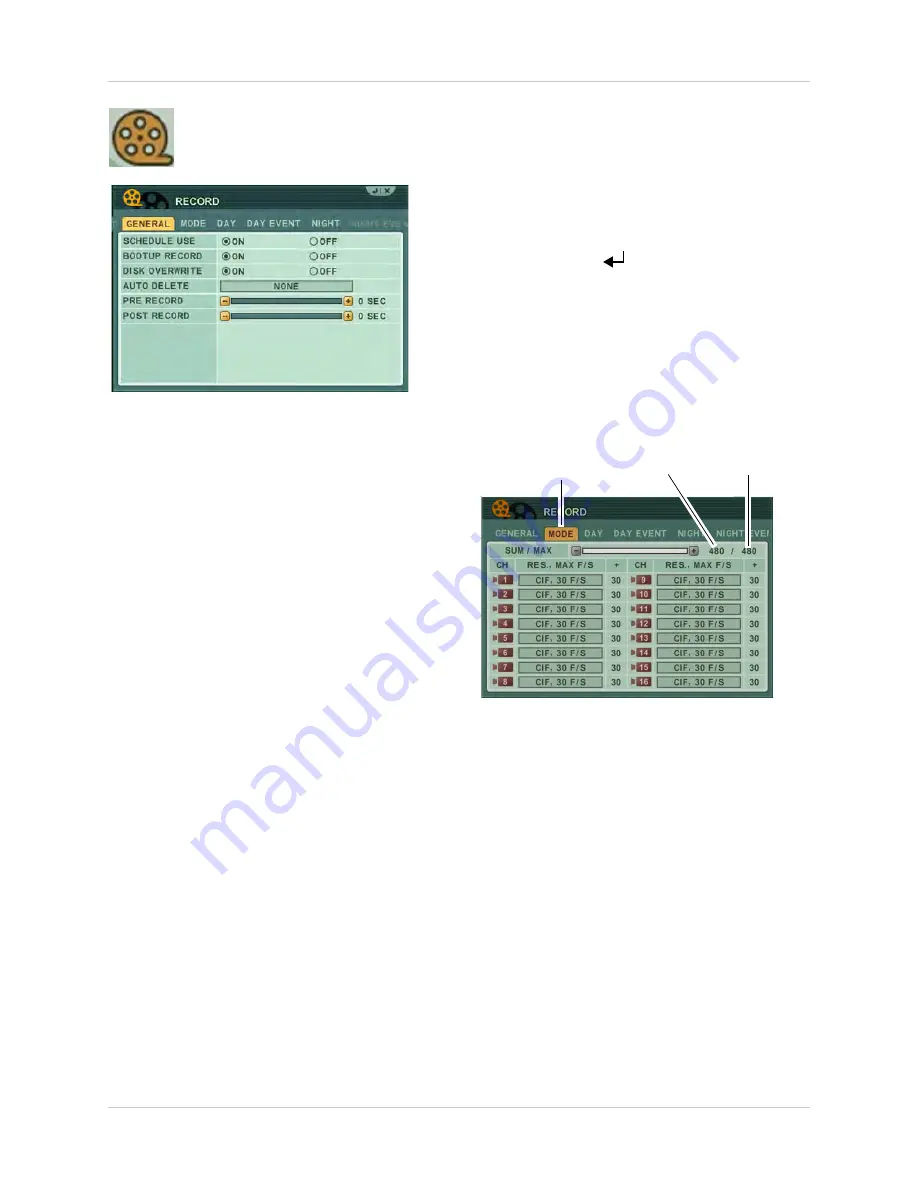
GENERAL
To configure the GENERAL tab:
1. Click the
GENERAL
tab (selected by
default).
2. Configure the following:
•
SCHEDULE USE
: Select
ON
to configure the
NIGHT and NIGHT EVENT tab. By default,
Schedule Use is turned off, and DAY
recording settings are used 24/7.
•
BOOTUP RECORD
: Turn this setting
ON
(default) so that the DVR begins recording
automatically at system boot up. If this
setting is turned off, the DVR will not record
until you press the record button.
•
DISK OVERWRITE
: Turn this setting
ON
(default) so that the hard drive
automatically erases the oldest data once
the hard drive is full (first in first out). If Disk
Overwrite is turned off, the system will stop
recording once the hard drive is full.
•
AUTO DELETE
: Configure the duration the
system should keep the data on the hard
drive before it is deleted. Select from 12
hours ~ 30 days. For example, if you choose
12 hours, the system keep the last 12 hours
of recording, deleting the older footage.
•
PRE RECORD:
Configure the amount of
time the system records before an event
recording. Select from 5 seconds ~ 300
seconds. For example, if an event occurred
at 12:00:00, and you have the pre-recording
time marked at 5 seconds, then during the
search, the video will begin at11:59:55.
•
POST RECORD
: Configure the amount of
time the system marks an event after an
event occurs. Select from 5 seconds ~ 300
seconds.
3. Click
ENTER
(
)
to save your changes.
MODE
To configure the MODE tab:
Prerequisite:
Stop the system recording
before configuration. If the system is still
recording, you will not be able to edit the
settings in the MODE tab.
1. Click the
MODE
tab.
MODE tab
Used FPS
Total FPS
2. Beside the camera number that you wish
to configure, set the following:
• Under
RES., MAX F/S
, select the frame rate
and resolution the channel should record
in.
• As you adjust the frame rates, the frame
counter tells you how many frames you
have left to assign to remaining channels
(Used FPS).
• If you go over the total frame count, a
warning message appears. Click
YES
to
disable the last channel so that the
remaining channels can use the extra
frame rates.
3. Press
/
on the front panel, or press the
button on the remote control to resume
Continuous Recording.
Summary of Contents for DH200+R Series
Page 12: ...xii...
Page 119: ...107 iSMS Client Remote Viewing on the Mac PTZ Controls cont d...
Page 174: ......
Page 175: ......


