3
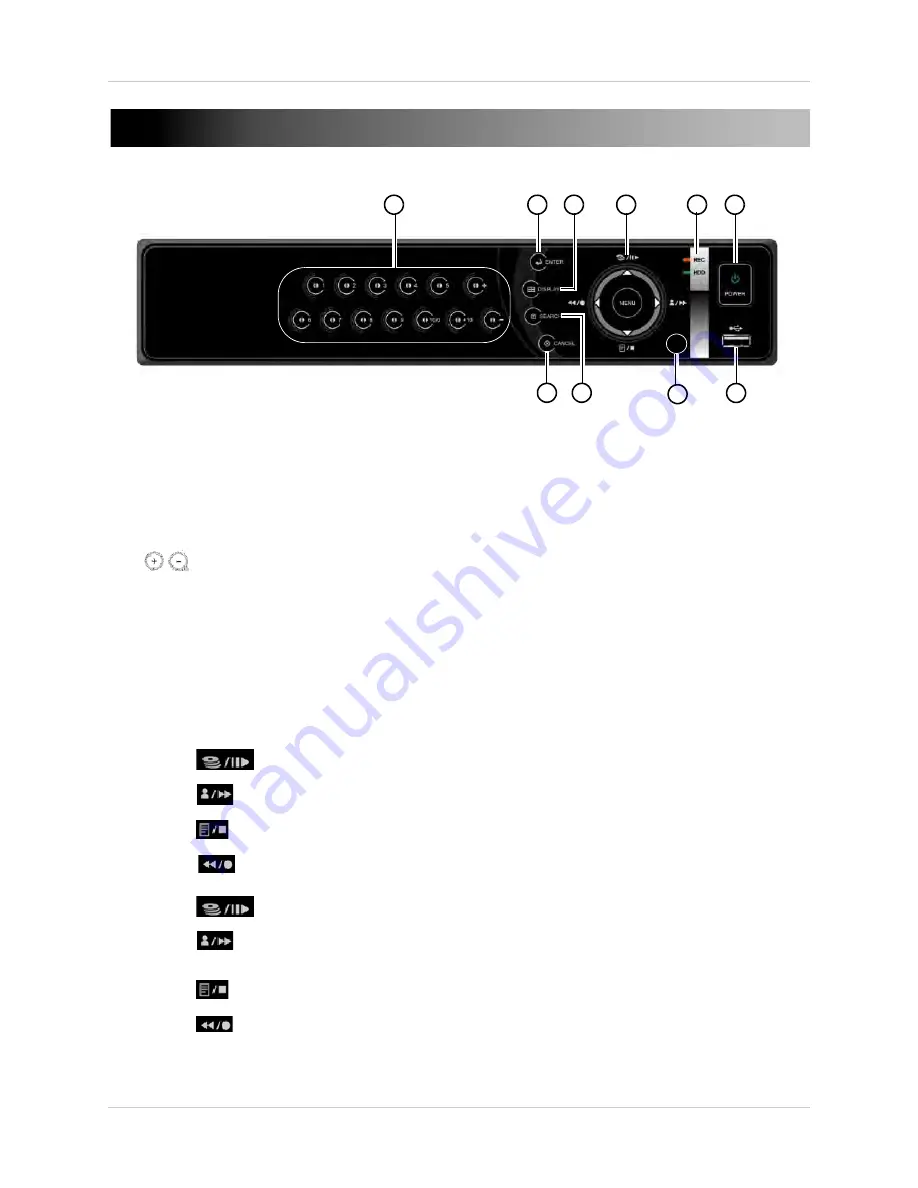
FRONT PANEL
1.
Channel Buttons:
•
1~10/0:
During Live view, press buttons 1~10/0 to view channels 1~10 in single channel view.
Use these buttons to enter numerical values within system menus, or to enter in the user
passwords. The
10/0
button has a numerical value of 0.
•
+10
: Press the
+10
button and a channel number to access channels 11 or greater. For example,
press
+10
and
1
to access channel 11, press
+10
and
5
to access channel 15 etc.
: Increase/decrease values within system menus.
2.
ENTER:
In menus, press to save changes.
3.
DISPLAY:
Press to cycle split-screen modes.
4.
CANCEL:
In menus, press to exist without saving changes. During live view, press to hide the
on-screen-display and alert icons.
5.
SEARCH:
Press to open Calendar and Time Search menu.
6.
Navigation Cursors
• Press
to move the cursor in menus.
• During Live-Viewing:
•
: Press to enter the Backup menu.
•
: Press to log in or out of the DVR.
•
: Press to access system log.
•
: Press to start/stop recording.
• During Playback:
•
: Press to pause/play video.
•
: Press to fast forward. While video is paused, press to advance video forward
frame-by-frame.
•
: Press to exit Playback.
•
: Press to rewind. While video is paused, press to reverse video frame-by-frame.
1
2
6
8
9
10
3
4
5
7
Summary of Contents for DH200+R Series
Page 12: ...xii...
Page 119: ...107 iSMS Client Remote Viewing on the Mac PTZ Controls cont d...
Page 174: ......
Page 175: ......


