15
Using the System
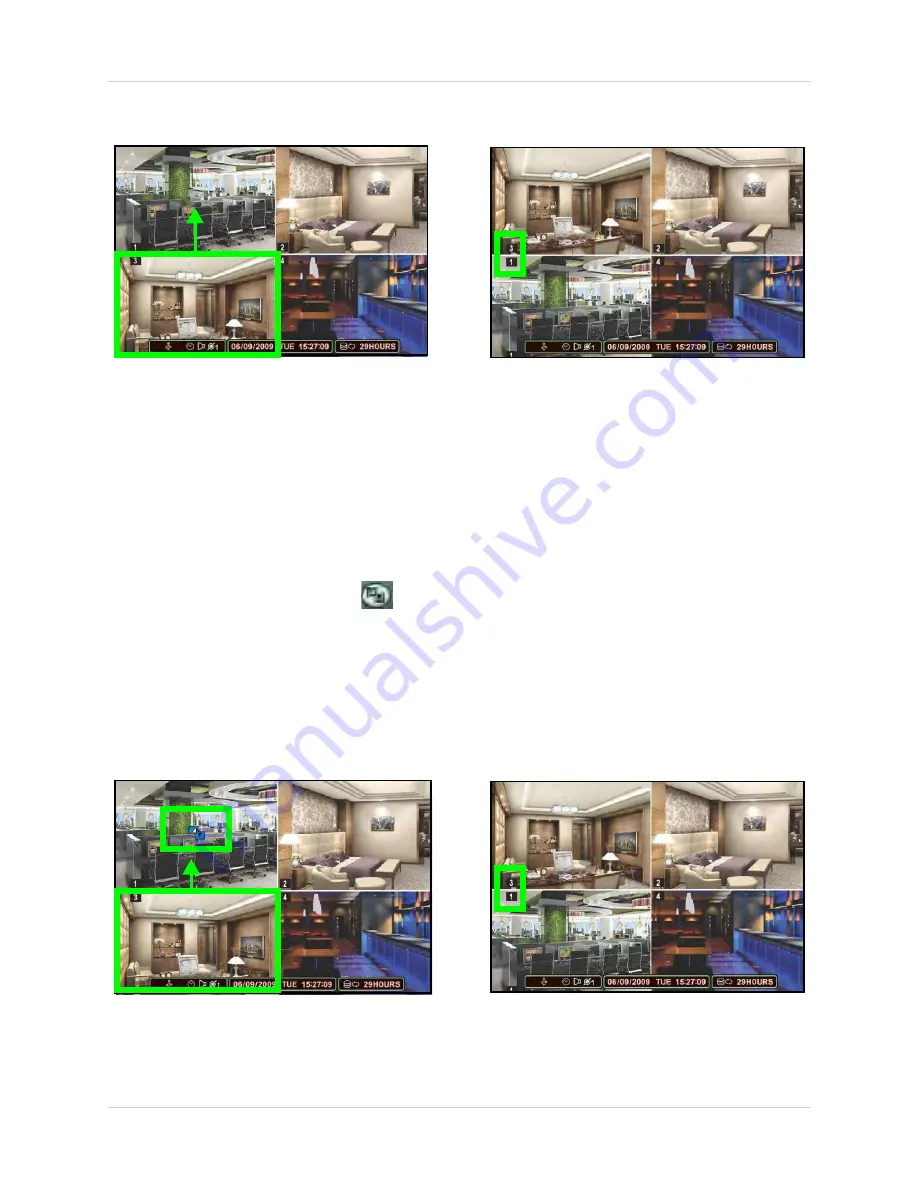
2. Press and hold inside the channel you would like to move. Drag your finger to the channel you
wish to reassign it to and release.
Press and hold inside channel 3 and drag your finger to move
channel 3 to the channel 1 position.
Channels repositioned
Channel 3 is now in the channel 1 position.
NOTE:
If the Virtual Remote appears while doing this, you may ignore it. After repositioning the
channel, tap anywhere outside the Virtual Remote to exit.
To reposition display channels using the front panel buttons or remote control:
1. Using the mouse, remote control, or front panel, place the main display screen in either a
quad display, or in a split-screen configuration.
NOTE:
Repositioning will not work if the main display screen is in full-screen single channel.
2. Using the mouse, right-click anywhere on the screen to open the Virtual Remote.
3. From the Virtual Remote, click
.
The Window cursor appears in the top-left channel
(typically channel 1).
4. Reposition the channels through the following:
•
Remote Control:
Press the button for the channel you wish to place in the location of the
Window cursor. For example, if the cursor is on channel 1, and you want to have channel 4 in
its location, press the 4 button on the remote control. You can also press F2 on the remote to
open the Window cursor, then press the desired channel number that you wish to change to.
•
Front Panel:
Press the button for the channel you wish to place in the location of the Window
cursor
5. Press the
buttons to change the location of the Window cursor.
6. Press the
MENU
button to save your settings.
Window cursor is in channel 1
Press the 3 button to move channel 3 to the channel 1 position.
Channels repositioned
Channel 3 is now in the channel 1 position.
Summary of Contents for DH200+R Series
Page 12: ...xii...
Page 119: ...107 iSMS Client Remote Viewing on the Mac PTZ Controls cont d...
Page 174: ......
Page 175: ......


