29
SETTING UP MOTION RECORDING
Motion recording allows the system to mark events as motion recording. This allows you to search
for footage that only has movement.
Step 1: Configure Camera motion sensitivity & configure Event frame rates
1. Press the
MENU
button on the remote or front panel to open the main menu.
• If using a mouse, right-click to open the virtual remote, then click
MENU
.
2. Click
CAMERA
.
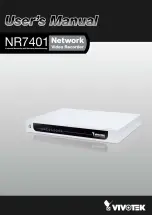
3. Click the camera number button to select the camera you wish to configure.
Click camera button
Motion detection area. Blue areas
indicate that the screen is enabled
for motion recording.
4. Beside MOTION GRID, click (
) to enable motion detection on the entire screen (selected
by default) or click (
) to enable certain portions of the screen by double-clicking the
portions of the screen you wish to enable motion.
5. Beside MOTION LEVEL, press
-/+
to adjust the motion sensitivity.
6. Click
ENTER
(
)
to save your settings.
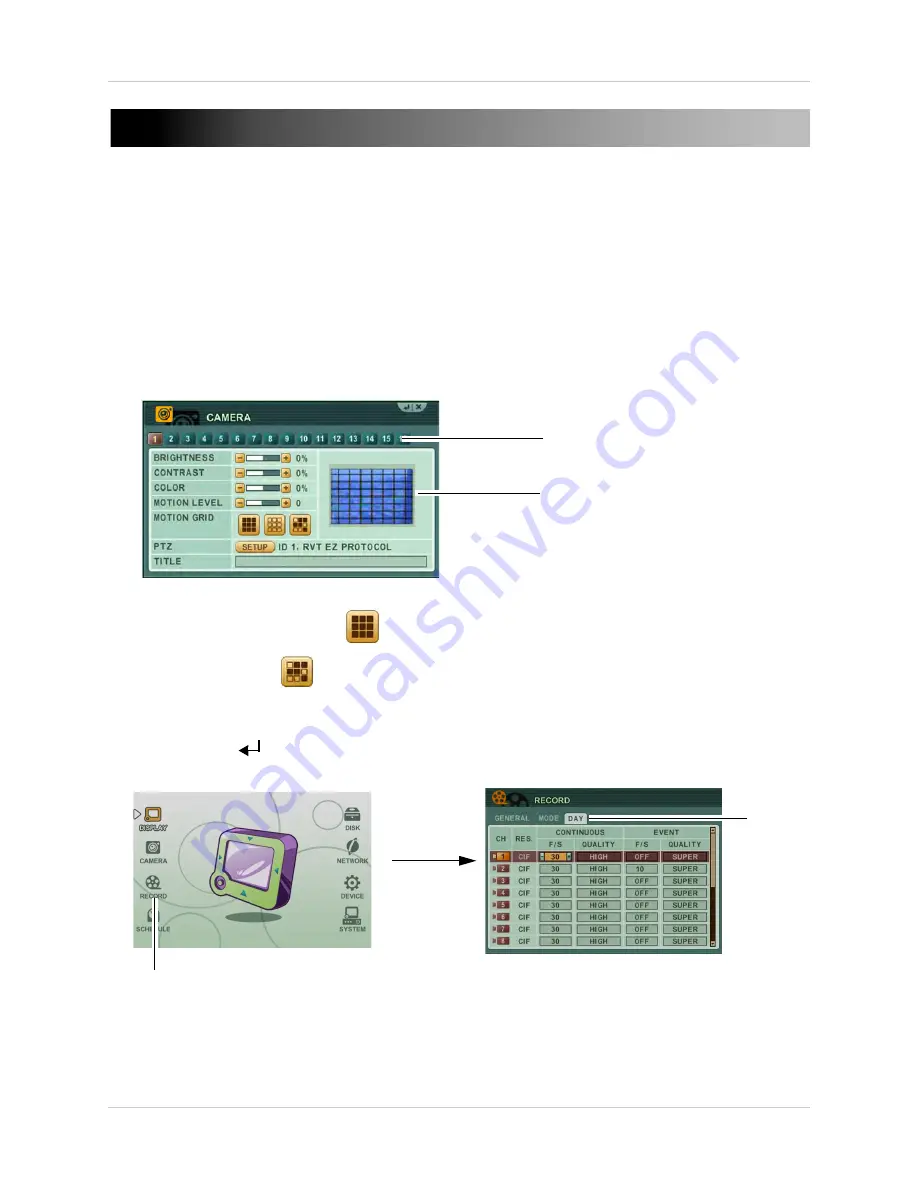
7. Click
RECORD>DAY.
Record
DAY
NOTE:
If you would like to create a schedule with different settings at different times, you can
click on
RECORD>GENERAL,
and under
SCHEDULED USE
,
select
ON
. Then, click the
NIGHT
tab and follow the same instructions below.
Summary of Contents for DH200+R Series
Page 12: ...xii...
Page 119: ...107 iSMS Client Remote Viewing on the Mac PTZ Controls cont d...
Page 174: ......
Page 175: ......