43
Using the Main Menu
Formatting a new hard drive
You must format a new hard drive before it can
be used for recording.
To format a new hard drive connected to the
system:
1. Install the new internal hard drive to the
DVR.
2. Under DEVICE, select the hard drive. The
naming convention looks something like
this : "INT-A: Unknown".
3. In the ACTION field, click
+/-
and select
Assign to Record
.
4. Click
Start
to format the hard drive. After
the formatting is complete, the hard drive
shows up in the RECORDING DISK tab.
Initializing (formatting) an external hard
drive or USB flash drive for backup
Before the system can detect an external hard
drive or USB flash drive, it must be initialized.
To initialize a hard drive:
1. Connect the USB flash drive or external
hard drive to the system.
2. Under DEVICE, select the drive you wish to
initialize.
3. In the ACTION field, click
+/-
and select
Initialize for backup
.
4. Click
Start
to begin formatting.
Link Record Disk
The Link Record Disk function allows you to
install a hard drive from a different DH216+R
or DH230 series DVR without formatting. This
is useful if you have several DVRs, and wish to
swap hard drives for viewing/backup
purposes.
To use the Link Record Disk function:
1. Connect the internal/external hard drive to
the system.
2. Under DEVICE, select the drive you wish to
initialize.
3. In the ACTION field, click
+/-
and select
Link Record Disk.
4. Click
Start
to begin the process.
Limitations of the Record Disk function:
• You must remove the original hard drive
before installing the new hard drive from
another system.
• The hard drive must be from the same DVR
series.
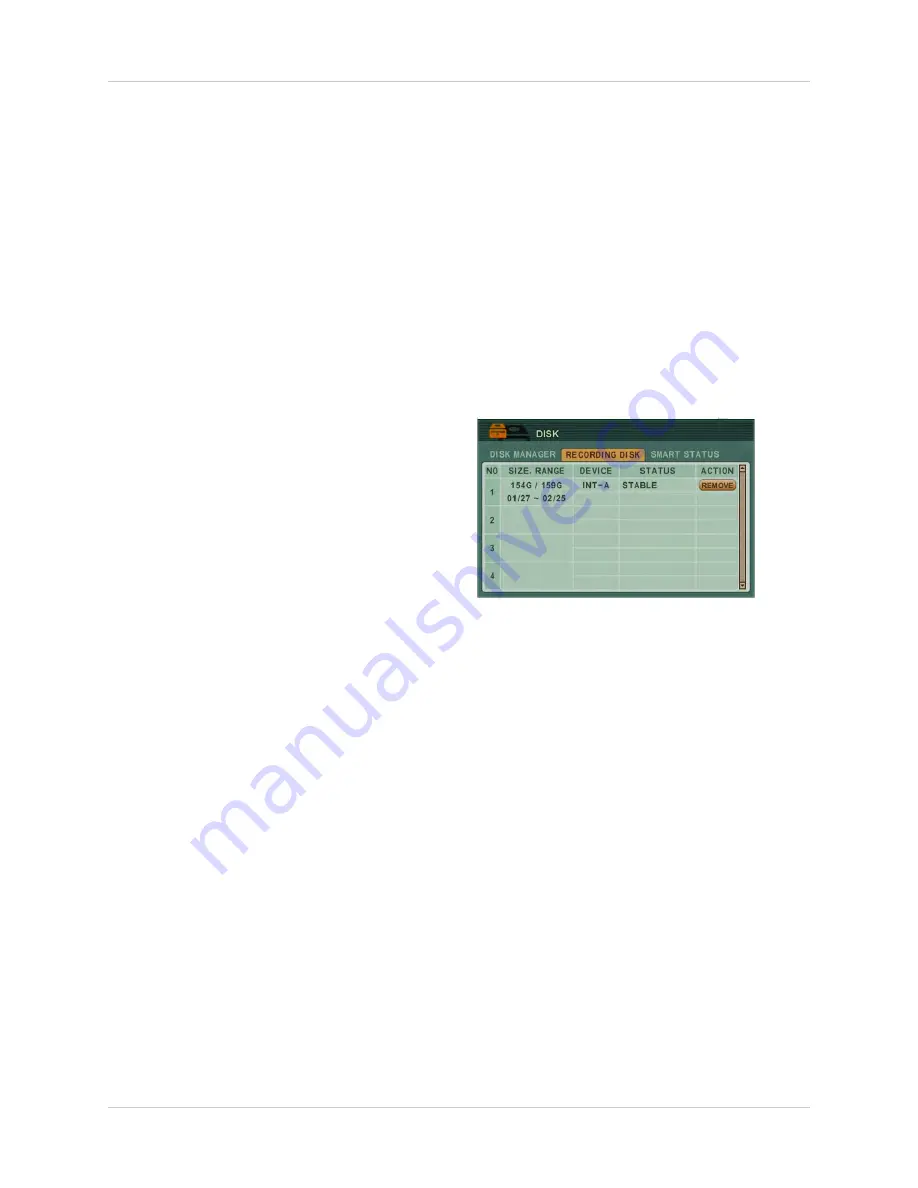
Recording Disk
The Recording Disk tab lists the drives that are
currently used for system recording.
The Recording Disk menu displays the
following:
•
SIZE, RANGE
: Displays the hard drive size,
and the duration of recording.
•
DEVICE
: Displays the type of device
connected to the system.
• STATUS
: Displays the hard drive health
status.
•
STABLE
: The hard drive works
properly.
•
RE-SYNC
: The system is forcing
pending buffered disk writes to the new
hard drive.
•
FAULTY
: Hard drive error.
• ACTION
: Click the
REMOVE
button to
un-mount a hard drive, and then click
YES
to confirm.
Summary of Contents for DH200+R Series
Page 12: ...xii...
Page 119: ...107 iSMS Client Remote Viewing on the Mac PTZ Controls cont d...
Page 174: ......
Page 175: ......


