155
Appendix K: Touch Screen Monitor Setup
Step 2 of 3: Power on the Monitor
Step 3 of 3: Test the Touch Screen Functions
Access Virtual Remote
• While in viewing or playback mode, press and hold anywhere on the screen to access the
Virtual Remote.
• Tap the Virtual Remote buttons to use the Virtual Remote.
• Tap outside the Virtual Remote to exit.
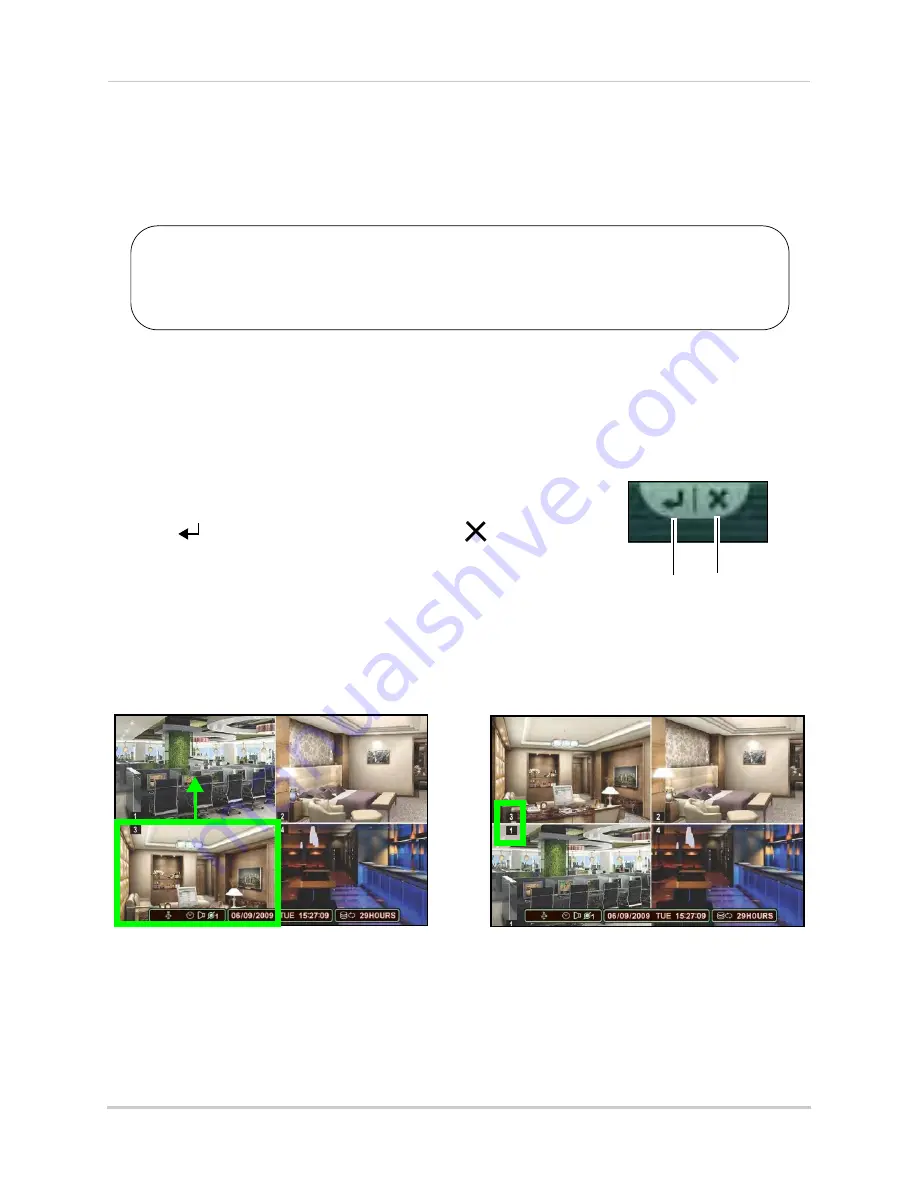
Navigate Menus
Enter
Exit
• While navigating menus, tap to select a menu option.
• Tap
(
ENTER
) to save your changes and
(
EXIT
) to exit
menus without saving changes.
Select Channels
• While in a split-screen display mode, double-tap an individual
channel to view it in full-screen. Double-tap again to return to split-screen display mode.
NOTE:
4. Press and hold inside the channel you would like to move. Drag your finger to the channel you
wish to reassign it to and release.
Press and hold inside channel 3 and drag your finger
to move channel 3 to the channel 1 position.
Channels repositioned
Channel 3 is now in the channel 1 position.
NOTE:
If the Virtual Remote appears while doing this, you may ignore it. After repositioning the channel,
press anywhere outside the Virtual Remote to exit
Before you start:
1. Make sure your monitor is turned on.
2. Power on your DVR.
3. Wait for the DVR to boot into the main viewing mode.
Summary of Contents for DH200+R Series
Page 12: ...xii...
Page 119: ...107 iSMS Client Remote Viewing on the Mac PTZ Controls cont d...
Page 174: ......
Page 175: ......


