Fax
5-31
Specifying Destinations
4
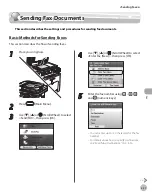
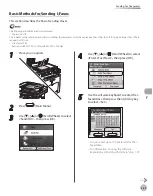
Enter a fax number using – , and
(numeric keys).
You can enter up to 120 characters for the fax
number.
Details of each item are shown below.
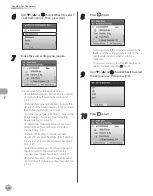
<Set Destination>: Set the desired
destination.
<Backspace>: Delete the last number entered.
<Pause>: Insert a pause of several seconds in
the fax number you are dialing. If you insert a
pause within the fax number, the letter <p> is
displayed between the numbers. If you insert
a pause at the end of the fax number, the
letter <P> appears.
When dialing an overseas number, insert a
pause after the country code and at the end
of the fax number. (See “Dialing an Overseas
Number (With Pauses),” on p. 5-22.)
<Tone>: Select when you want to directly call
an extension line that is connected to a PBX
(Private Branch Exchange), which accepts only
tone signals. If you select <Tone> and press
[OK], the letter <T> appears.
<Direct Send>: Send documents directly to
the recipient. Select <On>, then press [OK]. If
you do not select direct sending mode,
memory sending mode is used. (See “Direct
Sending,” on p. 5-52.)
<Hook>: Send a fax document manually or
use tone dialing. (See “Calling the Recipient
before Sending Fax Documents (Manual
Sending),” on p. 5-19, or “Switching
Temporarily to Tone Dialing,” on p. 5-21.)
–
–
–
–
–
–
You cannot insert a pause at the beginning of a
number.
If you enter a pause at the end of the number,
the pause is always 10 seconds long.
You can press (Clear) to clear your entry.
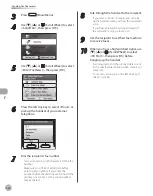
If <Confirm Entered Fax No.> in <Restrict the
Send Function> in <System Management Set.>
under <Additional Func.> is set to <On>, you
should enter the fax number again for
confirmation. Enter the fax number you
entered in step 4, then press [OK]. (See
“Security,” in the e-Manual.)
–
–
–
–
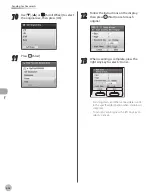
5
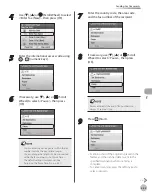
Use [
▼
] , [
▲
] or (Scroll Wheel) to
select <Set Destination>, then press [OK].
■
If you want to clear the specified
destination:
①
Press the left Any key to select <Confirm/
Erase>.
Summary of Contents for imageCLASS MF8450c
Page 53: ...Before Using the Machine 1 28 Timer Settings ...
Page 129: ...3 52 Storing Editing One Touch Storing Editing Address Book ...
Page 132: ...Copying 4 3 Overview of Copy Functions p 4 22 p 4 30 p 4 36 ...
Page 201: ...Copying 4 72 Confirming and Canceling Copy Jobs Confirming Copy Logs ...
Page 204: ...Fax 5 3 Overview of Fax Functions p 5 30 p 5 47 p 5 54 p 5 49 p 5 112 p 5 104 ...
Page 346: ...E mail 6 3 Overview of E Mail Functions ...
Page 354: ...Printing 7 3 Overview of Print Functions p 7 9 p 7 10 p 7 7 ...
Page 381: ...Printing 7 30 Checking and Canceling Print Jobs Checking Print Logs ...
Page 384: ...Scanning 8 3 Overview of Scanner Functions ...
Page 391: ...Scanning 8 10 Basic Scanning Operations ...

