Fax
5-20
Sending Fax Documents
3
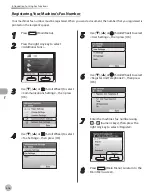
Press
(Main Menu).
4
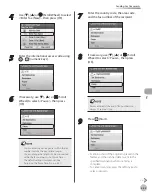
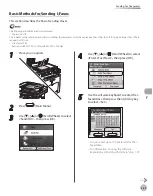
Use [
▼
], [
▲
] or (Scroll Wheel) to select
<Send/FAX>, then press [OK].
5
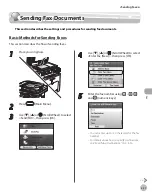
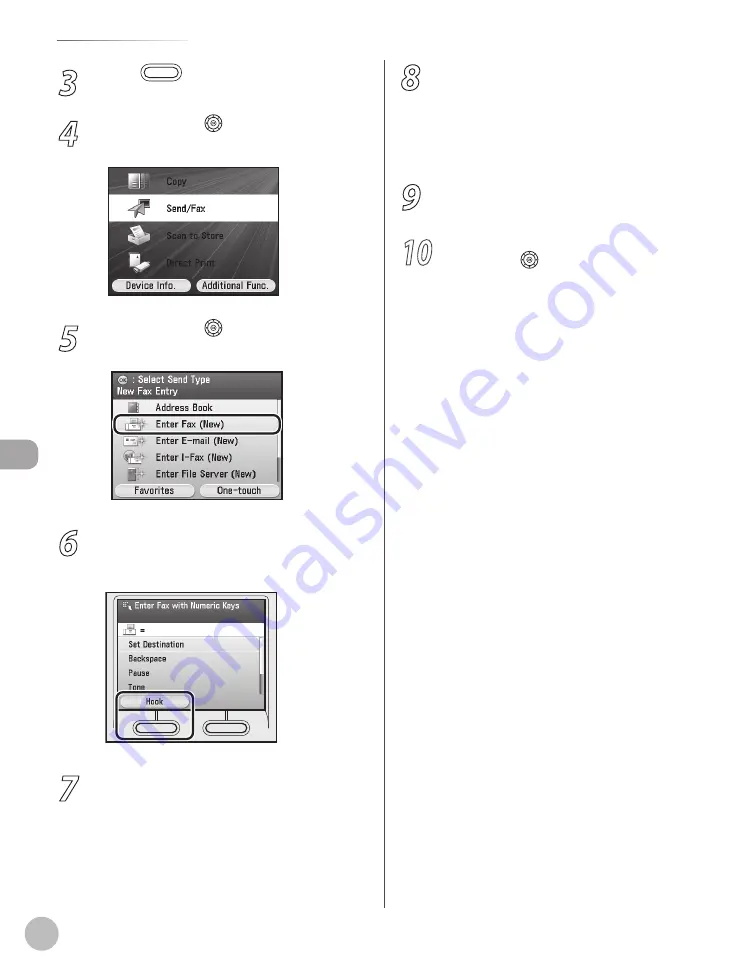
Use [
▼
], [
▲
] or (Scroll Wheel) to select
<Enter Fax (New)>, then press [OK].
6
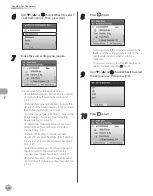
Press the left Any key to select <Hook> or
pick up the handset of your external
telephone.
7
Dial the recipient’s fax number.
You can enter up to 120 characters for the fax
number.
Make sure to confirm the dial tone before
entering a fax number. If you enter the
number before the dial tone can be heard, the
call may not connect, or the wrong number
may be dialed.
–
–
8
Talk through the handset to the recipient.
If you select <Hook> in step 6, you can pick
up the handset when you hear the recipient’s
voice.
If you hear a high-pitched signal instead of
the recipient’s voice, go to step 10.
9
Ask the recipient to set their fax machine
to receive faxes.
10
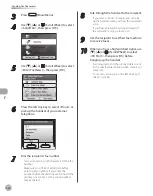
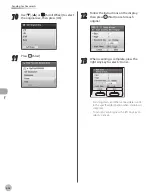
When you hear a high-pitched signal, use
[
▼
], [
▲
] or (Scroll Wheel) to select
<RX Start>, then press [OK] before
hanging up the handset.
Scanning starts, and the scanned data is sent
to the specified destination when scanning is
complete.
To cancel scanning, press the left Any key to
select <Cancel>.
–
–
–
–
Summary of Contents for imageCLASS MF8450c
Page 53: ...Before Using the Machine 1 28 Timer Settings ...
Page 129: ...3 52 Storing Editing One Touch Storing Editing Address Book ...
Page 132: ...Copying 4 3 Overview of Copy Functions p 4 22 p 4 30 p 4 36 ...
Page 201: ...Copying 4 72 Confirming and Canceling Copy Jobs Confirming Copy Logs ...
Page 204: ...Fax 5 3 Overview of Fax Functions p 5 30 p 5 47 p 5 54 p 5 49 p 5 112 p 5 104 ...
Page 346: ...E mail 6 3 Overview of E Mail Functions ...
Page 354: ...Printing 7 3 Overview of Print Functions p 7 9 p 7 10 p 7 7 ...
Page 381: ...Printing 7 30 Checking and Canceling Print Jobs Checking Print Logs ...
Page 384: ...Scanning 8 3 Overview of Scanner Functions ...
Page 391: ...Scanning 8 10 Basic Scanning Operations ...

