OmniChannel
Page 15-12
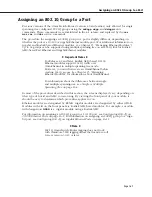
If the port you enter is already part of another OmniChannel, then it cannot be used in a
second OmniChannel. The following message displays for those ports that are already
part of another OmniChannel:
Primary port in use
5.
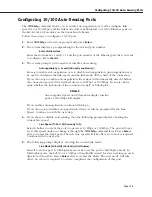
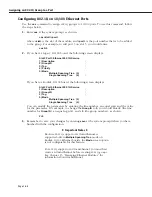
The following prompt displays:
To select a port, use the convention - Slot/Physical Port.
For eg. 2/1 is used to select Physical Port 1 on Slot 2
Secondary Slot/Port:
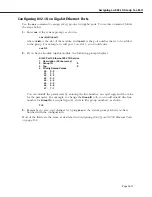
Enter the other ports that will be used in this OmniChannel. Up to four (4) Fast Ethernet
Ports may participate in an OmniChannel. Therefore, you can specify up to three (3)
additional ports which will initially become secondary ports. These secondary ports must
be on the same module as the primary port. Secondary ports do not participate in the
Spanning Tree algorithm; they are used for data transmission only.
♦
Note
♦
As explained in Step 4 above, a port that you initially
configure as a secondary port can become a primary
port.
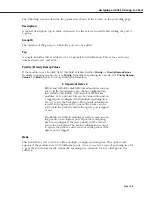
Specifying a Range of Ports
. To specify a range of ports, enter the slot number, a slash (/),
the port number for the first secondary port, a dash (-), and the port number for the last
secondary port. For example, to specify ports 3, 4, and 5 on the Fast Ethernet module in
slot 2 as secondary ports in an OmniChannel, you would enter:
2/3-5
Specifying Multiple Ports
. To specify multiple ports (on the same module) that are not
physically contiguous, enter the slot number, a slash (/), the port number for the first
secondary port, a comma (,), and then the slot and port for the next secondary port. For
example, to specify ports 3 and 5 on the Fast Ethernet module in slot 2, you would enter:
2/3, 2/5
The order in which you specify secondary ports is important. In the event of a failure on
the primary port, the first secondary port specified will become the primary port in the
OmniChannel and participate in Spanning Tree.
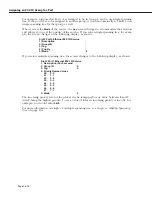
Messages will display, informing you that secondary ports were saved in flash memory:
Successfully saved sec port in flash
Successfully saved sec port in flash
Содержание Omni Switch/Router
Страница 1: ...Part No 060166 10 Rev C March 2005 Omni Switch Router User Manual Release 4 5 www alcatel com ...
Страница 4: ...page iv ...
Страница 110: ...WAN Modules Page 3 40 ...
Страница 156: ...UI Table Filtering Using Search and Filter Commands Page 4 46 ...
Страница 164: ...Using ZMODEM Page 5 8 ...
Страница 186: ...Displaying and Setting the Swap State Page 6 22 ...
Страница 202: ...Creating a New File System Page 7 16 ...
Страница 270: ...Displaying Secure Access Entries in the MPM Log Page 10 14 ...
Страница 430: ...OmniChannel Page 15 16 ...
Страница 496: ...Configuring Source Route to Transparent Bridging Page 17 48 ...
Страница 542: ...Dissimilar LAN Switching Capabilities Page 18 46 ...
Страница 646: ...Application Example DHCP Policies Page 20 30 ...
Страница 660: ...GMAP Page 21 14 ...
Страница 710: ...Viewing the Virtual Interface of Multicast VLANs Page 23 16 ...
Страница 722: ...Application Example 5 Page 24 12 ...
Страница 788: ...Viewing UDP Relay Statistics Page 26 24 ...
Страница 872: ...The WAN Port Software Menu Page 28 46 ...
Страница 960: ...Deleting a PPP Entity Page 30 22 ...
Страница 978: ...Displaying Link Status Page 31 18 ...
Страница 988: ...Displaying ISDN Configuration Entry Status Page 32 10 ...
Страница 1024: ...Backup Services Commands Page 34 14 ...
Страница 1062: ...Diagnostic Test Cable Schematics Page 36 24 ...
Страница 1072: ...Configuring a Switch with an MPX Page A 10 ...
Страница 1086: ...Page B 14 ...
Страница 1100: ...Page I 14 Index ...

