The WAN Port Software Menu
Page 28-14
The WAN Port Software Menu
User interface commands for the
WSX
board are on a separate menu that is accessed through
the
wan
command. The WAN Port menu is a submenu of the Interface menu. Typing
wan
at
any system prompt displays the following menu:
Command
Wide Area Networking Menu
-------------
-------------------------------------------------
wpmodify
Modify a given WAN port’s parameters
wpdelete
Delete a given port’s parameters, and restore defaults
wpview
View WAN port parameters for a given slot and port
wpstatus
View WAN port status of entire chassis, slot, or individual port
fr
Enter the Frame Relay submenu
ppp
Enter the PPP submenu
isdn
Enter the ISDN-specific submenu
link
Enter the link-specific submenu
Main
File
Summary
VLAN
Networking
Interface
Security
System
Services Help
♦
Note
♦
The ISDN menu will only appear on systems with a
least one
WSX-BRI
module installed.
You can start most of the commands by typing the first three (3) letters of the command
name. For example, to use the
wpview
command, type
wpv
.
The following sections describe the use of commands on the WAN Port menu.
Setting Configuration Parameters
When you plug in a
WSX
board, it is automatically configured to the default settings. By
default, the
WSX
uses Frame Relay protocol. In addition, the access rate for serial ports
defaults to 64 kbps for RS-232 cables. The access rate for other cable types defaults to 2
Mbps. You can change these settings, as well as several other settings, such as clocking and
protocol type, with the
wpmodify
command.
Modifying a Port
Use the
wpmodify
command to modify a port, as shown below:
wpmodify <slot>/<port>
in which
<slot>
is the slot number where the
WSX
board is located, and
<port>
is the port
number on the
WSX
board that you want to modify. When this command is entered, the
system automatically senses what type of port is being configured, and displays the
appropriate screen for that type of port. The screen is different depending on the type of
encapsulation used, either Frame-Relay or Point-to-Point Protocol.
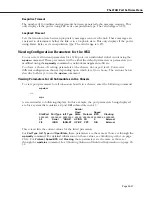
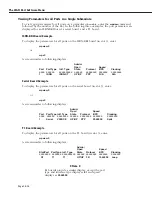
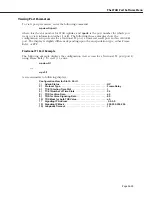
Make changes by entering the line number for the option you want to change, an equal sign
(=), and the value for the new parameter. When you have finished entering the new values,
type
save
at the prompt to save the new parameters. The following sections describe the
options you can alter through this menu. The following three examples show a typical setup
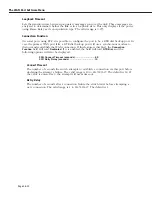
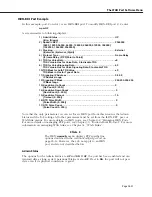
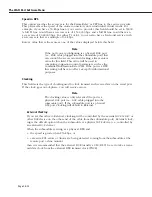
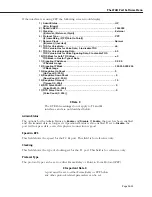
screen for a serial port, an ISDN-BRI port, and a fractional T1 port, respectively.
Содержание Omni Switch/Router
Страница 1: ...Part No 060166 10 Rev C March 2005 Omni Switch Router User Manual Release 4 5 www alcatel com ...
Страница 4: ...page iv ...
Страница 110: ...WAN Modules Page 3 40 ...
Страница 156: ...UI Table Filtering Using Search and Filter Commands Page 4 46 ...
Страница 164: ...Using ZMODEM Page 5 8 ...
Страница 186: ...Displaying and Setting the Swap State Page 6 22 ...
Страница 202: ...Creating a New File System Page 7 16 ...
Страница 270: ...Displaying Secure Access Entries in the MPM Log Page 10 14 ...
Страница 430: ...OmniChannel Page 15 16 ...
Страница 496: ...Configuring Source Route to Transparent Bridging Page 17 48 ...
Страница 542: ...Dissimilar LAN Switching Capabilities Page 18 46 ...
Страница 646: ...Application Example DHCP Policies Page 20 30 ...
Страница 660: ...GMAP Page 21 14 ...
Страница 710: ...Viewing the Virtual Interface of Multicast VLANs Page 23 16 ...
Страница 722: ...Application Example 5 Page 24 12 ...
Страница 788: ...Viewing UDP Relay Statistics Page 26 24 ...
Страница 872: ...The WAN Port Software Menu Page 28 46 ...
Страница 960: ...Deleting a PPP Entity Page 30 22 ...
Страница 978: ...Displaying Link Status Page 31 18 ...
Страница 988: ...Displaying ISDN Configuration Entry Status Page 32 10 ...
Страница 1024: ...Backup Services Commands Page 34 14 ...
Страница 1062: ...Diagnostic Test Cable Schematics Page 36 24 ...
Страница 1072: ...Configuring a Switch with an MPX Page A 10 ...
Страница 1086: ...Page B 14 ...
Страница 1100: ...Page I 14 Index ...


