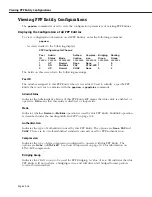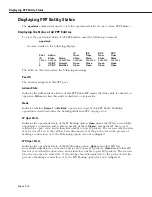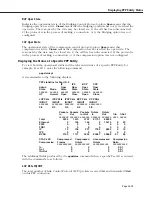
Page 30-4
On the receiving side, as low priority frames are being received they will be put into the
MLPPP reassembly queue, as supported by the existing software. As complete frames are
received they will be forwarded to the normal PPP processing. When high priority frames are
received, since they will always be sent complete, they will immediately be forwarded to the
normal PPP processing.
The only configurable parameter that has been added is the maximum delay. The feature is
enabled when this parameter is set to a non-zero value. A flag has been utilized to force a 16
fragment maximum for a fragmented frame to make this process compatible with Cisco
products.
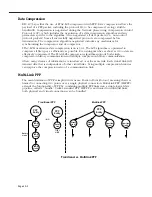
The following diagram illustrates this concept:
PPP Fragmentation Process
Overview of PPP Configuration Procedures
The configuration of a PPP connection on your switch is divided into three separate tasks.
This three-phase strategy was chosen to allow PPP connections to be configured over
any
serial channel interface without requiring the use of multiple PPP configuration displays for
each separate type of interface.
Step 1. Configure the Physical Interface to be Used for PPP
The information configured at the physical interface level includes the specification of the
type of WSX interface and of any information that is specific to the given type of interface.
The interfaces that can support PPP are ISDN, T1/E1, and the Universal Serial Port on all WSX
boards.
An ISDN interface (WSX-BRI) requires the specification of the switch type, the local telephone
number, and the Service Profile Identifiers (SPIDs) if appropriate for the switch type. The UI
commands used to configure ISDN interfaces allow for modifying and viewing ISDN port’s
configuration and the display of its operational status. See Chapter 32 titled “Managing ISDN
Ports” for detailed information on configuring an ISDN interface for PPP.
Higher Priority Frame
Lower Priority Frame
Higher Priority Frame
Lower Priority Fragment
Lower Priority Fragment
Before Transmission
After Transmission
Queue
Queue
Содержание Omni Switch/Router
Страница 1: ...Part No 060166 10 Rev C March 2005 Omni Switch Router User Manual Release 4 5 www alcatel com ...
Страница 4: ...page iv ...
Страница 110: ...WAN Modules Page 3 40 ...
Страница 156: ...UI Table Filtering Using Search and Filter Commands Page 4 46 ...
Страница 164: ...Using ZMODEM Page 5 8 ...
Страница 186: ...Displaying and Setting the Swap State Page 6 22 ...
Страница 202: ...Creating a New File System Page 7 16 ...
Страница 270: ...Displaying Secure Access Entries in the MPM Log Page 10 14 ...
Страница 430: ...OmniChannel Page 15 16 ...
Страница 496: ...Configuring Source Route to Transparent Bridging Page 17 48 ...
Страница 542: ...Dissimilar LAN Switching Capabilities Page 18 46 ...
Страница 646: ...Application Example DHCP Policies Page 20 30 ...
Страница 660: ...GMAP Page 21 14 ...
Страница 710: ...Viewing the Virtual Interface of Multicast VLANs Page 23 16 ...
Страница 722: ...Application Example 5 Page 24 12 ...
Страница 788: ...Viewing UDP Relay Statistics Page 26 24 ...
Страница 872: ...The WAN Port Software Menu Page 28 46 ...
Страница 960: ...Deleting a PPP Entity Page 30 22 ...
Страница 978: ...Displaying Link Status Page 31 18 ...
Страница 988: ...Displaying ISDN Configuration Entry Status Page 32 10 ...
Страница 1024: ...Backup Services Commands Page 34 14 ...
Страница 1062: ...Diagnostic Test Cable Schematics Page 36 24 ...
Страница 1072: ...Configuring a Switch with an MPX Page A 10 ...
Страница 1086: ...Page B 14 ...
Страница 1100: ...Page I 14 Index ...

