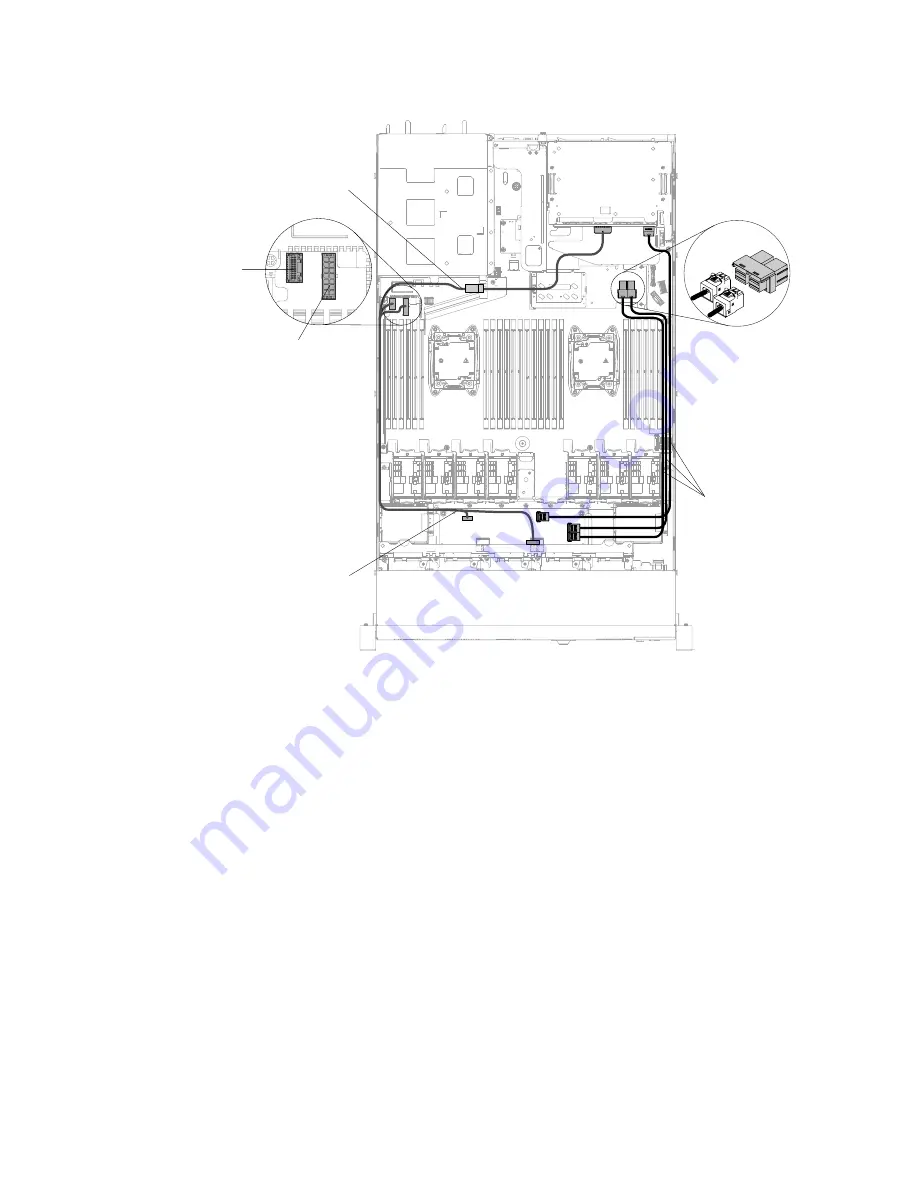
SAS/SATA signal
cables
SAS/SATA power cable
SAS/SATA power
connector
SAS/SATA
configuration
connector
SAS/SATA power cable
Figure 115. ServeRAID adapter cable routing for twelve 2.5-inch hot-swap hard disk drive configuration
Step 8.
Connect the signal cables to the SAS/SATA adapter.
Step 9.
Reconnect any cables that you removed.
Step 10. Replace PCI riser-card assembly 1 if you have removed it earlier (see “Replacing a PCI riser-card
Step 11. Reinstall the cover (see “Replacing the cover” on page 120).
Step 12. Turn on the peripheral devices and the server.
Step 13. Import your RAID configuration to the replacement ServeRAID adapter as
a foreign configuration. See the
ServeRAID-M Software User Guide
at
https://www-947.ibm.com/support/entry/portal/docdisplay?lndocid=migr-5086126 for
instructions.
Note:
When you restart the server, you are prompted to import the existing RAID configuration to the
new ServeRAID adapter.
Removing the ServeRAID adapter memory module
Use this information to remove the ServeRAID adapter memory module.
To remove the ServeRAID adapter memory module, complete the following steps:
Removing and replacing components
191
Summary of Contents for System x3550 M5
Page 1: ...Lenovo System x3550 M5 Installation and Service Guide Machine Type 8869 ...
Page 6: ...iv Lenovo System x3550 M5 Installation and Service Guide ...
Page 66: ...52 Lenovo System x3550 M5 Installation and Service Guide ...
Page 298: ...284 Lenovo System x3550 M5 Installation and Service Guide ...
Page 1120: ...1106 Lenovo System x3550 M5 Installation and Service Guide ...
Page 1124: ...1110 Lenovo System x3550 M5 Installation and Service Guide ...
Page 1132: ...Taiwan BSMI RoHS declaration 1118 Lenovo System x3550 M5 Installation and Service Guide ...
Page 1134: ...1120 Lenovo System x3550 M5 Installation and Service Guide ...
Page 1142: ...1128 Lenovo System x3550 M5 Installation and Service Guide ...
Page 1143: ......
Page 1144: ......


