b.
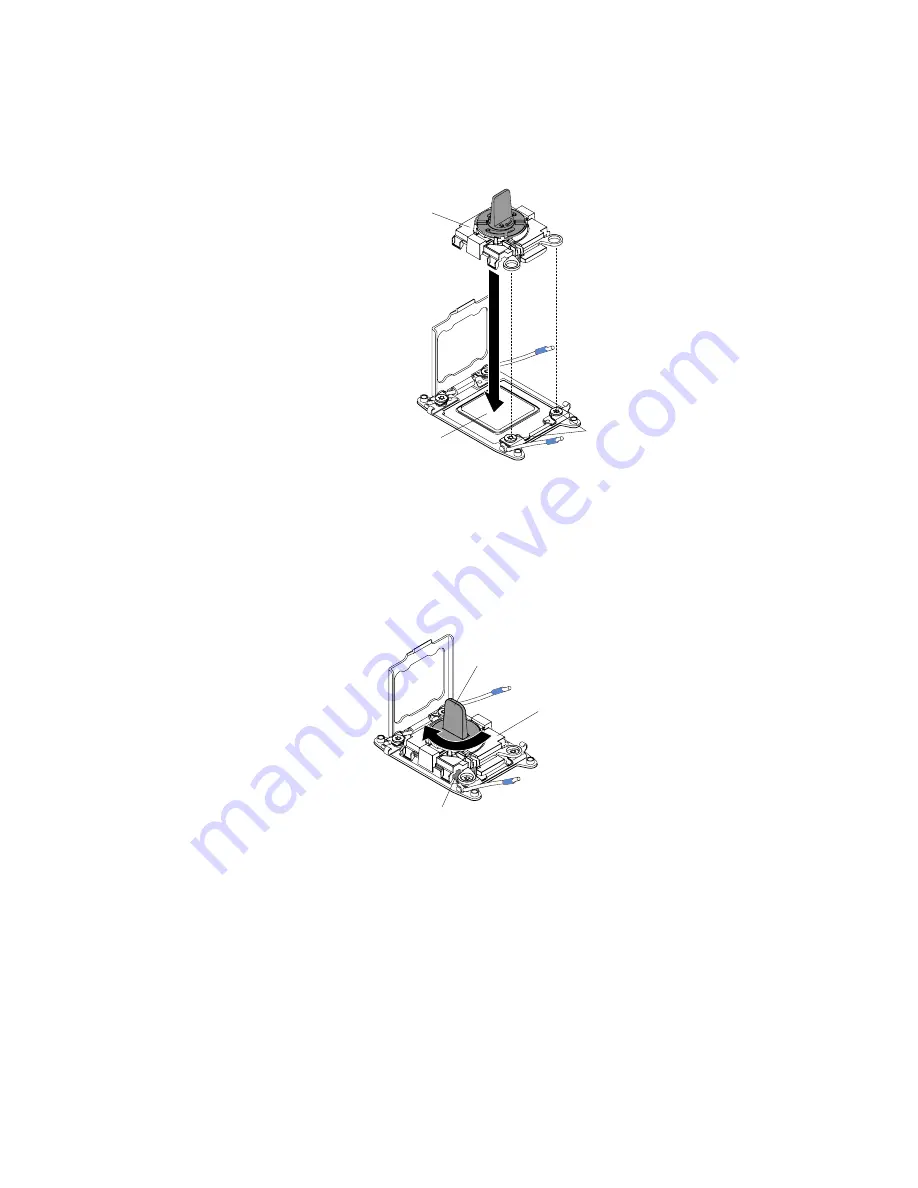
Align the installation tool with the screws, as shown in the following graphic, and lower the
installation tool on the microprocessor. The installation tool rests flush on the socket only
when it is aligned correctly.
Installation tool
Alignment
pins
Microprocessor
Figure 195. Installation tool alignment
c.
Using the following instructions for your installation tool to remove the microprocessor.
• When using the installation tool, gently twist the handle of the installation tool clockwise
until it locks in the “H” or “L” position, depending on the size of microprocessor, and then
lift the microprocessor out of the socket.
Handle
Microprocessor
Installation tool
Figure 196. Installation tool handle adjustment
266
Lenovo System x3550 M5 Installation and Service Guide
Summary of Contents for System x3550 M5
Page 1: ...Lenovo System x3550 M5 Installation and Service Guide Machine Type 8869 ...
Page 6: ...iv Lenovo System x3550 M5 Installation and Service Guide ...
Page 66: ...52 Lenovo System x3550 M5 Installation and Service Guide ...
Page 298: ...284 Lenovo System x3550 M5 Installation and Service Guide ...
Page 1120: ...1106 Lenovo System x3550 M5 Installation and Service Guide ...
Page 1124: ...1110 Lenovo System x3550 M5 Installation and Service Guide ...
Page 1132: ...Taiwan BSMI RoHS declaration 1118 Lenovo System x3550 M5 Installation and Service Guide ...
Page 1134: ...1120 Lenovo System x3550 M5 Installation and Service Guide ...
Page 1142: ...1128 Lenovo System x3550 M5 Installation and Service Guide ...
Page 1143: ......
Page 1144: ......


