Attention:
• Do not set down the heat sink after you remove the plastic cover.
• Do not touch the thermal grease on the bottom of the heat sink after you remove the plastic
cover. Touching the thermal grease will contaminate it. See “Thermal grease” on page 275
for more information.
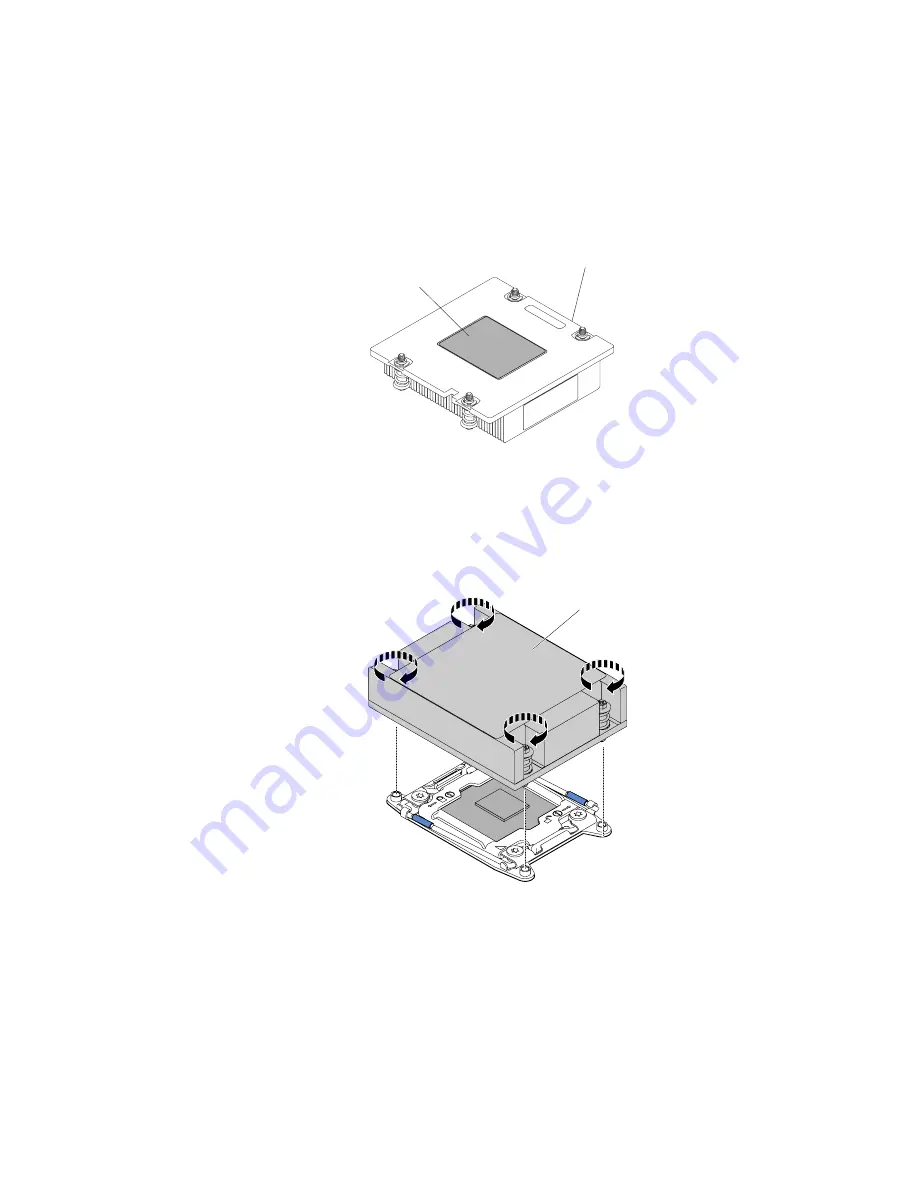
Thermal
grease
Heat
sink
Figure 207. Thermal grease
a.
Remove the plastic protective cover from the bottom of the heat sink.
b.
Position the heat sink over the microprocessor. The heat sink is keyed to assist with proper
alignment.
Heat Sink
Figure 208. Heat sink installation
c.
Align and place the heat sink on top of the microprocessor in the retention bracket, thermal
material side down.
d.
Press firmly on the heat sink.
e.
Press down on the center of the heat sink; then, press firmly on the captive screws and tighten
them, alternating between the screws in a figure-8 pattern as illustrated on the heat sink label
until they are tightened. You can cause damage to the microprocessor if you tighten the
274
Lenovo System x3550 M5 Installation and Service Guide
Summary of Contents for System x3550 M5
Page 1: ...Lenovo System x3550 M5 Installation and Service Guide Machine Type 8869 ...
Page 6: ...iv Lenovo System x3550 M5 Installation and Service Guide ...
Page 66: ...52 Lenovo System x3550 M5 Installation and Service Guide ...
Page 298: ...284 Lenovo System x3550 M5 Installation and Service Guide ...
Page 1120: ...1106 Lenovo System x3550 M5 Installation and Service Guide ...
Page 1124: ...1110 Lenovo System x3550 M5 Installation and Service Guide ...
Page 1132: ...Taiwan BSMI RoHS declaration 1118 Lenovo System x3550 M5 Installation and Service Guide ...
Page 1134: ...1120 Lenovo System x3550 M5 Installation and Service Guide ...
Page 1142: ...1128 Lenovo System x3550 M5 Installation and Service Guide ...
Page 1143: ......
Page 1144: ......


