4. Program Edit W
indow
105
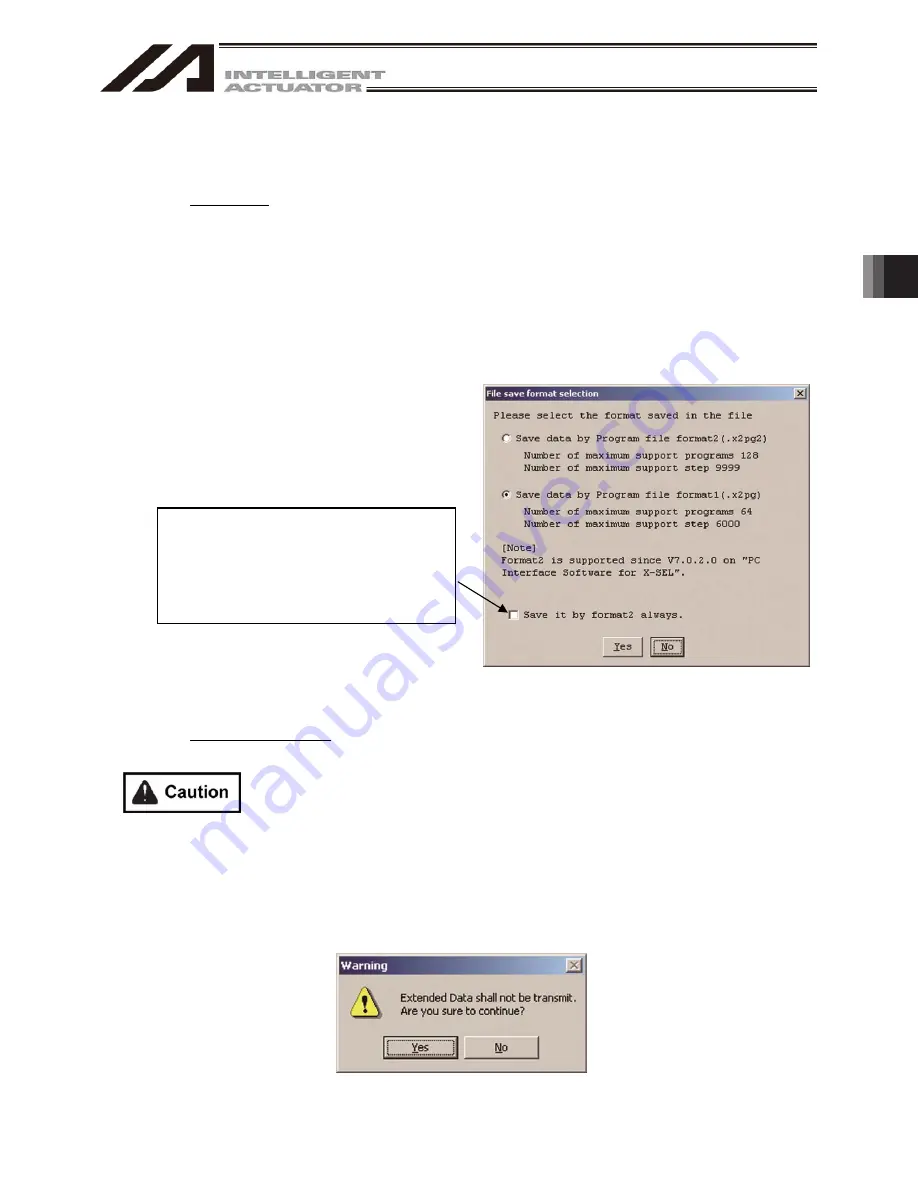
Caution: If you click "Always save with
Format 2", files will be always saved with
Format 2. And this screen won’t be
displayed after that. It can be displayed
again by setting in the Environment Setup
screen (15. Tool).
4.2 Saving a Program, Transferring and Closing the Edit Window
4.2.1 Saving a Program Online, Transferring and Closing the Edit Window
(1) Saving to a file the program data you are editing
Click the Save to File button in the program edit window.
This is the same as clicking File (F) and then selecting Save As (A).
After clicking the Save to File button, Save File Select screen will be displayed.
In case of the X-SEL-P/Q, PX/QX controllers compatible with increased memory (with gateway function),
you can not select the Program File Format 1 (normal format) for Step No.6001 or later and Program
No.65 or later.
In case of the SSEL controllers, you can not select the Program File Format 1 (normal format) for Step
No.2001 or later and Program No.65 or later.
Select the Program File Format 2 (extended format) to save.
(PC interface software version 7.2.0.0 or later)
Fig. 4.11 Save File Select Screen
(2) Transferring to the controller the program data you are editing.
You can save the program data you are editing to the controller’s memory.
Click the Transfer to Controller button in the program edit window.
This button is selectable only in the online edit mode.
If the program contains any error, the error will be displayed and the program will not be
transferred to the controller.
* The data saved by the Program File Format 1 (normal format) can be transferred to X-SEL-P/Q,
X-SEL-PX/QX controllers incompatible with increased memory (with gateway function).
* If the data saved by the Program File Format 2 (extended format) of XSEL-P/Q, X-SEL-PX/QX
controller (with gateway function) is transferred to the controllers incompatible with the increased
memory, the extended part of data (Step No.6001 or later) will not be transferred.
SSEL controller is the extended part of data (Step No.2001 or later) will not be transferred.
The following Alarm screen will be displayed. Click Yes to transfer the data.
Fig.4.12 Alarm Screen
Summary of Contents for IA-101-TT-USB
Page 2: ......
Page 4: ......
Page 8: ......
Page 50: ...1 Before You Begin 42 1 4 Connection to Controller Fig 1 48 X SEL K J Type Controller ...
Page 52: ...1 Before You Begin 44 Figure shows example of TT Fig 1 50 Table Top Actuator TT TTA ...
Page 53: ...1 Before You Begin 45 Fig 1 51 X SEL KX JX Type Controller ...
Page 62: ...1 Before You Begin 54 Fig 1 60 ASEL Type Controller USB Cable ...
Page 63: ...1 Before You Begin 55 Fig 1 61 PSEL Type Controller USB Cable ...
Page 189: ...9 Symbol Edit Window 181 ...
Page 251: ...13 How to Reset an Absolute Encoder 243 Fig 13 38 Arm Length 120 Reference Position ...
Page 386: ...16 Appendix 378 ...
Page 391: ......


