12.5 Making Printer Settings
324
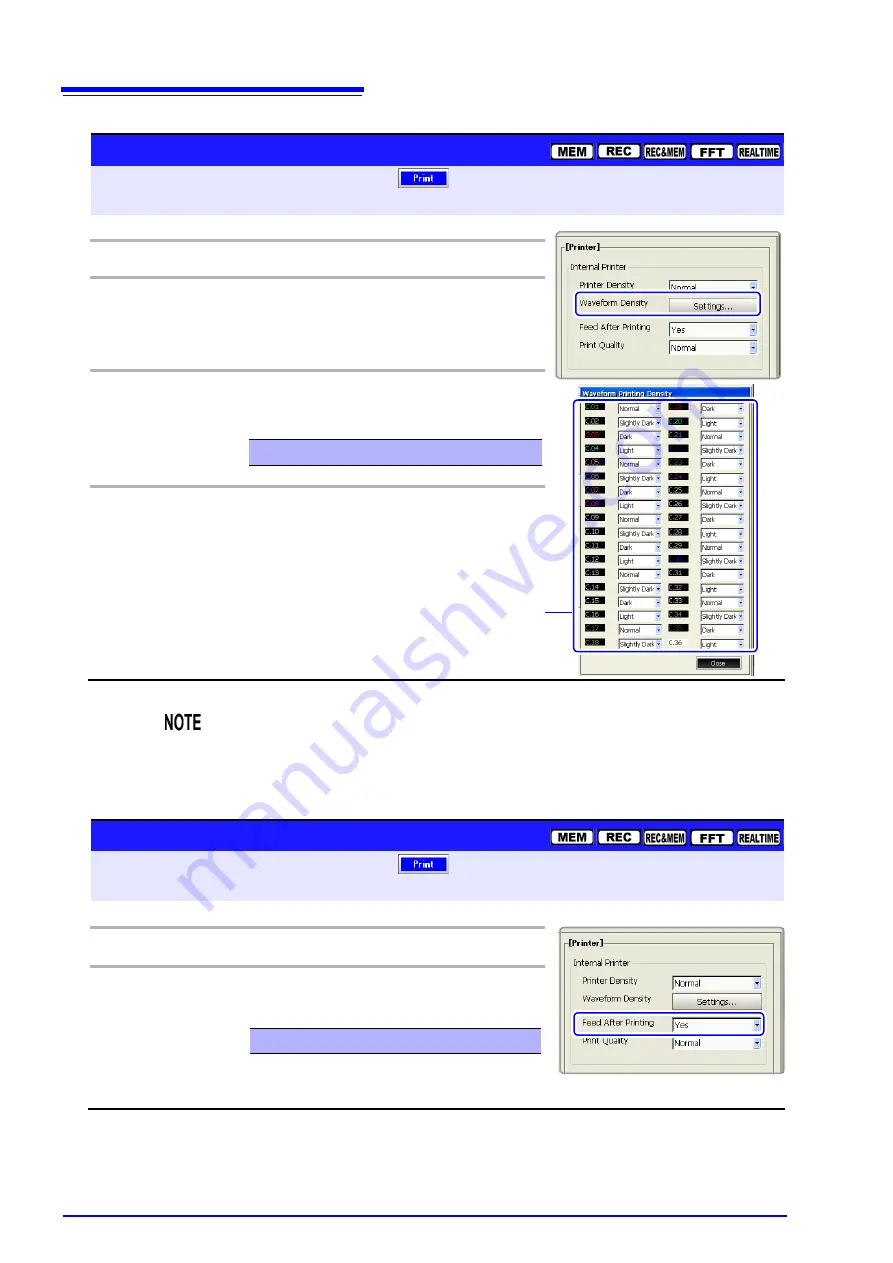
Waveform Printing Density Settings
To open the screen: Press the
SET
key
Select
with the
SUB MENU
keys
Print Settings screen
See
Screen Layout (p. 41)
Operating Key
Procedure
1
SHEET/PAGE
Select the
[Printer]
page.
2
CURSOR
Move the cursor to the [
Waveform Density]
item.
F1
Select
[Set]
.
The [Waveform Printing Density] dialog box ap-
pears.
3
CURSOR
Move the cursor to the color whose density you
want to change.
F1 to F8
Select the print density.
4
CURSOR
Move the cursor to the
[Close]
button.
F1
Select
[Close].
Close the dialog.
Light, Normal, Slightly Dark, Dark
[Waveform Printing Density] dialog
2
3
When the Recorder Function is enabled and Real-Time Print is [On]
If the timebase is in a range faster than 1s/div, the printing may be light even if
the printing density is set to
[Dark]
.
Paper Feed After Printing Settings
To open the screen: Press the
SET
key
Select
with the
SUB MENU
keys
Print Settings screen
See
Screen Layout (p. 41)
Operating Key
Procedure
1
SHEET/PAGE
Select the
[Printer]
page.
2
CURSOR
Move the cursor to the
[Feed After Printing]
item.
F1 to F8
Select whether or not to feed the paper.
Yes (default setting), No
Summary of Contents for 8860-50
Page 2: ......
Page 12: ...Contents x...
Page 18: ...Reading this Manual 6...
Page 24: ...1 3 Interconnection and Block Diagrams 12...
Page 180: ...6 12 Making Trigger Settings on the Waveform Screen 168...
Page 246: ...8 15 Inserting and Searching for Event Marks on a Waveform 234...
Page 356: ...12 7 Print Examples 344 A B Waveform_________________________________________________...
Page 406: ...14 2 External I O 394...
Page 489: ......
Page 490: ......


