


LOWER THREADING
19
Em
br
oi
d
er
y St
ep
b
y S
te
p
1
■
Using the Spool Stand
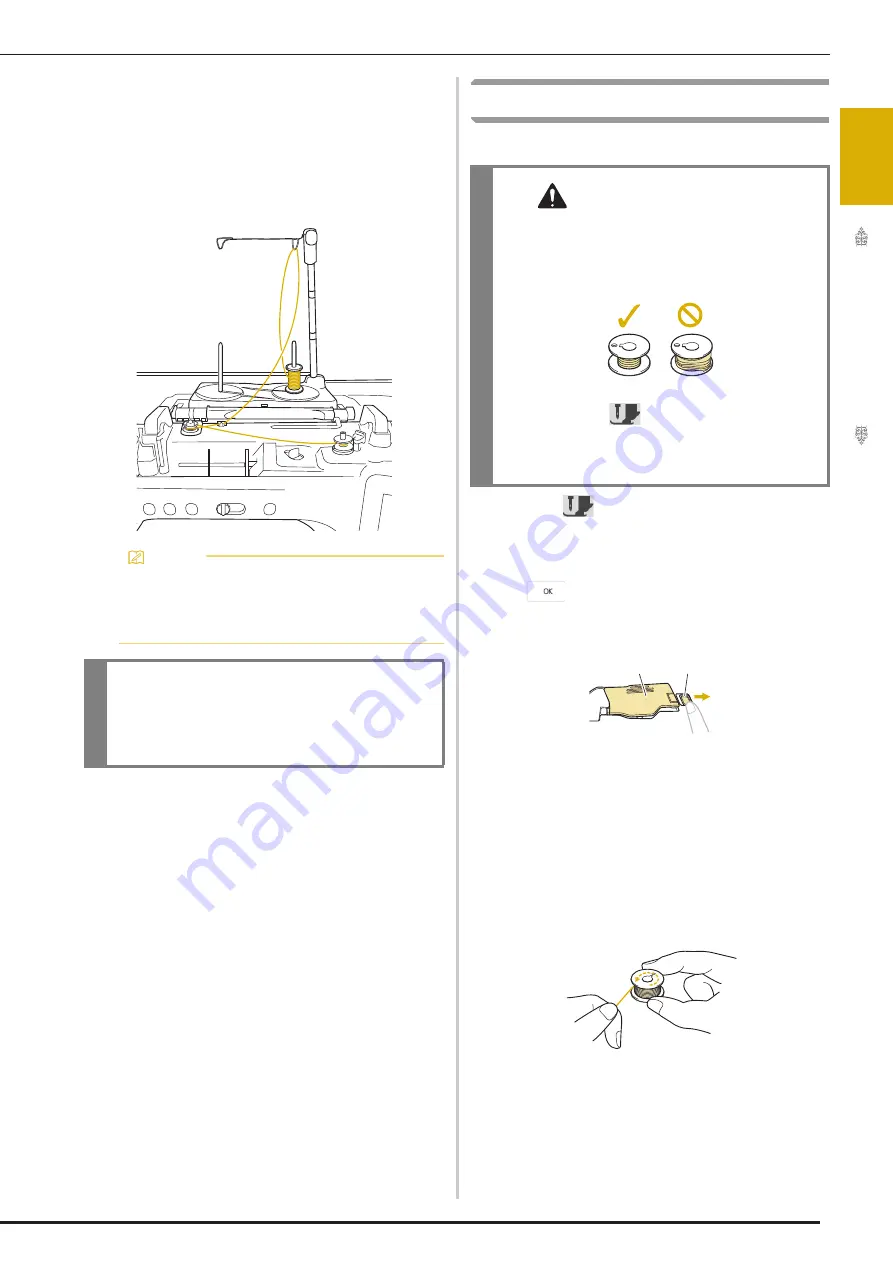
To wind thread on the bobbin while the spool stand
is installed, pass the thread from the spool through
the thread guide on the telescopic thread guide, and
then wind the bobbin according to steps
e
through
k
of “Using the Supplemental Spool Pin”on
page 16 to page 17.
Setting the Bobbin
Install the bobbin wound with thread.
a
Touch
to lock all keys and buttons and
raise the presser foot.
*
If the message [OK to automatically lower the
presser foot?] appears on the LCD screen, touch
to continue.
b
Slide the bobbin cover latch to the right.
a
Bobbin cover
b
Latch
The bobbin cover opens.
c
Remove the bobbin cover.
d
Hold the bobbin with your right hand and
hold the end of the thread with your left
hand.
Memo
• Refer to the Instruction and Reference Guide
(Sewing) to assemble the spool stand.
• Refer to page 24 to thread the machine using
the spool stand.
IMPORTANT
• When winding thread on the bobbin, do not
cross the bobbin winding thread with the
upper thread in the thread guides.
CAUTION
• Use a bobbin thread that has been correctly
wound. Otherwise, the thread tension may be
incorrect and the needle may break, causing
injuries.
• Before inserting or changing the bobbin, be
sure to touch
in the LCD to lock all keys
and buttons, otherwise injuries may occur if
the “Start/Stop” button or any other button is
pressed and the machine starts embroidering.
a
b
Summary of Contents for Solaris VISION BLSA3
Page 1: ......
Page 2: ......
Page 6: ...CONTENTS 4 ...
Page 7: ...Chapter 1 Embroidery Step by Step ...
Page 59: ...Chapter 2 Basic Editing ...
Page 87: ...Chapter 3 Advanced Editing ...
Page 150: ...USING THE CAMERA TO CONNECT PATTERNS 148 ...
Page 151: ...Chapter 4 IQ Designer ...
Page 192: ...IQ INTUITION POSITIONING APP 190 ...
Page 193: ...Chapter 5 Appendix ...
Page 204: ...English 882 W34 Version 0 ...


