


PREPARING THE FABRIC
29
Em
br
oi
d
er
y St
ep
b
y S
te
p
1
g
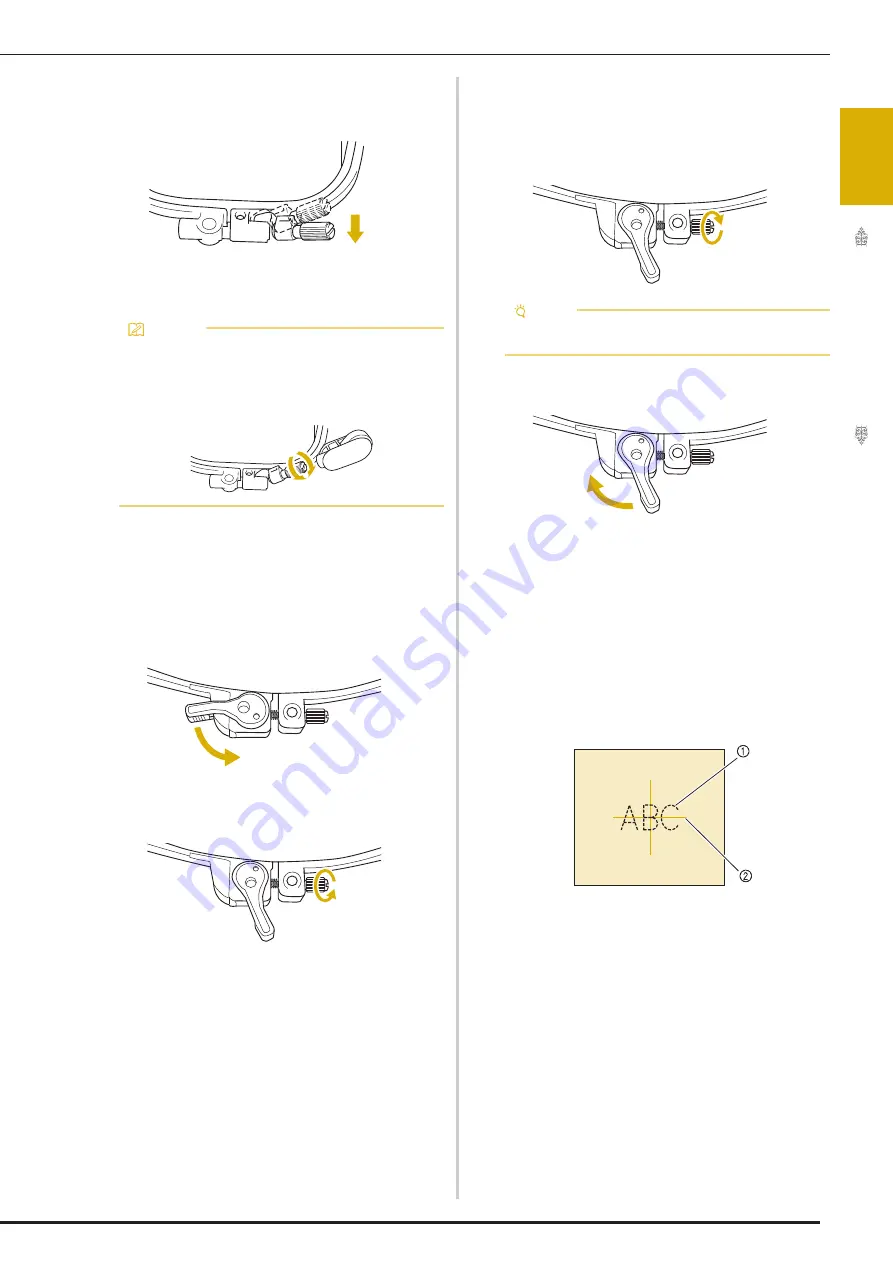
Return the frame adjustment screw to its
initial position.
■
Inserting Fabric into Embroidery
Frame (Only Embroidery Frames
with a Lever)
a
Lower the lever.
b
Loosen the frame adjustment screw by
hand, and then remove the inner frame.
c
Refer to steps
c
through
f
of “Inserting
the Fabric” on page 28 to hoop the fabric.
d
Tighten the frame adjustment screw by
hand.
e
Return the lever to its original position.
■
Using the Embroidery Sheet (Sold
Separately)
When you want to embroider the pattern in a
particular place, use the embroidery sheet with the
frame.
a
With a chalk pencil, mark the area of the
fabric you want to embroider.
a
Embroidery pattern
b
Mark
Memo
• You can use the included multi-purpose
screwdriver, setting the position to “3”, when
you loosen or tighten the frame adjustment
screw.
Note
• Do not overtighten the screw.
Summary of Contents for Solaris VISION BLSA3
Page 1: ......
Page 2: ......
Page 6: ...CONTENTS 4 ...
Page 7: ...Chapter 1 Embroidery Step by Step ...
Page 59: ...Chapter 2 Basic Editing ...
Page 87: ...Chapter 3 Advanced Editing ...
Page 150: ...USING THE CAMERA TO CONNECT PATTERNS 148 ...
Page 151: ...Chapter 4 IQ Designer ...
Page 192: ...IQ INTUITION POSITIONING APP 190 ...
Page 193: ...Chapter 5 Appendix ...
Page 204: ...English 882 W34 Version 0 ...


