


IQ DESIGNER WITH SCAN
166
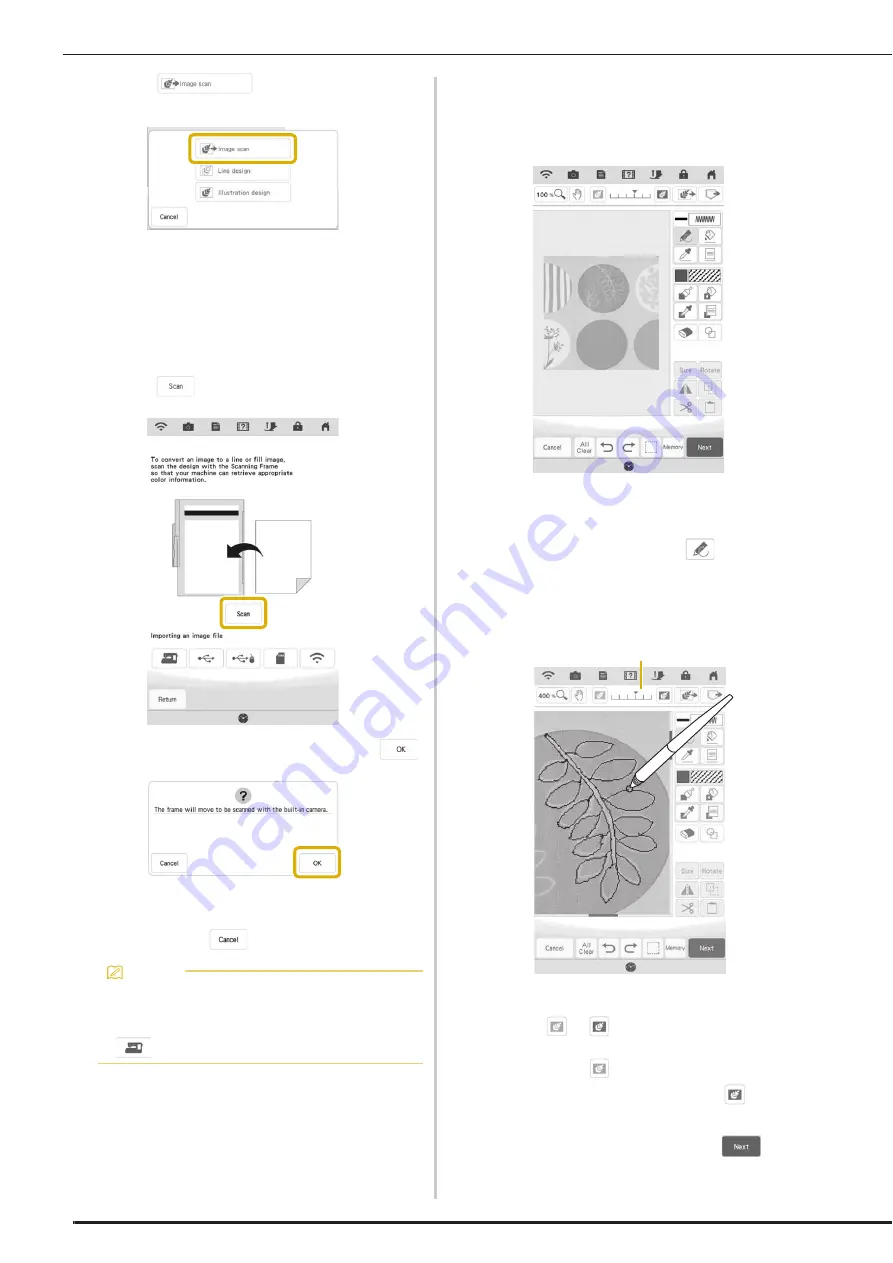
b
Touch .
The image display screen appears.
c
Using the magnets, affix a picture to the
scanning frame and attach the frame to the
machine. Refer to “Using the Scanning
Frame” on page 164.
d
Touch .
When the following message appears, touch
.
Scanning begins.
*
To stop scanning and return to the screen in
step
d
, touch
.
e
When scanning is finished, scanned image is
displayed transparently in the pattern
drawing area.
f
Using the included fine tipped stylus pen or
dual purpose stylus, touch
, and then
draw lines to trace the image.
*
For details on drawing lines, refer to “Drawing
Lines” on page 152.
a
Transparency adjustment
*
Touch
or
to adjust the transparency of the
background.
Each touch of
lightens the background, making
the line pattern darker. Each touch of
darkens
the background, making the line pattern lighter.
g
After editing the pattern, touch
to
specify the settings for pattern.
Memo
• The most recently scanned image is
automatically stored in the machine’s
memory. To import this saved image, touch
. (page 167)
a
Summary of Contents for Solaris VISION BLSA3
Page 1: ......
Page 2: ......
Page 6: ...CONTENTS 4 ...
Page 7: ...Chapter 1 Embroidery Step by Step ...
Page 59: ...Chapter 2 Basic Editing ...
Page 87: ...Chapter 3 Advanced Editing ...
Page 150: ...USING THE CAMERA TO CONNECT PATTERNS 148 ...
Page 151: ...Chapter 4 IQ Designer ...
Page 192: ...IQ INTUITION POSITIONING APP 190 ...
Page 193: ...Chapter 5 Appendix ...
Page 204: ...English 882 W34 Version 0 ...


