EMBROIDERY APPLICATIONS
139
Ad
va
nc
ed
Ed
iti
n
g
3
g
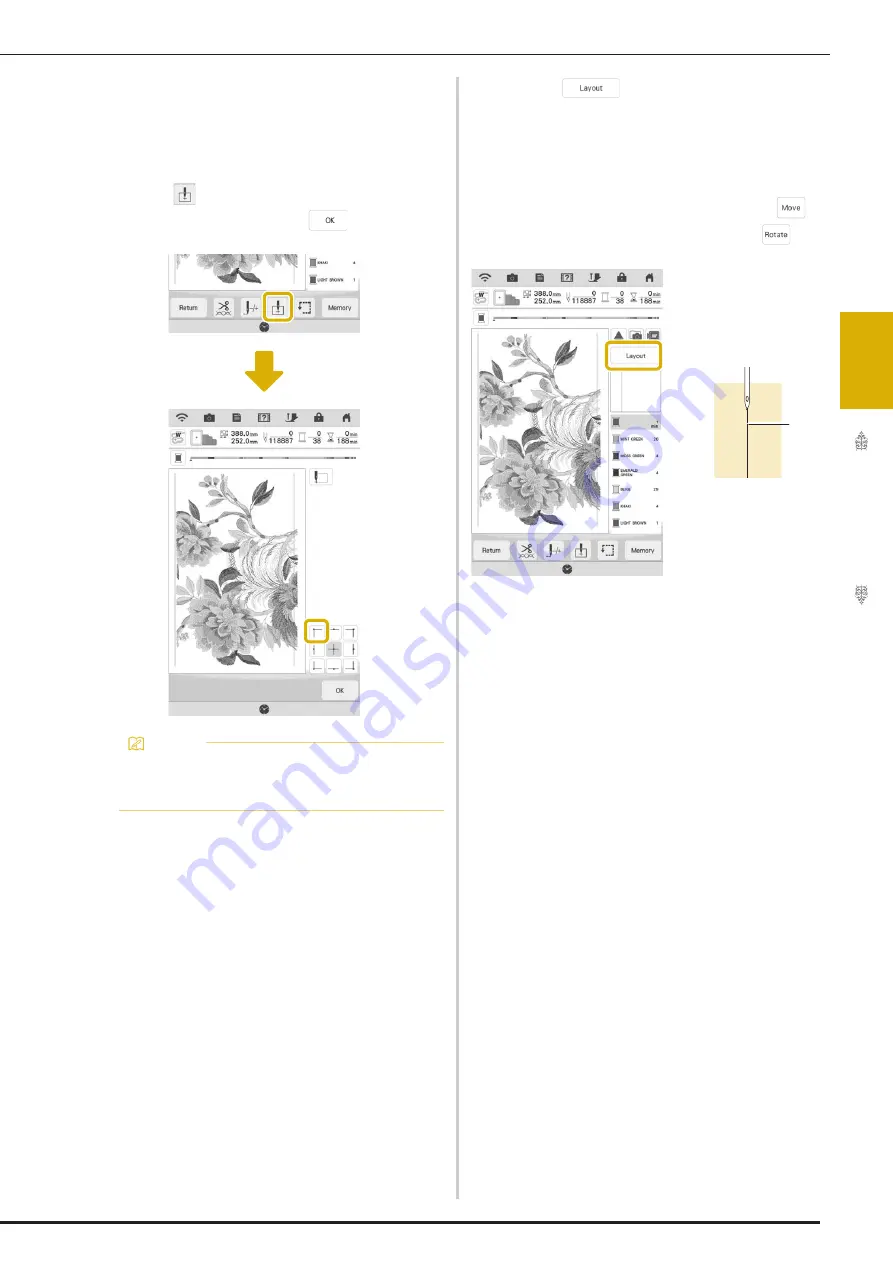
Rehoop the fabric. Adjust the position and
angle for the next pattern so that the
alignment stitching embroidered with the
first pattern and the needle position for the
next pattern are aligned. For this example,
touch
, select the upper-left needle
position, and then touch
.
h
Touch
, and then adjust the position
and angle for the next pattern so that the
needle position is aligned with the
alignment stitching embroidered with the
first pattern.
*
To adjust the position of the pattern, touch
.
*
To adjust the angle of the pattern, touch
.
a
Alignment stitching
i
In the same way, select the lower-left
needle position, and then adjust the
position and angle of the next pattern so
that the needle aligns with the thread mark
embroidered with the first pattern.
j
Embroider the second pattern.
k
Embroider the remaining patterns in the
same way as with the second pattern.
l
Remove the thread marks.
Memo
• For best results, if fabric puckers, iron the
wrong side of the fabric to smooth out before
rehooping.
a
Summary of Contents for Solaris VISION BLSA3
Page 1: ......
Page 2: ......
Page 6: ...CONTENTS 4 ...
Page 7: ...Chapter 1 Embroidery Step by Step ...
Page 59: ...Chapter 2 Basic Editing ...
Page 87: ...Chapter 3 Advanced Editing ...
Page 150: ...USING THE CAMERA TO CONNECT PATTERNS 148 ...
Page 151: ...Chapter 4 IQ Designer ...
Page 192: ...IQ INTUITION POSITIONING APP 190 ...
Page 193: ...Chapter 5 Appendix ...
Page 204: ...English 882 W34 Version 0 ...


