


EMBROIDERY APPLICATIONS
115
Ad
va
nc
ed
Ed
iti
n
g
3
k
Pass the yarn through the telescopic thread
guide and the yarn guide (
1
) to (
2
).
l
Pass the yarn through the guide on
embroidery couching foot “Y”.
m
Thread the yarn through embroidery
couching foot “Y”.
Pass the yarn through the loop in the yarn
threader, and then pass the threader from
top to bottom through the hole in
embroidery couching foot “Y”. Pull the
yarn to the front of the machine.
n
Touch
to unlock all keys and buttons.
o
Thread the machine with the upper thread.
p
Press the "Presser Foot Lifter" button twice
to raise the presser foot and then attach the
embroidery frame to the embroidery unit.
■
Embroidering a Couching Pattern
a
Touch .
b
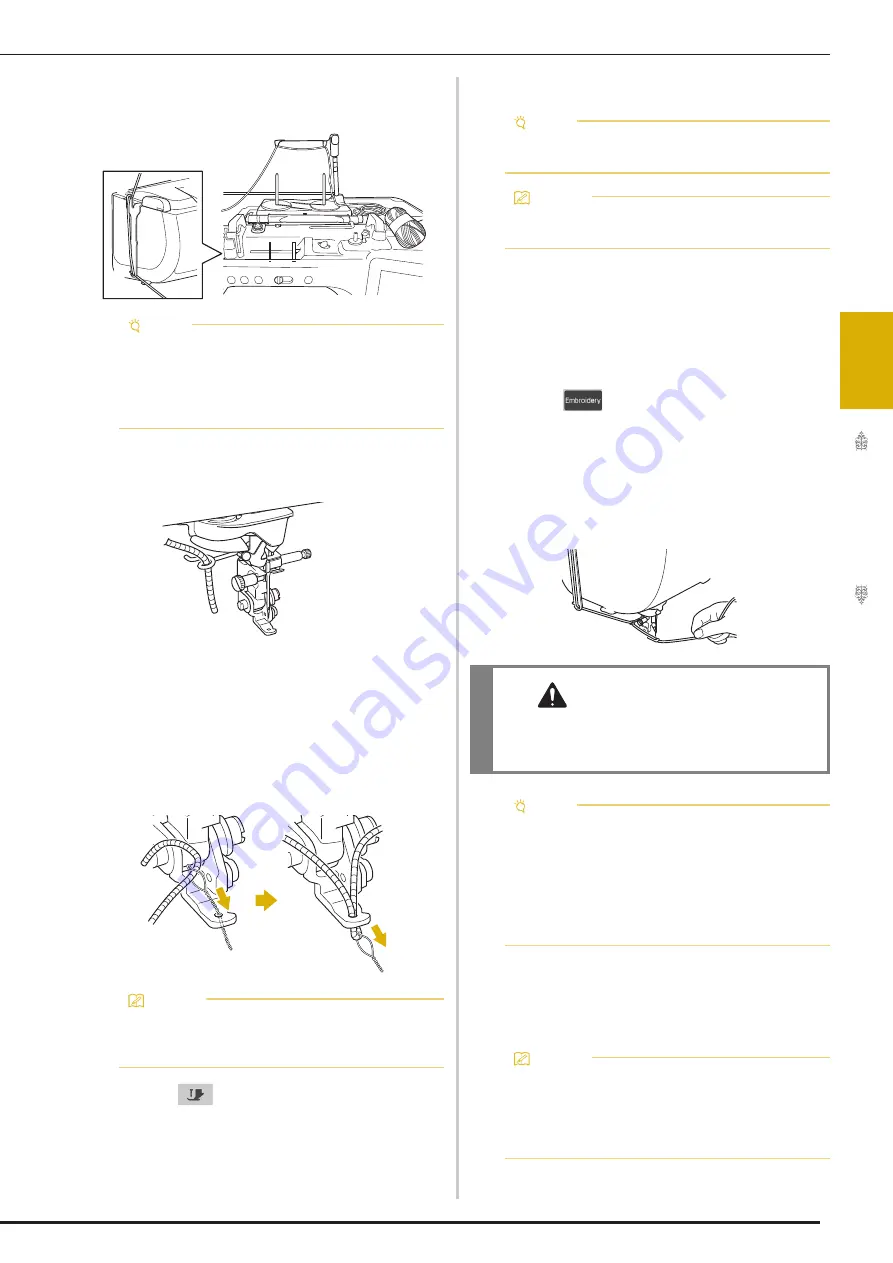
Make sure that about 20 cm (8 inches) of
yarn is pulled to the front of the machine.
c
While holding the yarn in your hand in
front of you, press the “Start/Stop” button.
d
After embroidering several stitches, release
the yarn.
When embroidering is finished, the machine will
automatically trim the threads and stop.
Note
• Pull off an appropriate amount of yarn from
the ball so that the yarn does not become
taut.
• Make sure that the yarn does not become
entangled as you work.
Memo
• Place a sheet of paper under the presser foot
to smoothly pass the yarn threader through
the hole in embroidery couching foot “Y”.
1
2
Note
• Do not use the spool stand for upper thread.
Otherwise thread may tangle with yarn.
Memo
• For best results, use an upper thread that is
the same color as the yarn.
CAUTION
• Pulling the yarn upwards may cause it to catch
on the needle, causing it to break. Be careful
not to allow the yarn to catch on the needle.
Note
• Before embroidering, make sure that there is
enough yarn, upper thread and bobbin thread.
• Make sure that the yarn passes smoothly
through the guides. Unravel as much yarn
from the ball as necessary so that the yarn
does not become taut.
• Use yarn that has no knots.
Memo
• When using a high-density yarn, the upper
thread tension may be disturbed. If this
happens, it is possible to improve it by raising
the [Embroidery Foot Height] by about 1 mm
on the settings screen.
Summary of Contents for Solaris VISION BLSA3
Page 1: ......
Page 2: ......
Page 6: ...CONTENTS 4 ...
Page 7: ...Chapter 1 Embroidery Step by Step ...
Page 59: ...Chapter 2 Basic Editing ...
Page 87: ...Chapter 3 Advanced Editing ...
Page 150: ...USING THE CAMERA TO CONNECT PATTERNS 148 ...
Page 151: ...Chapter 4 IQ Designer ...
Page 192: ...IQ INTUITION POSITIONING APP 190 ...
Page 193: ...Chapter 5 Appendix ...
Page 204: ...English 882 W34 Version 0 ...


