EMBROIDERY APPLICATIONS
126
Embroidering Quilting Border
Patterns (Semi-Auto Split Quilt
Sash)
By rehooping the fabric to embroider connecting
patterns, a quilting border of up to 3 m × 3 m
(approx.118 inches × 118 inches) can be created.
The pattern is positioned manually.
■
Creating Quilting Border Data
a
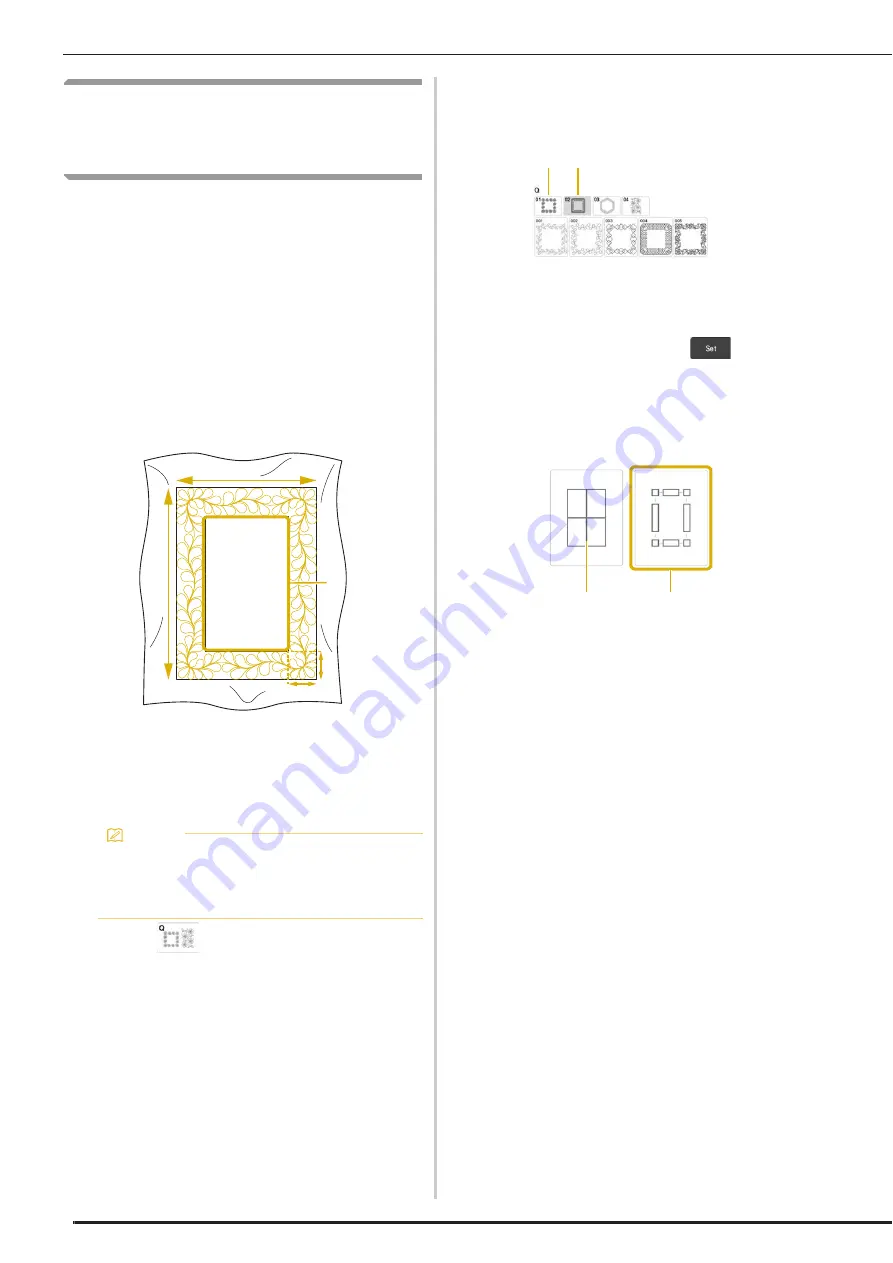
With a chalk pencil, mark the quilt top with
the inner outline of the quilting border to
be embroidered.
Measure the size of the quilting border.
a
Inner outline (used for positioning)
b
Width (includes the width of borders)
c
Height (includes the height of borders)
d
Width of quilting border
b
Touch .
c
Select a sub-category.
For this example, select two-color
rectangular quilting border patterns.
a
Single-color rectangular quilting border patterns
b
Two-color rectangular quilting border patterns
d
Select the pattern that you want to
embroider, and then touch
.
e
Select how to divide the pattern. For this
example, select “Semi-Auto split quilt
sash”.
a
Auto split quilt sash
For details, refer to “Embroidering Quilting Border
Patterns (Auto Split Quilt Sash)” on page 123
b
Semi-Auto split quilt sash
Memo
• Be sure to cut the quilt layers (quilt top,
batting, and quilt backing) with an excess of
about 10 cm (4 inches) so that the quilt will
extend to the edges of the embroidery frame.
b
c
d
a
a
b
a
b
Summary of Contents for Solaris VISION BLSA3
Page 1: ......
Page 2: ......
Page 6: ...CONTENTS 4 ...
Page 7: ...Chapter 1 Embroidery Step by Step ...
Page 59: ...Chapter 2 Basic Editing ...
Page 87: ...Chapter 3 Advanced Editing ...
Page 150: ...USING THE CAMERA TO CONNECT PATTERNS 148 ...
Page 151: ...Chapter 4 IQ Designer ...
Page 192: ...IQ INTUITION POSITIONING APP 190 ...
Page 193: ...Chapter 5 Appendix ...
Page 204: ...English 882 W34 Version 0 ...


