


EMBROIDERY APPLICATIONS
119
Ad
va
nc
ed
Ed
iti
n
g
3
b
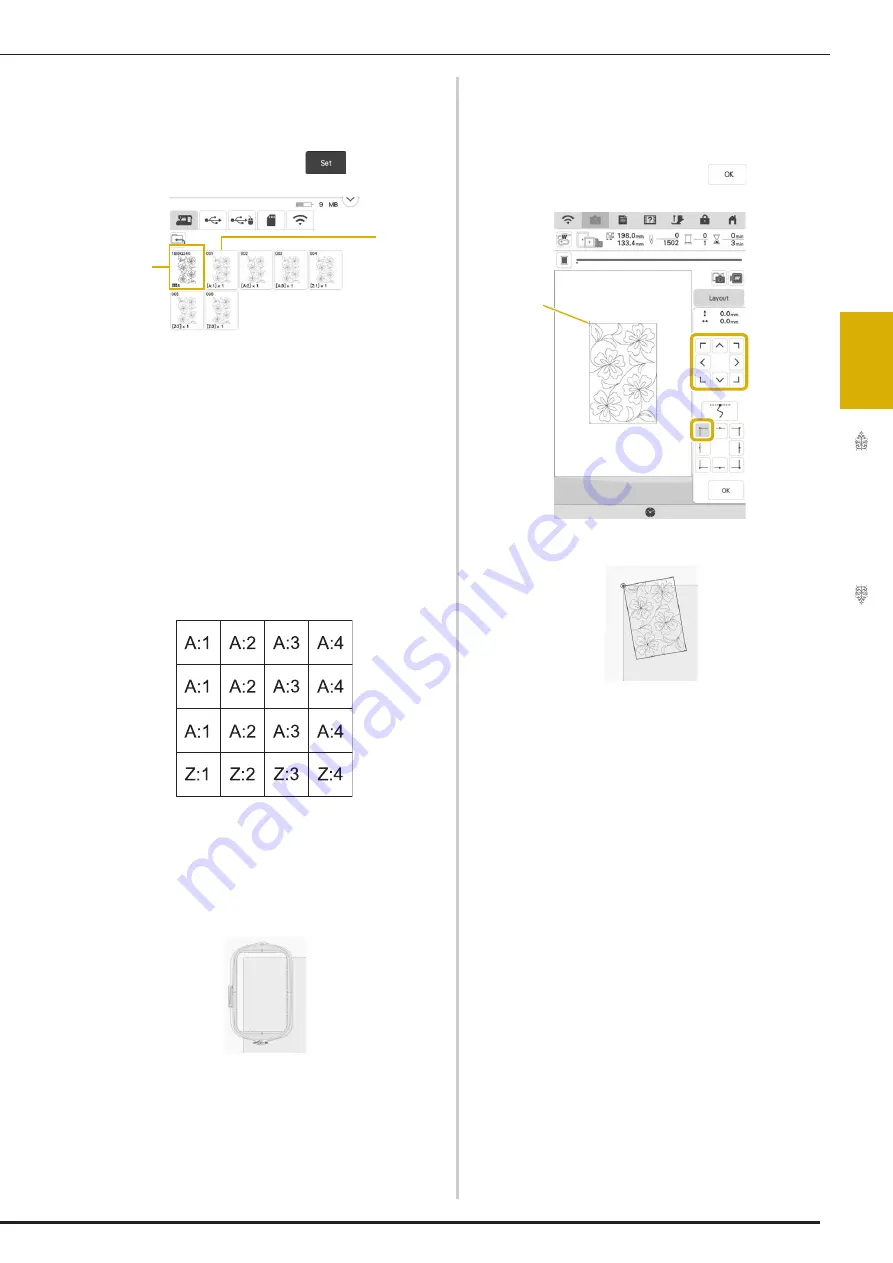
For this example, since we will embroider
the edge-to-edge quilt pattern according to
the on-screen instructions, select the
thumbnail for the entire edge-to-edge quilt
pattern. And then touch
.
a
Touch this key to embroider the edge-to-edge
quilt pattern according to the on-screen
instructions. The number in the lower-left corner
indicates the total number of segments for the
edge-to-edge quilt pattern.
b
To embroider by visually aligning the pattern
sections, touch each pattern section to be
embroidered.
You can check where and how many times the
part will be embroidered with the codes written on
each key.
“A” refers to rows other than the last one, “Z”
refers to the last row, and the numbers indicate
the order in which the patterns are to be
connected.
Example: When connecting patterns in four rows
and four columns
c
Hoop the quilt in the embroidery frame so
that the marked upper-left corner of the
edge-to-edge quilt pattern is in the
embroidering area, and then attach the
embroidery frame.
d
Use the move pattern keys to align the
upper-left corner of the chalk reference
lines previously drawn on the quilt with the
upper-left corner of the part projected by
the projector. Then, touch
.
a
Upper-left corner
b
a
a
Summary of Contents for Solaris VISION BLSA3
Page 1: ......
Page 2: ......
Page 6: ...CONTENTS 4 ...
Page 7: ...Chapter 1 Embroidery Step by Step ...
Page 59: ...Chapter 2 Basic Editing ...
Page 87: ...Chapter 3 Advanced Editing ...
Page 150: ...USING THE CAMERA TO CONNECT PATTERNS 148 ...
Page 151: ...Chapter 4 IQ Designer ...
Page 192: ...IQ INTUITION POSITIONING APP 190 ...
Page 193: ...Chapter 5 Appendix ...
Page 204: ...English 882 W34 Version 0 ...


