MAKING EMBROIDERY ADJUSTMENTS
100
h
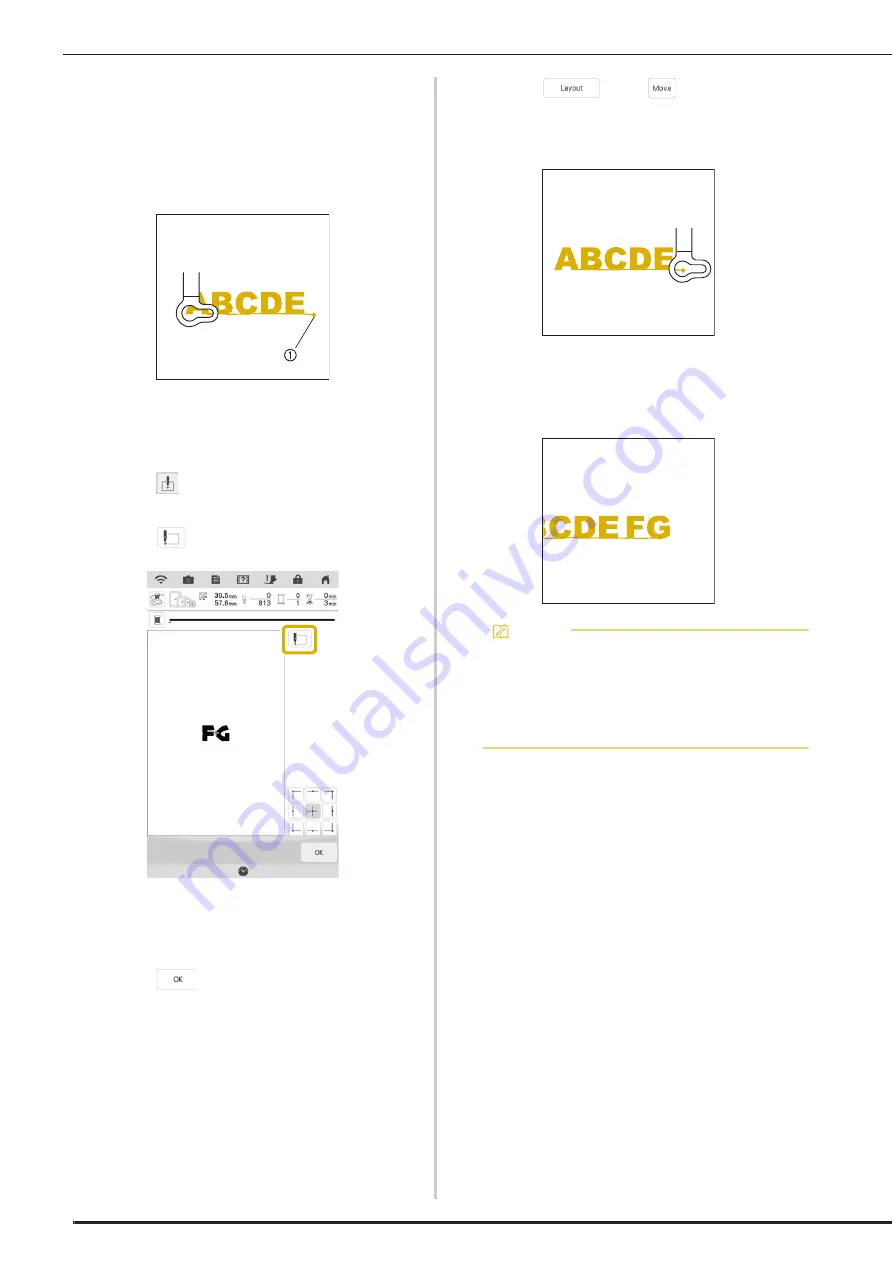
After the characters are embroidered, cut
the threads to a generous length, remove
the embroidery frame, rehoop the fabric so
that the remaining characters (“FG”) can be
embroidered, and then attach the
embroidery frame again.
a
End of the embroidering
i
As in step
a
, select the character patterns
for “FG”.
j
Touch .
k
Touch .
The carriage moves so that the needle is positioned
in the lower-left corner of the pattern. You will need
to match this point to the end of embroidering for
the previous pattern.
l
Touch .
m
Touch
, then
to align the
needle with the end of embroidering for the
previous pattern.
n
Press the “Start/Stop” button to begin
embroidering the remaining character
patterns.
Memo
• You may want to use the camera positioning
function (with the grid displayed) to ensure the
next set of characters are precisely aligned
with the first set of characters. For details,
refer to “Aligning the Embroidering Position
Using the Built-In Camera” on page 43.
Summary of Contents for Solaris VISION BLSA3
Page 1: ......
Page 2: ......
Page 6: ...CONTENTS 4 ...
Page 7: ...Chapter 1 Embroidery Step by Step ...
Page 59: ...Chapter 2 Basic Editing ...
Page 87: ...Chapter 3 Advanced Editing ...
Page 150: ...USING THE CAMERA TO CONNECT PATTERNS 148 ...
Page 151: ...Chapter 4 IQ Designer ...
Page 192: ...IQ INTUITION POSITIONING APP 190 ...
Page 193: ...Chapter 5 Appendix ...
Page 204: ...English 882 W34 Version 0 ...


