UPPER THREADING
25
Em
br
oi
d
er
y St
ep
b
y S
te
p
1
b
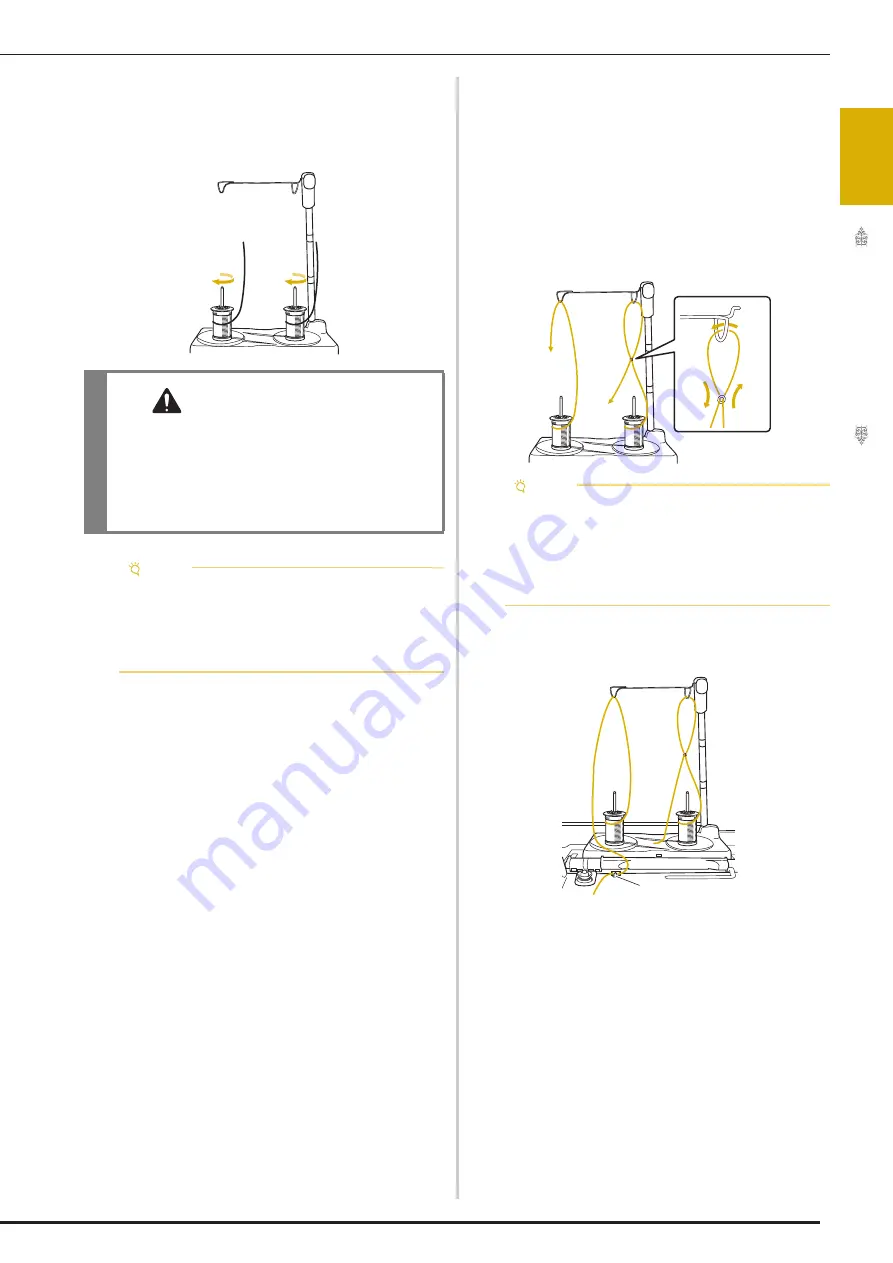
Place the spool of thread on the spool pin
so that the thread feeds off the spool
clockwise. Firmly insert the spool cap onto
the spool pin.
c
Pull the thread off the spool. Pass the thread
from the back to the front through the
thread guides at the top.
When using thread that quickly feeds off the spool,
such as metallic thread, use the enclosed ring to
prevent the thread from becoming entangled.
Threading sequence: Pull the thread from the spool,
place the thread through the ring from the bottom up
(
1
), into the thread guide (
2
) and through the ring
from the top down (
3
). When using the ring, do not
use the spool cap base.
d
Pass the thread through the machine’s
thread guide from the right to the left.
a
Thread guide
e
Thread the machine according to the steps
f
to
o
of “Upper Threading” on page 21.
CAUTION
• Make sure that the spools do not touch each
other, otherwise the thread will not feed off
smoothly, and the needle may break and cause
injury. In addition, make sure that the spools
do not touch the telescopic thread guide at the
center.
Note
• When using 2 spools of thread, make sure
that both spools are feeding in the same
direction.
• Make sure that the thread is not caught under
the spool.
Note
• Guide the thread so that it does not become
entangled with the other thread.
• After feeding the thread as instructed, wind
any excess thread back onto the spool,
otherwise the excess thread will become
tangled.
2
1
3
a
Summary of Contents for Solaris VISION BLSA3
Page 1: ......
Page 2: ......
Page 6: ...CONTENTS 4 ...
Page 7: ...Chapter 1 Embroidery Step by Step ...
Page 59: ...Chapter 2 Basic Editing ...
Page 87: ...Chapter 3 Advanced Editing ...
Page 150: ...USING THE CAMERA TO CONNECT PATTERNS 148 ...
Page 151: ...Chapter 4 IQ Designer ...
Page 192: ...IQ INTUITION POSITIONING APP 190 ...
Page 193: ...Chapter 5 Appendix ...
Page 204: ...English 882 W34 Version 0 ...


