PREPARING THE FABRIC
28
■
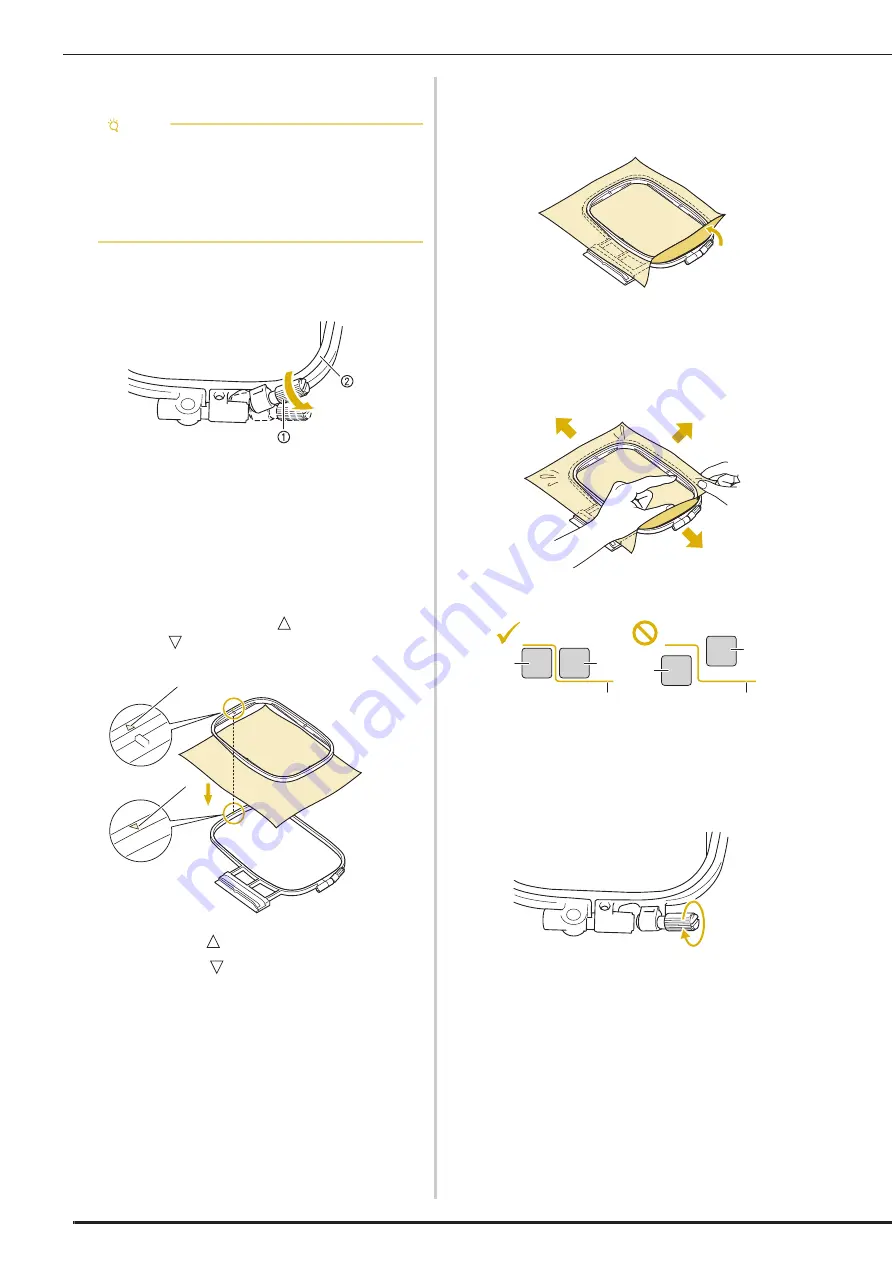
Inserting the Fabric
a
Lift-up and loosen the frame adjustment
screw and remove the inner frame.
a
Frame adjustment screw
b
Inner frame
b
Lay the fabric right side up on top of the
outer frame.
c
Re-insert the inner frame making sure to
align the inner frame’s
with the outer
frame’s .
a
Inner frame’s
b
Outer frame’s
d
Slightly tighten the frame adjustment screw,
and then remove the slack in the fabric by
pulling on the edges and corners.
e
Gently smooth out the fabric. Make sure
fabric is flat and without wrinkles.
*
After stretching the fabric, make sure the fabric is
taut.
*
Make sure the inside and outside frames are even
before you start embroidering.
a
Outer frame
b
Inner frame
c
Fabric
f
Tighten the frame adjustment screw.
Note
• If the fabric is not securely held in the
embroidery frame, the embroidery design will
embroider out poorly. Insert the fabric on a
level surface, and gently stretch the fabric taut
in the frame. Follow the steps below to insert
the fabric correctly.
a
b
a
b
c
a
b
c
Summary of Contents for Solaris VISION BLSA3
Page 1: ......
Page 2: ......
Page 6: ...CONTENTS 4 ...
Page 7: ...Chapter 1 Embroidery Step by Step ...
Page 59: ...Chapter 2 Basic Editing ...
Page 87: ...Chapter 3 Advanced Editing ...
Page 150: ...USING THE CAMERA TO CONNECT PATTERNS 148 ...
Page 151: ...Chapter 4 IQ Designer ...
Page 192: ...IQ INTUITION POSITIONING APP 190 ...
Page 193: ...Chapter 5 Appendix ...
Page 204: ...English 882 W34 Version 0 ...


