


CONFIRMING THE PATTERN POSITION
47
Em
br
oi
d
er
y St
ep
b
y S
te
p
1
g
A reminder message appears. Remove the
embroidery positioning sticker from the
fabric, and touch
.
*
To remove the embroidery positioning sticker more
easily, touch
so that the carriage moves
slightly forward and away from under the needle.
After the embroidery positioning sticker is removed,
touch .
h
Press the “Start/Stop” button to begin
embroidering.
*
Refer to “Embroidering Patterns” on page 50.
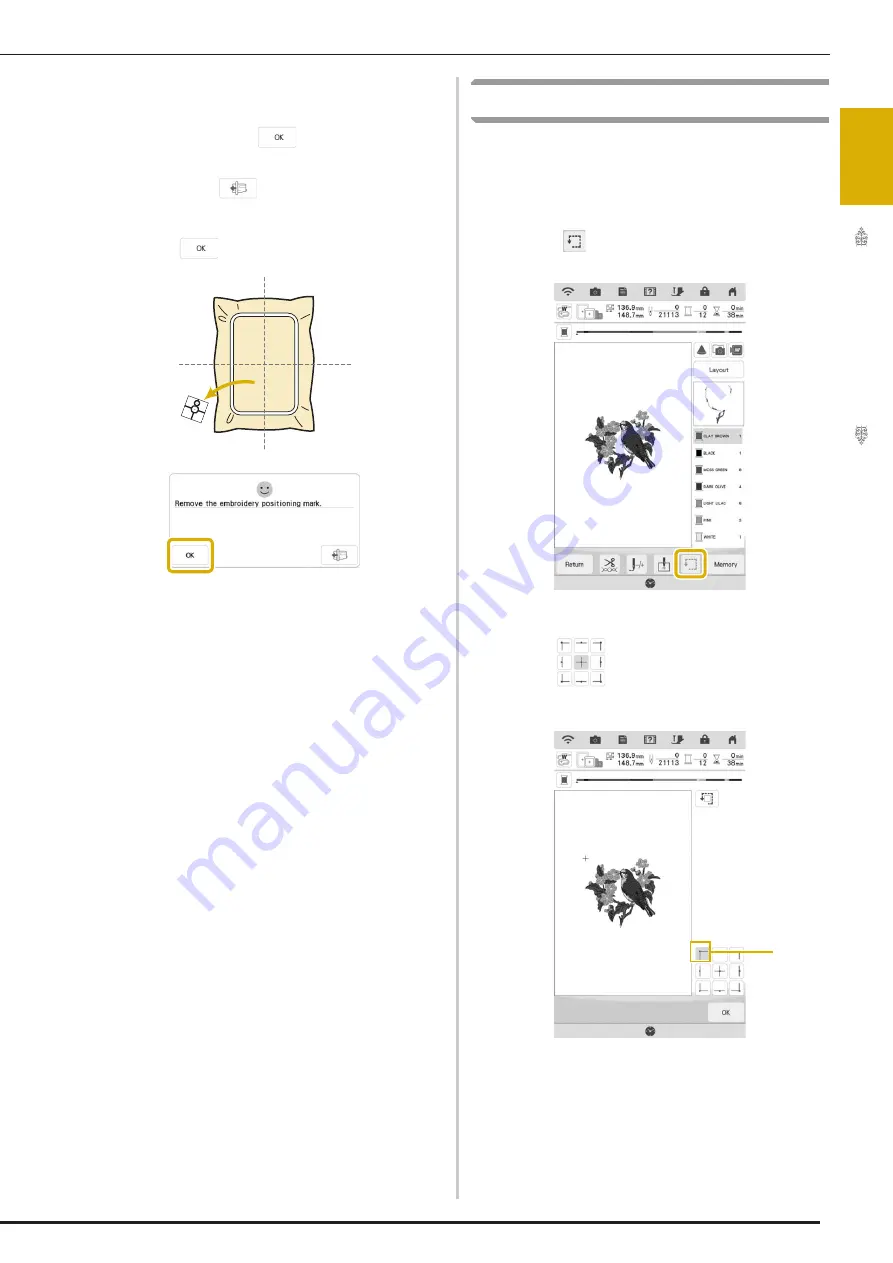
Checking the Pattern Position
The carriage moves and shows the pattern
position. Watch the embroidery frame closely to
make sure the pattern will be embroidered in the
right place.
a
Touch .
The following screen is displayed.
b
From
, touch the key for the position
that you want to check.
a
Selected position
The carriage will move to the selected position on
the pattern.
a
Summary of Contents for Solaris VISION BLSA3
Page 1: ......
Page 2: ......
Page 6: ...CONTENTS 4 ...
Page 7: ...Chapter 1 Embroidery Step by Step ...
Page 59: ...Chapter 2 Basic Editing ...
Page 87: ...Chapter 3 Advanced Editing ...
Page 150: ...USING THE CAMERA TO CONNECT PATTERNS 148 ...
Page 151: ...Chapter 4 IQ Designer ...
Page 192: ...IQ INTUITION POSITIONING APP 190 ...
Page 193: ...Chapter 5 Appendix ...
Page 204: ...English 882 W34 Version 0 ...


