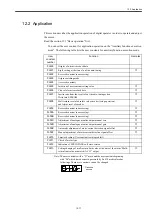


12.2 Application
12-29
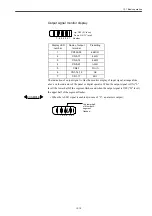
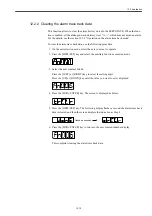
6. Press the [DATA/ENTER] key to return to the auxiliary function execution mode dis-
play.
This completes the motor current detection signal offset automatic adjustment.
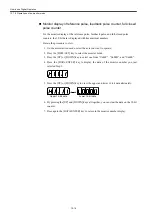
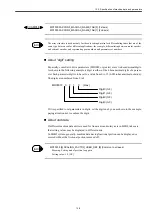
Motor current detection signal offset manual adjustment
Use the following procedure for the offset manual adjustment of motor current detection sig-
nal.
Before initiating the manual adjustment, run the motor at about 100 min
-1
and adjust the ripple for the
torque reference monitor (See the Section 16.4 "Analog monitor") becomes minimum. You must bal-
ance the U-phase and V-phase current offset when adjusting. For this purpose, you have to adjust alter-
nately these phase current offsets several times.
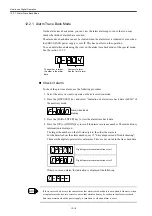
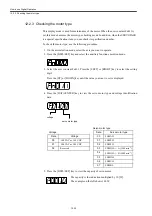
1. On the axis selection mode, select the axis you want to operate.
2. Press the [DSPL/SET] key to select the auxiliary function execution mode.
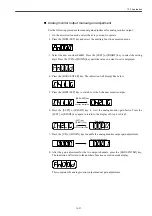
3. Select the user constant Fn00F. Press the [LEFT] or [RIGHT] key to select the setting
digit. Press the [UP] or [DOWN] key until the value you want to set is displayed.
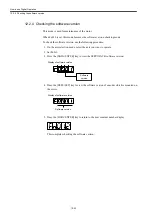
4. Press the [DATA/ENTER] key. The indication will be displayed as below.
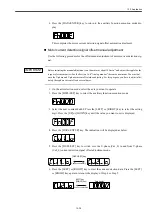
5. Press the [DSPL/SET] key to switch over the U-phase (Cu1_0) to and from V-phase
(Cu2_0) current detection signal offset adjustment mode.
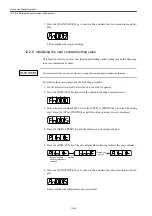
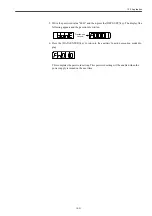
6. Press the [LEFT] or [RIGHT] key to view the current detection data. Press the [LEFT]
or [RIGHT] key again to return to the display of Step 4 or Step 5.
IMPORTANT
[DSPL/SET] key
Changes alternately.
Changes alternately.
[LEFT] key
([RIGHT] key)
Data display
Содержание CNC Series
Страница 1: ...Maintenance Manual Serviceman Handbook MANUAL No NCSIE SP02 19 Yaskawa Siemens CNC Series...
Страница 26: ...Part 1 Hardware...
Страница 38: ...System Configuration 1 2 3 Spindle motor designations 1 12...
Страница 58: ...Installing the control panels 2 3 5 Installing lightning surge absorbers 2 20...
Страница 62: ...Installing the motors 3 4...
Страница 84: ...Connection method 4 3 2 Setting the rotary switches on the inverters and servo units 4 22...
Страница 96: ...Part 2 Software...
Страница 102: ...Software configuration 6 6...
Страница 103: ...7 1 Chapter 7 Backup 7 1 How to archive 7 2 7 2 Network settings 7 7 7 2 1 YS 840DI settings 7 7 7 2 2 PC settings 7 14...
Страница 105: ...7 1 How to archive 7 3 3 Select the Workpieces folder 4 Click on Archive File which is one of the right side keys...
Страница 113: ...7 2 Network settings 7 11 8 Click on the radio button to the left of Specify an IP address...
Страница 121: ...7 2 Network settings 7 19...
Страница 122: ...Part 3 PLC...
Страница 154: ...Part 4 Setting up and maintenance...
Страница 160: ...Overview of System 10 1 2 Basic operation 10 6...
Страница 204: ...How to use Digital Operation 12 2 9 Setting the password setting for write prohibit 12 32...
Страница 327: ...Error and Troubleshooting 15 4...
Страница 328: ...15 1 Errors without Alarm Display and Troubleshooting 15 5...
Страница 329: ...Error and Troubleshooting 15 6...
Страница 343: ...Maintenance and Check 16 3 3 Setting up Initializing Absolute encoder 16 14...


