background image

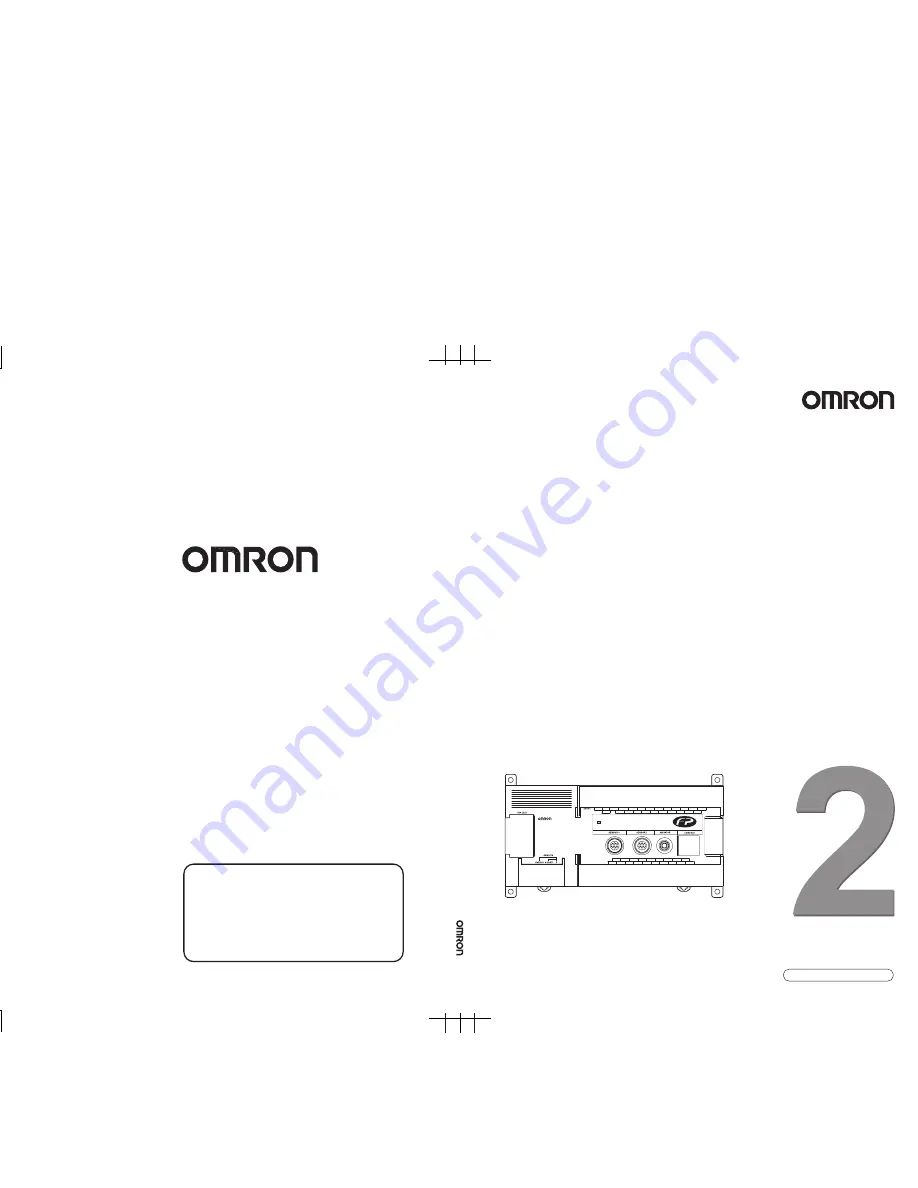
Multi-Dimensional Sensor

Z550

Operation Manual

This manual explains menu operation method 
and communication method with external 
devices.

POWER

Cat.No. Z190-E1-02

 Cat.No.Z190-E1-02           Multi-Dimensional Sensor          Operation Manual

Authorized Distributor:

Cat. No. Z190-E1-02

In the interest of product improvement, specifications are 
subject to change without notice.

Printed in Japan
0505-0.1M (1103) (M)

OMRON Corporation

Industrial Automation Company

Sensing Devices Division H.Q.
Application Sensors Division

Shiokoji Horikawa, Shimogyo-ku,
Kyoto, 600-8530 Japan
Tel: (81)75-344-7068/Fax: (81)75-344-7107

Regional Headquarters

OMRON EUROPE B.V.

Sensor Business Unit,
Carl-Benz-Str. 4, D-71154 Nufringen,
Germany
Tel: (49)7032-811-0/Fax: (49)7032-811-199

OMRON ELECTRONICS LLC

1 East Commerce Drive, Schaumburg, IL 60173
U.S.A.
Tel: (1)847-843-7900/Fax: (1)847-843-8568

OMRON ASIA PACIFIC PTE. LTD.

83 Clemenceau Avenue, 
#11-01, UE Square,
239920 Singapore
Tel: (65)6835-3011/Fax: (65)6835-2711

OMRON (CHINA) CO., LTD. 

Room 2211, Bank of China Tower, 
200 Yin Cheng Road (M), 
Shanghai, 200120 China
Tel: (86)21-5037-2222/Fax: (86)21-5037-2200

Summary of Contents for Z550

Page 1: ...nsing Devices Division H Q Application Sensors Division Shiokoji Horikawa Shimogyo ku Kyoto 600 8530 Japan Tel 81 75 344 7068 Fax 81 75 344 7107 Regional Headquarters OMRON EUROPE B V Sensor Business Unit Carl Benz Str 4 D 71154 Nufringen Germany Tel 49 7032 811 0 Fax 49 7032 811 199 OMRON ELECTRONICS LLC 1 East Commerce Drive Schaumburg IL 60173 U S A Tel 1 847 843 7900 Fax 1 847 843 8568 OMRON A...

Page 2: ...vice Operation Manual Explains menu operation method and communication method with external devices Multi Dimensional Sensor Setup Manual Multi Dimensional Sensor Operation Manual Trademarks Windows 95 98 Windows NT 2000 are registered trademarks of the Microsoft Corporation in the United States and other countries Hyper Terminal has been developed by Hilgraeve Inc in the United States and are als...

Page 3: ...NTRODUCTION SECTION 1 SECTION 2 SECTION 3 SECTION 4 SECTION 5 SECTION 6 SECTION 7 Table of Contents Menus Features Basic Operations Setting Measurement Conditions Expert Menu Other Functions System Settings Communication with External Devices Troubleshooting and Maintenance Operation Manual Multi Dimensional Sensor Z550 Z550 MC10 MC15 ...

Page 4: ...nu Operations 20 Screen Types and Display Methods 25 Image Monitor 26 Profile Monitor 28 Digital Monitor 30 Trend Monitor 31 Learning Basic Operations Conversational Menu 32 Step 1 Selecting the Sensor Installation Method 32 Step 2 Selecting the Measurement Method 34 Step 3 Setting the Measurement Region 36 Step 4 Adjusting the Sensitivity 37 Step 5 Setting Workpiece Position Detection Method 38 S...

Page 5: ...alibration 100 Setting Span and Offset 107 Setting the Judgment Conditions 109 Selecting Hold Conditions for Measurement Values 111 Selecting Inclination Compensation Error Handing 113 Select the Display Unit 115 Setting Averaging Number 117 Setting Trigger for Hold Measurement 118 Using the Logging Function 126 Setting the Detailed Conditions 128 Selecting Measurement Mode 134 SECTION 4 Other Fun...

Page 6: ...cene Switching 177 Setting Conditions at Startup 178 Selecting How Height Coordinates are Handled 179 Selecting the Displayed Number of Digits Decimal Part 180 Using the Download Function 181 Initialization 183 Checking System Version 184 SECTION 6 Communication with External Devices 185 Analog Output 186 Terminal Block 188 RS 232C 193 Timing Charts 222 SECTION 7 Troubleshooting and Maintenance 23...

Page 7: ...p 37 Detect setting p 38 Measurement setting p 40 OUT0 to 7 Height p 72 Changing p 98 Upper p 109 Step 2 pts p 40 Step 3 pts p 75 Edge position p 78 Width p 81 Peak bottom p 85 Angle p 87 Area p 89 Arithmetic average roughness Maximum roughness p 92 Define p 95 Calibrate Output Delete p 99 Lower p 109 Hold p 111 Zero p 136 Span p 107 Offset p 107 Slant error Unit p 115 Edge center p 84 p 92 p 113 ...

Page 8: ...roughness Maximum roughness p 92 Define p 95 Calibration Output condition Clearing settings p 99 Lower p 109 Hold p 111 Zero p 136 Span p 107 Offset p 107 Slant error Unit p 115 Measurement method p 48 Region Sensitivity p 51 Details p 54 Height Reflectance p 57 Slant correct p 67 Detect setting p 56 Height position correct Reflectance correct Measurement Mode p 134 Output setting Analog p 186 Ter...

Page 9: ...ion specification Setting menu p 175 Initialize p 183 Version p 184 Sensor installation p 176 Startup monitor p 178 Test measurement p 159 Surrounding image p 164 Backup p 166 Profile p 197 1st scene p 178 Dec pts p 180 Scene selection p 177 Height coordinates p 179 Environment setting p 196 Download p 181 Download p 181 Output setting Analog p 186 Terminals p 188 RS 232C p 193 Extra setting to av...

Page 10: ...s are the same as those for measurement item setting Operation Manual 31 Step 1 Sensor Installation Condition Step 3 Measurement region setting Step 4 Sensitivity adjustment Step 5 Detection method Step 6 Measurement setting Step 2 Measurement method selection SECTION 3 䃂Title of each section 䃂Header Indicates the contents of the page 䃂Sub header 䃂Overview Describes the overview and operation flow...

Page 11: ...SC Key while pressing the SHIFT Key down on the console Example Select Setting This statement indicates to move the cursor to Setting and press the ENT Key Visual Aids Indicates information required to take full advantage of the functions and performance of the product Incorrect application methods may result in data corruption or damage to the product Read and follow all precautionary information...

Page 12: ...10 INTRODUCTION Editor s Note Z550 Operation Manual INTRODUCTION MEMO ...

Page 13: ...SECTION 1 Features 11 Z550 Operation Manual SECTION 1 Features SECTION 1 explains the features of the Controller Features of the Controller 12 Operational Flow 14 ...

Page 14: ...workpiece It makes these measurements by irradiating laser beams onto the workpiece and receiving the reflected light with the CCD inside the sensor Example Inspection of LCD seal material application RS 232C output Measurement value output Judgment output Width Cross sectional area Height Profile output Measurement value output Measurement items Analog output Terminal block output ...

Page 15: ...such as height width and cross sectional area according to the specific purpose Simultaneous measurement of up to 8 items can be performed p 70 If this is the first time you operate the Controller If you want to set up the measurement conditions as you wish by utilizing various functions Please use the conversational menu You can set up the measurement conditions with ease by simply entering the i...

Page 16: ...he measurement range Select the measurement range Set the detection method of the Set the detection method of the workpiece position as necessary workpiece position as necessary Adjust the sensitivity Adjust the sensitivity Set the measurement region Set the measurement region Screen types and display methods Screen types and display methods Set the measurement items Set the measurement items Star...

Page 17: ...ttings Set communication specification Set communication specification and input output format and input output format with external devices with external devices Communication with external devices Applied setting operations Saving settings Troubleshooting Troubleshooting Use the force zero function Use the force zero function Check the line beam Check the line beam position position Surrounding ...

Page 18: ...16 SECTION 1 Operational Flow Z550 Operation Manual SECTION 1 Features MEMO ...

Page 19: ...n Types and Display Methods 25 Image Monitor 26 Profile Monitor 28 Digital Monitor 30 Trend Monitor 31 Learning Basic Operations Conversational Menu 32 Step 1 Selecting the Sensor Installation Method 32 Step 2 Selecting the Measurement Method 34 Step 3 Setting the Measurement Region 36 Step 4 Adjusting the Sensitivity 37 Step 5 Setting Workpiece Position Detection Method 38 Step 6 Setting Measurem...

Page 20: ...ange of the sensor Place the workpiece and adjust the sensor position while monitoring the displayed image 1 Check that the basic components have been connected correctly Before connecting components or wiring power supply lines and grounding wires be sure to refer to the relevant section in Setup Manual Page 15 in Setup Manual 2 Turn the power supply to the monitor on 3 Turn the power supply to t...

Page 21: ...yellow line indicating the height of the workpiece is displayed If the profile indicating the workpiece is not displayed the workpiece is not positioned properly within the measurement range Adjust the position of the workpiece relative to the sensor 㪄㪄㪄㪄㪄㪄㪄㪄㪄㪄㪄 25 50 S 㸠 㸢 Display S ENT Adjust mm Zero s OFF Scn 0䂯 99 60ms OUT 0䂯 Run 䂯 FAR NEAR Sen0 LV PEAK LV PEAK Sen1 PASS 005 188000 25 50 S 㸠 㸢...

Page 22: ...e any effect It must be pressed in combination with another key to have any effect A function has been assigned to a key combination in each screen Up Down Left and Right keys The Up and Down keys are used to move the cursor up or down and also to set values Use the Up key to increment a value by 1 Use the Down key to decrement a value by 1 Hold down the Up or Down key to increase or decrease a va...

Page 23: ...oller Select this mode to set communication specifications with external devices Save Select this to save data in the flash memory in the Controller If new settings have been made be sure to save the data before quitting S 㸠 㸢 Display S ENT Adjust Scn 0䂯䇭Run 䂯 99 60ms Mode See the table below The current operating mode is displayed It varies depending on the item to be measured Measurement period ...

Page 24: ...cursor to the item you want to select Up Down key Moves the cursor 2 Press the ENT Key In this example the cursor will move to the submenu below Image 3 Repeat this operation to move the cursor to lower submenus Press the ESC Key once to move to the submenu immediately above Scn 0䂯 Set 䂯 Image Detect set Meas set Extra set Meas mode Output Expert menu Under Set Image Detect set Meas set Extra set ...

Page 25: ...xample move the cursor to Sampling time 2 Press the ENT Key The selections appear 3 Move the cursor using the Up Down key 4 Press the ENT Key The selection will be registered 䋺 䋺 䋺 䋺 Scn 0䂯 䇭Set 䂯 Expert menu Under Set Image Details Priority Upper Lower Gradations End Sampling time 25 1 170 䋺 䋺 䋺 䋺 Scn 0䂯 䇭Set 䂯 Priority Upper Lower Gradations Sampling time 䇭 25 1 170 Dynamic range Sampling time 䋺...

Page 26: ...nged Left Right key Moves the cursor to the left right 4 Change the value Up key Increases the value Down key Decreases the value 5 Repeat this operation to change other digits 6 Press the ENT Key The value will be set Expert menu Under Set Image Details 䋺 䋺 䋺 䋺 Scn 0䂯 䇭Set 䂯 Priority Upper Lower Gradations End Sampling time 25 1 170 䋺 䋺 䋺 䋺 Scn 0䂯 䇭Set 䂯 Priority Upper Lower Gradations Sampling t...

Page 27: ...piece is detected by checking shape It is also possible to keep track of the height information visually Two or more measurement results can be checked at the same time The Controller allows measuring up to eight items simultaneously This monitor screen is convenient when multiple measurement items have been set Chronological change of height distribution of 1024 points profile can be checked on a...

Page 28: ...checking the shape At setting It is possible to check whether the sensor is positioned within the measurement range During measurement It is possible to visually keep track of the detection status and the position of the workpiece Profile Display Line Brightness Display PASS mm 005 188000 BRIGHT DARK 15 170 TRIG Key PASS mm 005 188000 15 170 S 㸠 㸢 Display S ENT Adjust Zero s OFF Scn 0䂯 99 60ms OUT...

Page 29: ...99 60ms Run 䂯 FAR NEAR Sen0 LV PEAK LV PEAK Sen1 Output number OUT 0 to OUT 7 The output number for the currently displayed measurement result is displayed Measurement value The measurement value is displayed in green if the judgment result is PASS It is displayed in red if the judgment result is HIGH LOW or ERROR Forced zero Zero s OFF Forced zero not executed Zero s ON Forced zero executed Judgm...

Page 30: ...installation conditions of the sensor Shaded 3D Image Display and Profile Display The profile or one horizontal line in the shaded 3D image is displayed at the lower part of the screen How to change the cursor position p 155 S 㸠 㸢 Display S ENT Adjust PASS mm 005 188000 Scn 0䂯 䂯 99 60ms Sen 0䂯 Run 䂯 Thru 1div T 0 996 s V 0 1250 mm Shaded 3 D image display Trend Display Profile Display Movement ori...

Page 31: ...he waveform display are displayed If the setting is changed the display also changes Use these values as reference when displaying the waveform 1div V Measurement value mm T Second s Conversion values for X and Y axes Low High Time s Waveform display status During waveform display green is displayed While the waveform is stopped red is displayed Scn 0䂯 䂯 Run 䂯 1div T 0 996 s V 0 1250 mm PASS mm 00...

Page 32: ...HI 010 000000 LO 010 000000 3 mm HI 010 000000 LO 010 000000 Measurement value Output number Press the TRIG Key to switch the number Judgment value The judgment value for each output number will be displayed HI Judgment upper limit LO Judgment lower limit Judgment result S 㸠 㸢 Display S ENT Adjust Scn 0䂯 99 60ms Run 䂯 4 002 654132mm PASS HI 010 000000 LO 010 000000 5 004 654321mm PASS HI 010 00000...

Page 33: ... Display S ENT Adjust PASS mm 005 188000 Zero s OFF Scn 0䂯 99 60ms OUT 0䂯 Run 䂯 Thru 1div T 0 996 s V 0 1250 mm Screen Mode Thru The waveform obtained by the Sensor is displayed continuously Trig A still image of the waveform based on the trigger settings is displayed Thin lines are used to represent the measurement start and measurement end timings Output number The current output number is displ...

Page 34: ...is measured as an example Switch to the conversational menu before starting the operation How to switch between the menus p 175 Step 1 Selecting the Sensor Installation Method Set up the sensor so that it can project and receive laser beams properly so as to obtain correct measurement images First select whether the installation status of the connected sensor is regular mirror reflection or diffus...

Page 35: ...Select System The selections of the System mode appear 3 Select Environment A setting screen appears 4 Select Sensor 5 Select End The setting will be registered and the screen display returns to 3 6 Press the ESC Key The screen display returns to 2 Scn 0ٕ Runٕ Set Run Tools System Save Scn 0ٕ Systemٕ Comm Profile Environment Download Initialize Version Settings Sensor Scene Monitor 1st scene Coord...

Page 36: ...surement range in the width direction is automatically changed according to this setting Please refer to Setup Manual for the measurement range of each sensor 1 Select Set The initial screen of the conversational menu appears 2 Select Next Reference distance Measurement center Measurement range Height Measurement range Width Sensor Scn 0䂯䇭Run䂯 Set Run Tools System Save Perform settings in the foll...

Page 37: ...method Step 6 Measurement setting Step 7 Starting measurement SECTION2 Basic Operations A measurement range setting screen appears 3 Select the measurement range while monitoring the image 4 Select the setting by pressing the ENT Key The setting is registered Scn 0䂯䇭Set 䂯 0 50mm 0 42mm 0 33mm 0 25mm 0 17mm 0 08mm To measure precisely select narrow range ENT Next ESC Back Proceed to Step 3 ...

Page 38: ...be shifted determine the size of the region taking the possible range of movement into consideration as well 1 Position the workpiece 2 Press the ENT Key The screen for specifying the region appears 3 Adjust the region so to surround only the measurement target area Up Down Left Right key Moves the cursor Press these keys together with the SHIFT Key to move the cursor quickly ENT Key Selects the s...

Page 39: ...default sensitivity adjustment method set at the shipment is Multi Select Multi under normal circumstances 1 Select Multi as the sensitivity adjustment method Sensitivity adjustment method p 51 The multiple sensitivity setting screen appears 2 Check that the workpiece is positioned within the measurement range and press the ENT Key The sensitivity level is registered Scn 0䂯䇭Set 䂯 Sen0 s sensitivit...

Page 40: ...ition in the height and horizontal directions and the inclination Example Measuring the gap between two locations Low High Height Sensor Scn 0䂯 Run 䂯 Measurement target lines Scn 0䂯 Run 䂯 Scn 0䂯 Run 䂯 Accurate measurement cannot be performed The measurement target lines are automatically adjusted by the amount of shift detected and the measurement is performed Measurement target lines No position ...

Page 41: ...stment Step 5 Detection method Step 6 Measurement setting Step 7 Starting measurement SECTION2 Basic Operations Here proceed to the next step without setting the detection method See SECTION 3 for the explanation about how to set thedetection method p 56 1 Select Next Scn 0䂯䇭Set 䂯 Height 䇭䇭䇭 䂯 Slant correct Height Pos correct Next ENT Next ESC Back Proceed to Step 6 ...

Page 42: ...assigned to OUT1 Specify two measurement target lines and calculate the difference between the two measurement points i e the gap between them Height is set in OUT0 as the default setting To set an item other than Height in OUT0 delete the existing measurement item p 99 Other measurement items p 70 1 Select Settings Difference Top face Bottom face Settings will be registered Allocate measurement i...

Page 43: ...bottom face Left Right key Moves the cursor Press these keys together with the SHIFT Key to move the cursor quickly ENT Key Selects the setting ESC Key Cancels the setting The characteristic quantity setting screen appears 5 Select the measurement point for the bottom face measurement Select which position peak bottom or average within the specified region will be the measurement point The cross c...

Page 44: ...es of the measurement target line and the measurement point on the top face A confirmation message appears 7 Select Execute The setting will be registered and the screen display returns to 2 8 Press the ESC Key The mode selections appear Average Peak Bottom Reference will be registered OK Cancel Back Execute Scn 0䂯䇭Set 䂯 OUT0 Height OUT1 OUT2 OUT3 OUT4 OUT5 OUT6 OUT7 Scn 0䂯䇭Run䂯 Set Run Tools Syst...

Page 45: ...e external device connected 1 Select Run The measurements are executed continuously and the results are displayed 2 Move the cursor to OUT 0 3 Press the ENT Key The selections appear 4 Select OUT1 for which Step 2 pts is set The measurement result of OUT1 is displayed Check that measurement is being performed correctly To switch to the Profile Monitor Trend Monitor Digital Monitor or Image Monitor...

Page 46: ...pears 2 Press the key corresponding to the item you want to adjust Example Press the Up key in order to adjust sensitivity The corresponding setting screen appears S 㸠 㸢 Display S ENT Adjust PASS mm 005 188000 Zero s OFF Scn 0䂯 99 60ms OUT 0䂯 Run 䂯 FAR NEAR 15 170 Sen0 LV PEAK LV PEAK Sen1 Scn 0ٕ ޓ Run ٕ ESC TRG χ φ ψ ω ENT Display Sensitvy Extra set Output Meas set Test Key Allocation Reference T...

Page 47: ...nges in the flash memory 1 Display the screen for the Run mode 2 Move the cursor to Run and press the ENT Key A list of modes appears 3 Select Save A confirmation message appears 4 Select Execute Do not turn the power off or input a RESET signal while a message is being displayed in any save or load operation Data in the memory will be destroyed and the Controller may not operate correctly the nex...

Page 48: ...46 SECTION 2 Saving Settings and Exiting Controller Operation Z550 Operation Manual SECTION 2 Basic Operations MEMO ...

Page 49: ...Detection Method Setting the Workpiece Position Detection Method 56 Measurement Setting Setting Measurement Items 70 Setting Calibration 100 Setting Span and Offset 107 Setting the Judgment Conditions 109 Selecting Hold Conditions for Measurement Values 111 Selecting Inclination Compensation Error Handing 113 Select the Display Unit 115 Auxiliary Setting Setting Averaging Number 117 Setting Trigge...

Page 50: ...nt range is changed the data of the displayed scene is cleared Only the measurement range in the height direction is specified here The measurement range in the width direction is automatically changed according to this setting Please refer to Setup Manual for the measurement range of each sensor 1 Select Image Meas method Reference distance Measurement center Measurement range Height Measurement ...

Page 51: ...sensor to be used is selected for each scene therefore it is possible to prepare setup settings including sensor installation status for up to two sensors The selections for measurement range appear 3 Select the measurement range while monitoring the image 4 Select the setting by pressing the ENT Key The setting will be registered and the screen display returns to 1 Coordinates when converting the...

Page 52: ...nts may become inaccurate near the boundaries of the measurement region Therefore the measurement region should be specified with sufficient margin 1 Select Image Region The screen for specifying the region appears 2 Specify the upper left and lower right corners of the region Up Down Left Right key Moves the cursor Press these keys together with the SHIFT Key to move the cursor quickly ENT Key Se...

Page 53: ...ment is made This method is suitable when the brightness of the workpiece surface is constant 119 52 ms Fixed The measurement is made with the fixed level of sensitivity specified Setting range 0 to 31 This method is suitable when accurate measurements cannot be made with Auto for example for lines at which workpieces of various colors are fed alternately 99 6 ms Multi Default setting Sensitivity ...

Page 54: ...own keys while monitoring the image on the monitor screen Select the level while checking the line brightness and light reception level 120 or less Insufficient light density 255 or more Excessive light density 4 Select the setting by pressing the ENT Key The setting will be registered and the screen display returns to 1 Setting range Sensitivity Color of workpiece LV0 laser turned off LV1 LV31 Lo...

Page 55: ...piece 1 Select Image Sensitivity The selections for sensitivity adjustment appear 2 Select Multi The multiple sensitivity setting screen appears 3 Check that the workpiece is positioned within the measurement range and press the ENT Key The sensitivity level will be registered and the screen display returns to 1 After the settings have been completed fine adjustment can be made under Details p 54 ...

Page 56: ... normal circumstances After changing the settings perform a workpiece measurement to check that measurement can still be performed correctly 1 Select Image Details The setting screen for sensitivity details appears 2 Make the settings for each item Refer to the next page for more details 3 Select End The setting will be registered and the screen display returns to 1 Image Detect set Meas set Extra...

Page 57: ...s unstable The measurement time is shorter for Sampling time Sampling time Default setting Upper 0 to 31 Set to 25 by default setting The appropriate sensitivity level is automatically selected from the range from the lower limit to the upper limit Only a value in the range from 0 to 25 can be specified if Sampling time is set in Priority for Multi Lower 0 to 31 Set to 1 by default setting Gradati...

Page 58: ...sation function is used when the position of the measurement workpiece is not consistent Example Measuring the gap between two locations Changing the Detect set setting may affect the specification of Meas set Therefore make sure to set Detect set first and then Meas set Low High Height Sensor Scn 0䂯 Run 䂯 Measurement target lines Scn 0䂯 Run 䂯 Scn 0䂯 Run 䂯 Accurate measurement cannot be performed ...

Page 59: ... of a mountain shaped object If Height is selected the measurement result fluctuates depending on the inclination angle The edges may be detected with high reliability by selecting Reflectance 㪈 㪉 㪊 㪋 Compensating for Position Shift in the Height and Potion Directions Inclination Compensation In the case of Height Compensating for Shift in the Position Direction Using Reflectance In the case of Se...

Page 60: ...e ENT Key The selections for edge detection method appear 3 Choose the detection method and select the choice by pressing the ENT Key Scn 0䂯䇭 Set 䂯 Image Detect set Meas set Extra set Meas mode Output Scn 0䂯䇭 Set 䂯 Image Detect set Meas set Extra set Meas mode Output Height 䇭䇭㩷㩷㩷㩷㩷㩷㩷㩷 䂯 Slant correct Height Pos correct Scn 0䂯䇭 Set 䂯 Image Detect set Meas set Extra set Meas mode Output Height 䇭䇭㩷㩷㩷...

Page 61: ... message appears if the settings of measurement items and the registration of reference height position correction or reflectance correction have already been performed 4 Press the ENT Key The setting will be registered and the screen display returns to 2 The detect method has been updated Check the settings for measurement items and correct data OK ...

Page 62: ...the settings This function can only be used when Height is selected as the detection method Height direction Position direction Sensor Sensor Region used for measuring the amount of position shift Set this level at a location where the target edge can be detected even if the workpiece moves horizontally Position registered as the reference Height registered as the reference Set this region at a lo...

Page 63: ...end lines Left Right key Moves the cursor Press these keys together with the SHIFT Key to move the cursor quickly ENT Key Selects the setting ESC Key Cancels the setting The characteristic quantity setting screen appears 4 Select the characteristic quantity to be used as the reference point Select which position peak bottom or average within the specified area will be measured The cross cursor ind...

Page 64: ...e keys together with the SHIFT Key to move the cursor quickly ENT Key Selects the setting The selections appear 6 Select the edge search direction Points that can be detected at the specified edge level are displayed as measurement point candidates 7 Repeat pressing the Left or Right key until the cross cursor appears at the point to be used as the reference position 8 Select the setting by pressi...

Page 65: ...elected and the screen display returns to 1 10 Move the cursor to None and press the ENT Key The selections appear 11 Select the compensation direction The setting will be registered and the screen display returns to 1 Scn 0䂯䇭 Set 䂯 Image Detect set Meas set Extra set Meas mode Output Height 䇭䇭㩷㩷䂯 Slant correct Height PosNone 䇭䂯 Reference None Height Position Height Pos ...

Page 66: ...nce is selected as the detection method The edge detection level specified here is also used for edge related measurement items such as edge position and width 1 Select Detect set Reflectance correct Edge level Position direction Sensor Edge detection level Reflectance display Position registered as the reference Set this edge detection level at a location where the target edge can be detected eve...

Page 67: ...The minimum reflectance value LV TH The reflectance corresponding to the edge detection level 3 Press the ENT Key to select the setting The setting will be registered and the screen display returns to 1 4 Select Reference A profile graph appears 5 Check that the workpiece is positioned correctly and press the ENT Key Points that can be detected at the edge level specified in 2 are displayed as can...

Page 68: ...on will be selected and the screen display returns to 1 10 Move the cursor to Inactive and press the ENT Key The selections appear 11 Select Active The setting will be registered and the screen display returns to 1 Reference will be registered OK Execute Cancel Back The reference position has been updated Check the settings for measurement items OK Scn 0䂯䇭Set 䂯 Image Detect set Meas set Extra set ...

Page 69: ...sition before you start settings 1 Select Detect set Slant correct Reference Sensor Set the regions in such a way as to enclose the ranges where the heights of two points can be measured Registered as the reference Height 1 x1 z1 Height 2 x2 z2 The profile data is calculated so that the two positions become horizontal compensating for the inclination Regions for measuring the amount of position sh...

Page 70: ...s the setting ESC Key Cancels the setting The characteristic quantity setting screen appear 4 Select the characteristic quantity to be used as the reference point Select which position peak bottom or average within the specified area will be measured The cross cursor indicating the measurement point moves according to the selection therefore select the position while monitoring the image The scree...

Page 71: ...stration will be selected and the screen display returns to 1 7 Move the cursor to None and press the ENT Key The selections appear 8 Select Active The setting will be registered and the screen display returns to 1 Reference will be registered OK Execute Cancel Back Scn 0䂯䇭 Set 䂯 Image Detect set Meas set Extra set Meas mode Output Height 䇭䇭䂯 Slant correct Height Pos None 䇭䂯 Reference Inactive Act...

Page 72: ... 72 Step 2 pts Two target measurement lines are specified After taking the measurement point on the 1st line as the reference the distance from the measurement point on the 2nd line is measured p 74 Step 3 pts Three target measurement lines are specified After taking the average of the measurement points on two of the lines specified above the difference from the measurement point on the 3rd line ...

Page 73: ...measured p 89 Arithmetic average roughness The roughness of the specified region is measured The average of absolute differences from the reference line is calculated p 92 Maximum roughness The roughness of the specified region is measured The difference between the maximum deviations in both directions from the reference line is calculated p 92 Define The measurement items are set by a user defin...

Page 74: ...e following conditions will be used as an example for describing the setting procedures 1 Select Meas set A list of outputs appears 2 Select an output for which Height is set In this example select OUT1 Measurement target lines Height Scn 0䂯䇭 Set 䂯 Image Detect set Meas set Extra set Meas mode Output Scn 0䂯䇭Set 䂯 OUT0 Height OUT1 OUT2 OUT3 OUT4 OUT5 OUT6 OUT7 ...

Page 75: ...ing The characteristic quantity setting screen appears 5 Select the measurement point Select which position peak bottom or average within the specified region will be measured The cross cursor indicating the measurement point moves according to the selection therefore select the position while monitoring the image A confirmation message appears 6 Select Execute The setting will be registered and t...

Page 76: ...Menu Step 2 pts Level differences grooves and other items of workpieces can be measured Specify two measurement target regions The difference between the measurement points in the regions i e the gap between them is calculated Refer to the next page for the operation method p 40 Difference Top face Bottom face ...

Page 77: ... e the gap between the average of the bottom face measurements and the top face measurement is calculated The following conditions will be used as an example for describing the setting procedures 1 Select Meas set A list of outputs appears 2 Select an output for which Step 3 pts is set In this example select OUT1 Top face Bottom face Bottom face Difference Scn 0䂯䇭 Set 䂯 Image Detect set Meas set E...

Page 78: ...with the SHIFT Key to move the cursor quickly ENT Key Selects the setting ESC Key Cancels the setting The characteristic quantity setting screen appears 5 Select the measurement point for bottom face region 1 Select which position peak bottom or average within the specified region will be measured The cross cursor indicating the measurement point moves according to the selection therefore select t...

Page 79: ...ment lines and measurement point for bottom face region 2 The measurement line setting screen for the top face region appears 7 Repeat the operations in 4 to 5 to set the characteristic quantity for measurement lines and measurement point for the top face region A confirmation message appears 8 Select Execute The setting will be registered and the screen display returns to 2 Average Peak Bottom Av...

Page 80: ... be used as an example for describing the setting procedures 1 Select Meas set A list of outputs appears 2 Select an output for which Edge position is set In this example select OUT1 The selections for measurement item appear 3 Select Edge position Edge level Edge position Scn 0䂯䇭 Set 䂯 Image Detect set Meas set Extra set Meas mode Output Scn 0䂯䇭Set 䂯 OUT0 Height OUT1 OUT2 OUT3 OUT4 OUT5 OUT6 OUT7...

Page 81: ... Edge level p 64 4 Specify the start and end lines Left Right key Moves the cursor Press these keys together with the SHIFT Key to move the cursor quickly ENT Key Selects the setting ESC Key Cancels the setting The edge level setting screen appears 5 Align the dotted line with the edge to be detected Up Down key Moves the cursor Press these keys together with the SHIFT Key to move the cursor quick...

Page 82: ... some cases the cursor will not be displayed on the intersection point of the edge level and the edge position However selection of an arbitrary cursor will give the same measurement result the intersection point becomes the measurement point as long as the selected cursor exists near the intersection point 9 Press the ENT Key to select the setting A confirmation message appears 10 Select Execute ...

Page 83: ...ng the setting procedures 1 Select Meas set A list of outputs appears 2 Select an output for which Width is set In this example select OUT1 The selections for measurement item appear 3 Select Width Edge level Width Scn 0䂯䇭 Set 䂯 Image Detect set Meas set Extra set Meas mode Output Scn 0䂯䇭Set 䂯 OUT0 Height OUT1 OUT2 OUT3 OUT4 OUT5 OUT6 OUT7 Measrmnt item Height Step 2 pts Step 3 pts Edge position W...

Page 84: ...n the dotted line with the edge to be detected Up Down key Moves the cursor Press these keys together with the SHIFT Key to move the cursor quickly 6 Press the ENT Key to select the setting The selections appear 7 Select the edge search direction Points that can be detected at the specified edge level are displayed as measurement point candidates 8 Keep pressing the Left or Right key until the cro...

Page 85: ...level setting screen for the second point appears 10 Repeat the operations from 4 to 9 to specify the edge level and measurement point for the second point A confirmation message appears 11 Select Execute The setting will be registered and the screen display returns to 2 Reference will be registered OK Cancel Back Execute ...

Page 86: ... A list of outputs appears 2 Select an output for which Edge center is set In this example select OUT1 The selections for measurement item appear 3 Select Edge center The operations from here are the same as 4 to11 for the width measurement p 81 Edge level Edge center Scn 0䂯䇭 Set 䂯 Image Detect set Meas set Extra set Meas mode Output Scn 0䂯䇭Set 䂯 OUT0 Height OUT1 OUT2 OUT3 OUT4 OUT5 OUT6 OUT7 Meas...

Page 87: ... can be measured The following conditions will be used as an example for describing the setting procedures 1 Select Meas set A list of outputs appears 2 Select an output for which Peak bottom is set In this example select OUT1 Peak Position Scn 0䂯䇭 Set 䂯 Image Detect set Meas set Extra set Meas mode Output Scn 0䂯䇭Set 䂯 OUT0 Height OUT1 OUT2 OUT3 OUT4 OUT5 OUT6 OUT7 ...

Page 88: ... The characteristic quantity setting screen appears 5 Select the measurement point Select which position peak or bottom within the specified region will be measured The cross cursor indicating the measurement point moves according to the selection therefore select the position while monitoring the image In this example select Peak A confirmation message appears 6 Select Execute The setting will be...

Page 89: ... setting procedures 1 Select Meas set A list of outputs appears 2 Select an output for which Angle is set In this example select OUT1 The selections for measurement item appear 3 Select Angle Second point First point Scn 0䂯䇭 Set 䂯 Image Detect set Meas set Extra set Meas mode Output Scn 0䂯䇭Set 䂯 OUT0 Height OUT1 OUT2 OUT3 OUT4 OUT5 OUT6 OUT7 Measrmnt item Height Step 2 pts Step 3 pts Edge position...

Page 90: ...first point Select which position peak bottom or average within the specified region will be measured The cross cursor indicating the measurement point moves according to the selection therefore select the position while monitoring the image The measurement line setting screen for the second point appears 6 Specify the characteristic quantity for the measurement line and measurement point for the ...

Page 91: ...tegrating the distances between each of the measurement points and the bottom face The following conditions will be used as an example for describing the setting procedures 1 Select Meas set A list of outputs appears 2 Select an output for which Area is set In this example select OUT1 Bottom face 1 Bottom face 2 Cross sectional area Scn 0䂯䇭 Set 䂯 Image Detect set Meas set Extra set Meas mode Outpu...

Page 92: ...etting screen appears 5 Select the characteristic quantity for the first point Select which position peak bottom or average within the specified region will be measured The cross cursor indicating the measurement point moves according to the selection therefore select the position while monitoring the image The measurement line setting screen for the second point appears 6 Specify the characterist...

Page 93: ...ross sectional area appears 7 Specify the start and end lines Left Right key Moves the cursor Press these keys together with the SHIFT Key to move the cursor quickly ENT Key Selects the setting A confirmation message appears 8 Select Execute The setting will be registered and the screen display returns to 2 Reference will be registered OK Cancel Back Execute ...

Page 94: ...hness and Roughness Ry in order to obtain the maximum roughness value Operations other than the above are common for both selections The following conditions will be used as an example for describing the setting procedures 1 Select Meas set A list of outputs appears 2 Select an output for which Roughness Ry is set In this example select OUT1 Reference line 1 Reference line 2 Maximum roughness Scn ...

Page 95: ...y setting screen appears 5 Select the characteristic quality for the first point Select which position peak bottom or average within the specified region will be measured The cross cursor indicating the measurement point moves according to the selection therefore select the position while monitoring the image The measurement line setting screen for reference line 2 appears 6 Specify the characteri...

Page 96: ...ppears 7 Specify the start and end lines Left Right key Moves the cursor Press these keys together with the SHIFT Key to move the cursor quickly ENT Key Selects the setting ESC Key Cancels the setting A confirmation message appears 8 Select Execute The setting will be registered and the screen display returns to 2 Reference will be registered OK Cancel Back Execute ...

Page 97: ...et cannot be selected 2 Arithmetic operators Operator Calculation Addition Subtraction Multiplication Real number division OUT3 Output number for which equation is set List of Items Select the items displayed here for which equation is set Equation OUT1䋪OUT2 OUT0 OUT1 OUT2 OUT3 OUT4 OUT5 OUT6 OUT7 䋫 䊷 䋪 䋯 䋬 ABS MAX MIN AVE Cons 㸢 㸠 DEL BS Set OUT0 OUT1 OUT2 OUT3 OUT4 OUT5 OUT6 OUT7 ABS MAX MIN AVE...

Page 98: ...olute value is calculated ABS argument MAX The largest value among the arguments is returned MAX Argument 1 Argument 2 Argument 3 MIN The smallest value among the arguments is returned MIN Argument 1 Argument 2 Argument 3 AVE The average value of the arguments is calculated AVE Argument 1 Argument 2 Argument 3 Scn 0䂯䇭 Set 䂯 Image Detect set Meas set Extra set Meas mode Output Scn 0䂯䇭Set 䂯 OUT0 Hei...

Page 99: ...esired items from the list of items and enter the equation 5 Select Set when the equation has been entered A confirmation message appears 6 Select Execute The setting will be registered and the screen display returns to 2 OUT1 OUT0 OUT1 OUT2 OUT3 OUT4 OUT5 OUT6 OUT7 䋫 䊷 䋪 䋯 䋬 ABS MAX MIN AVE Cons 㸢 㸠 DEL BS Set Reference will be registered OK Cancel Back Execute ...

Page 100: ...iously set measurement items in order to assign other measurement items 1 Move the cursor to the output whose item is to be changed and press the ENT Key The selections appear 2 Select Change The setting screen for measurement range appears The remaining procedures are the same as those for measurement item setting Scn 0䂯䇭Set䂯 OUT0 Height OUT1 Step 2 pts OUT2 OUT3 OUT4 OUT5 OUT6 OUT7 Scn 0䂯䇭Set䂯 C...

Page 101: ...ene p 158 1 Move the cursor to the output whose measurement item is to be cleared and press the ENT Key The selections appear 2 Select Delete A confirmation message appears 3 Select Execute The measurement item for the selected output is cleared and the screen display will return to 1 Scn 0䂯䇭Set䂯 OUT0 Height OUT1 Step 2 pts OUT2 OUT3 OUT4 OUT5 OUT6 OUT7 Scn 0䂯䇭set䂯 Change Calibrate Output Delete D...

Page 102: ... Height and Position To compensate for the error perform the measurement twice Applicable measurement items Height Edge position Edge center and Peak bottom Example 1 In case of Height Height of the workpiece 10 mm Compensate for a measured value of 9 95 mm such that it is registered as 10 mm Measurement item Compensation Calibration setting method Height Edge position Edge center Peak bottom Comp...

Page 103: ... Meas set The selections for output appears 2 Move the cursor to the output for which the calibration is to be set and press the ENT Key Calibrate to 5 mm 5mm 5mm 4 95mm Measurement of point 1 Measurement of point 2 Move the workpiece by 5 mm for the measurement Input the position of point 2 5mm Input the position of point 1 0mm Compensate for this error Measurement value Workpiece Movement Measur...

Page 104: ...he ENT Key without a workpiece in position The screen for selecting the position of point 1 will be appears 6 Set the value to 0 00000 and press the ENT Key The measurement screen for point 2 appears 7 Position the workpiece correctly and press the ENT Key The screen for selecting the position of point 2 appears 8 Set the value to 5 00000 and press the ENT Key Scn 0䂯䇭Set䂯 Change Calibrate Output D...

Page 105: ...measurement once Applicable measurement items Step 2 pts Step 3 pts Width Example In case of Step 2 pts Difference 5 mm Compensate for a measurement value of 4 95 mm such that it is registered as 5 mm System will be calibrated Execute Cancel 5mm 5mm 4 95mm Measure with the workpiece in position To compensate for this error perform the measurement once 0mm Compensate for this error Measurement valu...

Page 106: ...ut appear 2 Move the cursor to Step 2 pts and press the ENT Key The selections appear 3 Select Calibrate The selections appear 4 Select Set Scn 0䂯䇭 Set 䂯 Image Detect set Meas set Extra set Meas mode Output Scn 0䂯䇭 Set䂯 OUT0 Height OUT1 Step 2 pts OUT2 Edge position OUT3 Define OUT4 OUT5 OUT6 OUT7 Scn 0䂯䇭Set䂯 Change Calibrate Output Delete Set Clear ...

Page 107: ...ion of point 1 appears 6 Set the value to 0 00000 and press the ENT Key The screen for selecting the position of point 2 appears 7 Set the value to 5 00000 and press the ENT Key A confirmation message appears 8 Select Execute The setting will be registered and the screen display returns to 3 ੌ㪄㪇㪇㪉㪊㪅㪐㪏㪊㫄㫄 㐿ᆎ㪂㪇㪇㪉㪊㪅㪌㪐㪎㫄㫄㩷㩷 㪇㪇㪇㪇㪇㪅㪇㪇㪇㪇㪇 ੌ㪄㪇㪇㪉㪊㪅㪐㪏㪊㫄㫄 㐿ᆎ㪂㪇㪇㪉㪊㪅㪌㪐㪎㫄㫄㩷㩷 ੌ㪄㪇㪇㪉㪊㪅㪐㪏㪊㫄㫄 㐿ᆎ㪂㪇㪇㪉㪊㪅㪌㪐㪎㫄㫄㩷㩷 㪇㪇㪇㪇㪌㪅㪇㪇...

Page 108: ...ng is to be cleared and press the ENT Key The selections appear 2 Select Calibrate The selections appear 3 Select Clear A confirmation message appears 4 Select Clear The setting will be cleared and the screen display returns to 2 Scn 0䂯䇭Set䂯 OUT0 Height OUT1 Step 2 pts OUT2 OUT3 OUT4 OUT5 OUT6 OUT7 Scn 0䂯䇭Set䂯 Change Calibrate Output Delete Set Clear Clear calibration data Execute䇭Cancel䇭 ...

Page 109: ...ing the calibration make modification as necessary 1 Select Meas set Item Meaning Span Gain attribute of the sensor characteristic 0 20000 to 4 0000 set to 1 000000 by default setting Offset It is possible to add subtract a fixed value to from the measurement value 999 999999 to 999 999999 set to 0 000000 by default setting Measurement value 䋨mm䋩 Displacement of workpiece 0 2 4 0 Measurement value...

Page 110: ...ct Output The setting screen for output conditions appears 4 Specify Span and Offset 5 Select End The setting will be registered and the screen display returns to 3 Scn 0䂯䇭Set䂯 OUT0 Height OUT1 Step 2 pts OUT2 OUT3 OUT4 OUT5 OUT6 OUT7 Scn 0䂯䇭Set䂯 Change Calibrate Output Delete Scn 0䂯䇭Set䂯 Upper mm Lower mm Hold Zero mm Span Offset mm Slant error Unit 䋺 䋺 䋺 䋺 䋺 䋺 䋺 䋺 End 0 125000 0 125000 None䇭 䇭 0...

Page 111: ...cases 1 Select Meas set The selections for output appear 2 Move the cursor to the output to be set and press the ENT Key The selections appear 3 Select Output Output Meaning PASS Judgment lower limit Measurement value Judgment upper limit HIGH Measurement value Judgment upper limit LOW Measurement value Judgment lower limit Scn 0䂯䇭 Set 䂯 Image Detect set Meas set Extra set Meas mode Output Scn 0䂯䇭...

Page 112: ...nu The setting screen for output conditions appears 4 Specify Upper and Lower 5 Select End The setting will be registered and the screen display returns to 3 Scn 0䂯䇭Set䂯 Upper mm Lower mm Hold Zero mm Span Offset mm Slant error Unit 䋺 䋺 䋺 䋺 䋺 䋺 䋺 䋺 End 0 125000 0 125000 None䇭 䇭 0 000000 1 000000 0 000000 Inactive䇭 mm䇭 ...

Page 113: ...tion p 126 It is possible to hold the following five types of values The item to be held can be specified for each output OUT0 to 7 Hold the peak value Start of measurement Measurement value End of measurement Output the held value at the end of the measurement Accumulate and output the held value Accumulate and output the held value Accumulate and output the held value Measurement Measurement val...

Page 114: ...ions appears 4 Select the type of value from the selections for Hold 5 Select End The setting will be registered and the screen display returns to 3 Scn 0䂯䇭 Set 䂯 Image Detect set Meas set Extra set Meas mode Output Scn 0䂯䇭Set䂯 OUT0 Height OUT1 Step 2 pts OUT2 OUT3 OUT4 OUT5 OUT6 OUT7 Scn 0䂯䇭Set䂯 Change Calibrate Output Delete Scn 0䂯䇭Set䂯 Upper mm Lower mm Hold Zero mm Span Offset mm Slant error U...

Page 115: ...lections for output appear 2 Move the cursor to the output to be set and press the ENT Key Option Measurement of reference height Measurement processing Judgment Inactive OK The measurement is made after inclination compensation Judgment and output are performed according to the measurement result NG The measurement is made without performing inclination compensation Judgment and output are perfor...

Page 116: ...put The setting screen for output conditions appears 4 Select Slant error 5 Select End The setting will be registered and the screen display returns to 3 Scn 0䂯䇭Set䂯 Change Calibrate Output Delete Scn 0䂯䇭Set䂯 Upper mm Lower mm Hold Zero mm Span Offset mm Slant error Unit 䋺 䋺 䋺 䋺 䋺 䋺 䋺 䋺 End 0 125000 0 125000 None䇭 䇭 0 000000 1 000000 0 000000 Inactive䇭 mm䇭 Inactive Active ...

Page 117: ...t mm is set at shipment The unit can be specified for each output 1 Select Meas set The selections for output appear 2 Move the cursor to the output to be set and press the ENT Key PASS mm 005 188000 Zero s OFF Scn 0䂯 99 60ms OUT 0䂯 Run䂯 FAR NEAR 15 170 Sen0 LV PEAK LV PEAK Sen1 The unit is displayed here Scn 0䂯䇭 Set 䂯 Image Detect set Meas set Extra set Meas mode Output Scn 0䂯䇭Set䂯 OUT0 Height OU...

Page 118: ...or output conditionsappears 4 Select the unit from the selections for Unit 5 Select End The setting will be registered and the screen display returns to 3 Scn 0䂯䇭Set䂯 Change Calibrate Output Delete Scn 0䂯䇭Set䂯 Upper mm Lower mm Hold Zero mm Span Offset mm Slant error Unit 䋺 䋺 䋺 䋺 䋺 䋺 䋺 䋺 㪜㫅㪻 0 125000 0 125000 None䇭 䇭 0 000000 1 000000 0 000000 䈭䈚䇭 mm䇭 mm mm2 um um2 None ...

Page 119: ... set to avg The setting screen for averaging number appears 2 Select the averaging number 3 Select End The setting will be registered and the screen display returns to 1 Selections for averaging number 1 2 4 8 16 32 64 128 or 256 measurements set to eight measurements at shipment Measurement response time Averaging number Measurement response time Resolution 1 256 Short Long Low High Scn 0䂯䇭Set䂯 I...

Page 120: ...e following four points Select the measurement value hold condition for each output p 111 Start of measurement Trigger ON End of measurement Hold measurement period Trigger OFF Output held values Trigger Value Terminal block output Analog output OFF ON Direction of workpiece movement Output the held characteristic quantity at this timing The characteristic quantities of the measurement values outp...

Page 121: ...rigger off timing is independent of the trigger level Specify the times at which to turn the trigger on and off in advance Down The trigger is assumed to have been turned on when the measurement value goes below the trigger level The trigger off timing is independent of the trigger level Specify the times at which to turn the trigger on and off in advance Trigger ON OFF ON TRG terminal Trigger OFF...

Page 122: ... display will start from this position when the trigger is turned on Only when the display mode is Trig Left Right key Moves the cursor Press these keys together with the SHIFT Key to move the cursor quickly 4 Select the setting by pressing the ENT Key Scn 0䂯䇭Set䂯 Image Detect set Meas set Extra set Meas mo Output to avg Hold Logging Details Free Hold External Hold Self Logging Trigger ON position...

Page 123: ... target area are different specify the time difference The measurement start position can be the same as the trigger on position if it is not necessary to specify the time difference The setting screen for the measurement end position appears 7 Specify the measurement end position Specify the end position when there is a time difference between the completion of the measurement and the trigger off...

Page 124: ...ns to 1 Setting Hold Self A waveform of the workpiece shape can be obtained using the Trend Monitor screen and the self trigger level can be set based on this waveform 1 Display the Trend Monitor screen 2 Display the output to be used as the self trigger 3 Let the workpiece go through and press the TRIG Key at the instant the waveform representing the workpiece appears The settings will be changed...

Page 125: ...appears 5 Select Extra set Hold Logging The selections apepar 6 Select Hold Self The trigger setting screen appears 7 Select the output OUT0 to OUT7 to be used as the trigger and the direction 8 Select Execute Scn 0䂯 Run䂯 The mark changes Scn 0䂯䇭Set䂯 Image Detect set Meas set Extra set Meas mo Output to avg Hold Logging Details Free Hold External Hold Self Logging Trigger 䋺 Direction䋺 OUT0䂯 Up䂯 Ex...

Page 126: ...quickly 11 Select the setting by pressing the ENT Key The screen for specifying the trigger off position appears 12 Specify the trigger off position The trigger off timing is independent of the trigger level specify the times at which to turn the trigger on and off in this screen The time at the cursor position the time after the trigger is turned on appears in the lower part of the screen Specify...

Page 127: ...ears 14 Specify the measurement end position Specify the end position when there is a time difference between the completion of the measurement and the trigger off timing The measurement end position can be the same as the trigger off position if it is not necessary to specify the time difference A confirmation message appears 15 Select Execute The setting will be registered and the screen display...

Page 128: ... possible to accumulate data for a day because 100 ms 300 3000 90000 sec 1500 min 25h Example 2 Holding the peak value for every three measurements and accumulating and outputting the data used in combination with the hold function Select the measurement value hold condition for each output p 111 It is not allowed to use the hold output and logging output together Monitor type Data generated in on...

Page 129: ...data is displayed 5 Select Execute The setting will be registered and the screen display returns to 1 The logging data accumulated so far is cleared Scn 0䂯䇭Set䂯 Image Detect set Meas set Extra set Meas mo Output to avg Hold Logging Details Free Hold External Hold Self Logging Option Meaning Over write Overwrite data starting with the oldest data Write once The data accumulation is stopped when the...

Page 130: ...a set The selections are displayed 2 Select Details The setting screen for details appears 3 Make the settings for each item Refer to the next page for the details 4 Select End The setting will be registered and the screen display returns to 2 Scn 0䂯䇭Set䂯 Image Detect set Meas set Extra set Meas mode Output to avg Hold Logging Details Scn 0䂯䇭Set䂯 Filter Noise Interpolate meth Interpolate pixel Edg...

Page 131: ...els will be regarded as noise and excluded from the measurement Option Meaning None Set at shipment No smoothing Average 2 4 8 16 32 64 Smoothing is performed using the average value of adjacent data The values to the left indicate the number of data to be averaged over Median 1 2 3 Smoothing is performed using the median value of adjacent data It is effective in removing spikes of noise Option 0 ...

Page 132: ... obtained Option Meaning None A measurement error signal is output for each area where measurements could not be obtained Linear Set at shipment Data for areas where measurements could not be obtained is calculated by linear interpolation between the data to the left and right Up to 128 missing data values can be obtained by this method Previous Data for areas where measurements could not be obtai...

Page 133: ...to always interpolate between the existing data regardless of the number of pixels Example When the number of interpolated pixels is 2 Edge Detection Hysteresis Width Edge Width The hysteresis width of edge detection can be set Change the edge width when the edge detection is unstable Example When the level is 80 0000 mm and the level hysteresis width is 0 0500 mm Option 1 pixel 2 pixels 4 pixels ...

Page 134: ...n the workpiece it is possible to set the Controller to hold the previous data The numbers of the output terminals vary depending on the outputs Setting range 1 pixel default setting 5 pixels 9 pixels 13 pixels 17 pixels 21 pixels 25 pixels 29 pixels Peak point Option Meaning Clamp Default setting An error is displayed and is output Hold The value measured immediately before measurement became imp...

Page 135: ...ment upper lower limit if the HIGH PASS LOW judgment does not stabilize near the boundary Example When HI is 100 000000 mm LO is 80 000000 mm and the judgment value hysteresis value is 0 050000 mm Setting range 0 000000 to 999 999999 HI 䋨100 00000䋩 LO 䋨80 00000䋩 HIGH OFF ON OFF ON OFF ON LOW PASS Hysteresis䋨0 050000䋩 Hysteresis䋨0 050000 Reset at 80 050000mm Output Reset at 99 950000mm ...

Page 136: ...play returns to 1 Option Meaning Continuous The measurement is made at a fixed interval when the Controller is placed in the Measurement mode and then the result is output Trg External One measurement is performed each time the TRG signal input of the terminal block is turned on and then the result is output The upper limit of the communication baud rate for profile data output is 115 200 bps Trg ...

Page 137: ... additional functions provided to make use of the Controller in a more convenient manner Using the Force Zero Function 136 Changing the Screen Display 141 Switching Scenes 156 Testing Measurement Performance Test 159 Checking the Line Beam Position Surrounding Image 164 Backing up Setting Data 166 ...

Page 138: ...xample 1 The height of the workpiece is set as the reference value and the tolerance is output as the measurement value Also an offset value can be added to the 0 reference value Example 2 When 10 is set as the offset How to Set the Offset Value 1 Enter the Set mode and select Meas set 0 2 Judgment upper limit Reference value 2 Judgment lower limit 10 12 Judgment upper limit 8 Judgment lower limit...

Page 139: ...setting screen for output conditions appears 4 Specify the offset value in Zero 5 Select End The setting will be registered and the screen display returns to 3 Scn 0䂯䇭Set䂯 OUT0 Height OUT1 Step 2 pts OUT2 OUT3 OUT4 OUT5 OUT6 OUT7 Scn 0䂯䇭Set䂯 Change Calibrate Output Delete Scn 0䂯䇭Set䂯 Upper mm Lower mm Hold Zero mm Span Offset mm Slant error Unit 䋺 䋺 䋺 䋺 䋺 䋺 䋺 䋺 End 0 125000 0 125000 䈭䈚䇭 10 000000 ...

Page 140: ...e the force zero function from the console when the Image Monitor screen is displayed It is also possible to specify to use the force zero function from the terminal block or via RS 232C Terminal Block p 190 RS 232C p 208 Executing Force Zero Only for the Output Displayed 1 Position the reference workpiece 2 Move the cursor to Zero s OFF and press the ENT Key A confirmation message appears 3 Selec...

Page 141: ... OFF and press the ENT Key A confirmation message appears 3 Select All 0 A confirmation message appears 4 Select Yes The measurement is performed and the measurement result is registered as the reference value zero The screen display changes from Zero s OFF to Zero s ON The measurement value displayed also changes to tolerance relative to the reference value Zero s ON Scn 0䂯 Run䂯 FAR NEAR OUT 0 PA...

Page 142: ... the force zero function 1 Move the cursor to Zero s ON and press the ENT Key A confirmation message appears 2 Select Clear 0 The force zero function is canceled The screen display changes from Zero s ON to Zero s OFF Zero s ON Scn 0䂯 Run䂯 FAR NEAR OUT 0 PASS mm 000 000000 The zero point will be force set Yes 䇭 Clear 0 All 0 Zero s OFF Scn 0䂯 Run䂯 FAR NEAR OUT 0 PASS mm 005 188000 ...

Page 143: ...nction can be used for enlarging the profile and line brightness displays The position of the line brightness cursor can also be changed Enlarging Display The profile and line brightness in the specified range are enlarged and displayed 1 Display the Image Monitor screen and press the SHIFT and ENT Keys Specified The line brightness graph for the specified range is enlarged in Run Mode Scn 0䂯 Set䂯...

Page 144: ...ge Up Down key Moves the cursor Press these keys together with the SHIFT Key to move the cursor quickly ENT Key Selects the setting A confirmation message appears 5 Select Execute The setting will be registered and the screen display returns to 3 6 Press the ESC Key The Image Monitor screen is displayed with the specified range enlarged ESC TRG 㸡 㸠 㸢 㸣 ENT Display Sensitvy Extra set Output Meas se...

Page 145: ...reen and enter the View mode p 141 The selections appear 2 Select Reset A confirmation message appears 3 Select Execute The setting will be registered and the screen display returns to 2 4 Press the ESC Key The Image Monitor screen appears The enlaged display has been reset to the standard size Scn 0䂯䇭View䂯 Enlarge Reset Move cursr Display will be initialized OK Execute Cancel ...

Page 146: ...ion Left Right key Moves the cursor Press these keys together with the SHIFT Key to move the cursor quickly 4 Press the ENT Key The setting will be registered and the screen display returns to 2 5 Press the ESC Key The Image Monitor screen is displayed showing the line brightness at the changed cursor position Cursor Red Line Brightness Yellow 9 96ms Run䂯 FAR NEAR 15 170 Sen0 LV PEAK LV PEAK Sen1 ...

Page 147: ...ay Judgment value display Default setting Judgment upper lower limit SFT 㸠 㸢 Display SFT ENT Adjust Scn 0䂯 Run䂯 0 0002 65432mm PASS HI 0005 00000 LO 0000 00000 1 0004 65432mm PASS HI 0010 00000 LO 0005 00000 2 mm ERROR HI 0010 00000 LO 0005 00000 3 mm HI 0010 00000 LO 0010 00000 Measurement item name SFT 㸠 㸢 Display SFT ENT Adjust Scn 0䂯 Run䂯 0 0002 65432mm PASS Height 1 0004 65432mm PASS Step 2 p...

Page 148: ...unctions The items appear 3 Press the ENT Key The selections appear 4 Select an item to be displayed The setting will be registered and the screen display returns to 3 5 Press the ESC Key The focus returns to the Digital Monitor screen Scn 0䂯䇭View䂯 Judgement䇭䂯 Judgement Measurement ...

Page 149: ...as for the Profile Monitor screen The setting that has been specified the last will become effective 1 Display the Trend Monitor screen and press the SHIFT and ENT Keys The adjustment menu appears 2 Press the TRIG Key Option Meaning Thru default setting Displays the waveform obtained from the sensor continuously Trig Displays a still waveform corresponding to the trigger timing Updated when the tr...

Page 150: ...unctions The selections appear 3 Move the cursor to Thru and press the ENT Key The selections appear 4 Select a view mode The setting will be registered and the screen display returns to 2 5 Press the ESC Key The Trend Monitor screen appears Scn 0䂯䇭View䂯 Thru䂯 Vert Time Thru Tr i g ...

Page 151: ...xis Display time V axis T T axis V axis Axis Setting range Meaning Vert 999 999999 to 999 999999 The maximum and minimum values displayed on the screen are set Different values can be set for each output The default setting at the shipment varies depending on the model of the sensor connected Time 1 50 to 30 00 s Set to 5 00 s by default setting The display time range for the waveform displayed on...

Page 152: ...ions appear 2 Select either Vert or Time The setting screen appears 3 Make the settings for each item 4 Select End The setting will be registered and the screen display returns to 2 5 Press the ESC Key The Trend Monitor screen appears Scn 0䂯䇭View䂯 Thru䂯 Vert Time End Maxmun䋺 20 000000 mm Minimun䋺 20 000000 mm When selecting Vert End Time䋺 5 00 s When selecting Time ...

Page 153: ...le This setting is the same as for the Trend Monitor screen The setting that has been specified the last will become effective 1 Display the Profile Monitor screen and press the SHIFT and ENT Keys The adjustment menu appears 2 Press the TRIG Key Option Meaning Thru default setting The shaded 3D image acquired from the sensor appears continuously Trig The shaded 3D image appears in response to the ...

Page 154: ...ns The selections appear 3 Move the cursor to Thru and press the ENT Key The selections appear 4 Select a view mode The setting will be registered and the screen display returns to 3 5 Press the ESC Key The Profile Monitor screen appears Scn 0䂯䇭View䂯 Thru䂯 Vert Time Move cursr Thru Tr i g ...

Page 155: ...isplayed here T axis V axis V axis 3D direction V axis T axis T T axis V axis Axis Setting range Meaning Vert 999 999999 to 999 999999 The maximum and minimum values displayed on the screen are set The default setting at the shipment varies depending on the model of the sensor connected Time 1 50 to 30 00 s Set to 5 00 s by default setting The display time range for the waveform displayed on the s...

Page 156: ...ppear 2 Select either Vert or Time The setting screen appears 3 Make the settings for each item 4 Select End The setting will be registered and the screen display returns to 2 5 Press the ESC Key The Profile Monitor screen appears Scn 0䂯䇭View䂯 Thru䂯 Vert Time Move cursr End Maxmun䋺 20 000000 mm Minimun䋺 20 000000 mm When selecting Vert End Time䋺 5 00 s When selecting Time ...

Page 157: ...een for changing the cursor position appears 3 Change the cursor position Up Down Left Right key Moves the cursor Press these keys together with the SHIFT Key to move the cursor quickly 4 Press the ENT Key The setting will be registered and the screen display returns to 2 5 Press the ESC Key The Profile Monitor screen appears Trend cursor Profile cursor Scn 0䂯 䂯 Run䂯 Thru 1div x 1 000 s y 10 0000 ...

Page 158: ...t Models Switching Scenes Use the scene switching function to inspect different workpieces while switching between different measurement conditions for different measurement setups Scene 0 is displayed by default when the power supply is turned on but the Controller also accommodates scenes 1 to 15 The method for switching the scene on the console is explained below The command for switching scene...

Page 159: ...ove the cursor to Scn and press the ENT Key The selections for scenes 0 to 8 appear Use the Down key to scroll to display scenes 9 to 15 2 Move the cursor to the copy destination scene and press the SHIFT and ESC Keys The selections appear 3 Select Copy The screen for copying appears 4 Enter the number of the scene to be copied and select Execute The scene data will be copied Scn 0䂯 Run䂯 Scn 0䂯 Ru...

Page 160: ... cleared separately for each scene 1 Move the cursor to Scn and press the ENT Key The selections for scenes 0 to 8 appear Use the Down key to scroll to display scenes 9 to 15 2 Move the cursor to the scene to be cleared and press the SHIFT and ESC Keys The selections appear 3 Select Clear A confirmation message appear 4 Select Execute The scene data will be cleared Scn 0䂯 Run䂯 Scn 0䂯 Run䂯 Scn0 Scn...

Page 161: ...moving state Test results The most recent test results are displayed in reverse video After the 5th measurement the previous results are overwritten in order starting from 1 Measurement status During measurement RUN flashes Measurement results p The output number being tested is displayed Press the Up and Down keys to change the number OUT0 0004 03975mm STOP MAX MIN 0000 01821 0000 01821 No 1 2 3 ...

Page 162: ...erforming Test Measurements Continuously for the Specified Number of Measurements Only 1 Move the cursor to Run and press the ENT Key A list of modes appears 2 Select Tools The selections appear 3 Select Test Scn 0䂯 Run䂯 Scn 0䂯 Run䂯 Set Run Tools System Save Scn 0䂯 Tools䂯 Test Surrounding image Backup ...

Page 163: ...t measurements are performed for the number of times set and the measurement results are displayed Press the Left Right key in order to switch between displays 9 To continue testing repeat the operations of 7 and 8 10 To stop the test measurements press the ESC Key The display returns to the Tools mode screen OUT0 mm STOP MAX MIN No 1 2 3 4 5 AVE NUM Scn 0䂯 Tools䂯 OUT0 0010 53150mm STOP MAX MIN No...

Page 164: ...mode to Trg key 3 Select End The focus returns to the test measurement screen 4 Display the output whose measurement value you want to check Up Down key Switches between outputs 5 Press the TRIG Key The testing starts and the screen display changes to RUN 6 Press the TRIG Key again in order to end the test measurements OUT0 000 2332mm STOP MAX MIN No 1 2 3 4 5 AVE NUM Scn 0䂯 Tools䂯 Test mode 䋺Trg ...

Page 165: ...ar Press the Left Right key in order to switch between displays 7 Repeat the operations of 4 to 6 in order to perform the test measurements again 8 To stop the test measurements press the ESC Key The display returns to the Tools mode screen 001 81313 mm STOP OUT0 No 1 2 3 4 5 Scn 0䂯 Tools䂯 MAX MIN 0000 00367 AVE 0001 82836 NUM ...

Page 166: ...ent can be checked on the screen This is a convenient function when the sensor is installed inside a device preventing the measurement area from being checked directly 1 Move the cursor to Run and press the ENT Key A list of modes appears 2 Select Tools The selections appear 3 Select Surrounding image The sensor selections are displayed if two sensors are connected Select the number of the sensor ...

Page 167: ...image is not clear Up Down key Change the shutter time press these keys together with the SHIFT Key to change the shutter time quickly Left Right key Adjusts the sensitivity level ENT Key Switches the illumination on and off 5 To stop displaying the image press the ESC Key The display returns to the Tools mode screen Shutter 䋽 0 01 s䇭䇭㸡㸣 䋺Change Sensitivty 䋽 LV 11 䇭䇭㸠㸢䋺Change TRG䋺Get img Image Shu...

Page 168: ...section describes the data transfer procedures using Hyper Terminal a standard tool for Windows 95 98 and Windows NT4 0 2000 This example is based on the presumption that an RS 232C cable has been connected to the COM1 port on the PC Make the necessary adjustments if the cable is connected to a different port Refer to the relevant manual if different communication software is to be used Data is tr...

Page 169: ...ify the communication settings as follows The same communication settings must be used for both the Controller and the modem on the PC side The flow control is not performed because the XMODEM protocol is used for the communication 4 Once the preparations have been completed on the PC enter the Tools mode Item Setting value Baud rate 38400 bps Data length 8 bit Parity None Stop bits 1 bit Delimite...

Page 170: ... PC The selections for scenes appear 8 Select the scene whose data is to be saved in the PC Select Scn0 in this example Scn 0䂯 Tools䂯 Test Surrounding image Backup Scene System Sys scn Scn 0䂯 Tools䂯 Test Surrounding image Back up Scene System Sys scn Z550㫋㫆㩷PC PC㩷㫋㫆㩷Z550 Scn 0䂯 Tools䂯 Test Surrounding image Backup Scene System Sys scn Z550 to PC PC to Z550 Scn0 Scn1 Scn2 Scn3 Scn4 Scn5 Scn6 Scn7 㸡...

Page 171: ...Specify where the file is to be saved 12 Set the protocol to Xmodem 13 Click Receive and enter the file name The data will be transferred from the Controller to the PC When the transfer has been completed the screen display returns to 8 During the communication the Controller will generate a timeout error if there is no response from the external device for more than 110 seconds An error message a...

Page 172: ...rm the same operations as those described in 1 to 3 in the saving procedure to connect the Controller and PC p 166 2 Select Transfer Send File from the Hyper Terminal menu 3 Select the file to be loaded 4 Set the protocol to Xmodem 5 Select Send The data transfer screen appears 6 Once the preparations have been completed on the PC enter the Tools mode PC Data Scn 0䂯 Run䂯 Set Run Tools System Save ...

Page 173: ... will be transferred from the PC to the Controller When the transfer has been completed the screen display returns to 8 During the communication the Controller will generate a timeout error if there is no response from the external device for more than 110 seconds An error message appears on the screen Scn 0䂯 Tools䂯 Test Surrounding image Backup Scn 0䂯 Tools䂯 Test Surrounding image Backup Scene Sy...

Page 174: ...172 SECTION 4 Backing up Setting Data Z550 Operation Manual SECTION 4 Other Functions MEMO ...

Page 175: ... the System Mode 174 Switching Menus 175 Selecting the Sensor Installation Method 176 Selecting Input Source of Scene Switching 177 Setting Conditions at Startup 178 Selecting How Height Coordinates are Handled 179 Selecting the Displayed Number of Digits Decimal Part 180 Using the Download Function 181 Initialization 183 Checking System Version 184 ...

Page 176: ...nditions related to the system environment it is necessary to enter the System mode 1 Move the cursor to Run and press the ENT Key A list of modes appears 2 Select System The system mode selections appear Scn 0䂯 Run䂯 Scn 0ٕ Runٕ Set Run Tools System Save Scn 0ٕ Systemٕ Comm Profile Environment Download Initialize Version ...

Page 177: ...he following describes how to switch between these menus 1 Enter the System mode and select Environment p 174 The setting screen appears 2 Change the setting of Settings 3 Select End The setting will be registered and the screen display returns to 1 Scn 0ٕ Systemٕ Comm Profile Environment Download Initialize Version Settings Sensor Scene Monitor 1st scene Coordinate Dec pts Download End Scn 0ٕ Sys...

Page 178: ...llation status of the connected sensor is regular mirror reflection or diffuse reflection 1 Enter the System mode and select Environment p 174 The setting screen appears 2 Select Sensor 3 Select End The setting will be registered and the screen display returns to 1 Scn 0ٕ Systemٕ Comm Profile Environment Download Initialize Version Settings Sensor Scene Monitor 1st scene Coordinate Dec pts Downloa...

Page 179: ...le at the shipment 1 Enter the System mode and select Environment p 174 The setting screen appears 2 Change the setting of Scene 3 Select End The setting will be registered and the screen display returns to 1 Scn 0ٕ Systemٕ Comm Profile Environment Download Initialize Version Settings Sensor Scene Monitor 1st scene Coordinate Dec pts Download End Scn 0ٕ Systemٕ Expert Mirror Console Image Scn 0 In...

Page 180: ...lect End The setting will be registered and the screen display returns to 1 Item Option Meaning Startup Monitor screen Image Monitor screen default setting Digital Monitor screen Trend Monitor screen Profile Monitor screen The monitor screen that is displayed when the power supply is turned on is specified 1st scene Scene 0 to Scene 15 Scene 0 is set by default setting The scene that is displayed ...

Page 181: ...Meaning Individual coordinates default setting A separate coordinate system is used for each measurement range This option is used under normal circumstances Common coordinates One common coordinate system is used for all measurement ranges Because images differ according to the measurement range the measurement values may change if the measurement range is changed 30 mm 24 mm 0 mm 30 mm Individua...

Page 182: ...een 0 to 6 digits set to 6 digits by default 1 Enter the System mode and select Environment p 174 The setting screen appears 2 Change the setting of Dec pts 3 Select End The setting will be registered and the screen display returns to 1 Scn 0ٕ Systemٕ Comm Profile Environment Download Initialize Version Settings Sensor Scene Monitor 1st scene Coordinate Dec pts Download End Scn 0ٕ Systemٕ Expert M...

Page 183: ... measurement range is still stored Also perform the above procedure when a sensor of the same model is used to replace the existing sensor 1 Enter the System mode and select Environment p 174 The setting screen appears 2 Change the setting of Download 3 Select End The setting will be registered and the screen display returns to 1 Option Meaning OFF default setting Information is acquired via the s...

Page 184: ...load function is on download the sensor information to the controller in advance 1 Enter the System mode and select Download p 174 A confirmation message appears 3 Select Execute The sensor data will be downloaded and the screen display returns to 1 Scn 0ٕ Systemٕ Comm Profile Environment Download Initialize Version Download the sensor data Execute Cancel ...

Page 185: ... up in a PC before performing initialization Backing Up Data in a PC p 166 1 Enter the System mode and select Initialize p 174 A confirmation message appears 2 Select Yes A confirmation message appears 3 Select Execute The system will be initialized and another confirmation message appears 4 Select OK The screen display returns to 1 Scn 0ٕ Systemٕ Comm Profile Environment Download Initialize Versi...

Page 186: ...number and the software version 1 Enter the System mode and select Version p 174 The version information appears 2 Select OK The screen display returns to 1 Scn 0䂯 System䂯 Comm Profile Environment Download Initialize Version Z550 MC10 MC15 XXXX XX XX XX XX M Ver X XX S Ver X XX F Ver X XX OK Scn 0䂯 System䂯 Controller model number Software version and date of protection ...

Page 187: ...ed for communication with external devices via terminal blocks RS 232C or analog outputs Analog Output 186 Terminal Block 188 Setting Output Method and Communication Specifications 188 Input Format 190 Output Format 191 RS 232C 193 Selecting Output Items 194 Setting Communication Specifications 196 Setting the Profile Output Method 197 Command Formats 199 Timing Charts 222 ...

Page 188: ...not treated as actual signals by external devices 1 Enter the Set mode and select Output Scn 0䂯䇭 Set䂯 Output 4mA 5V 20mA 5V 䋺 䋺 䋺 OUT0䂯 20 000000 mm 20 000000 mm End Set the measurement value corresponding to the upper limit of the analog output 20 mA 5 V 䋨 999 999999 to 999 999999 mm䋩 The default setting at shipment varies depending on the sensor model that is connected Select the desired output ...

Page 189: ...reen for output data appears 3 Make the settings for each item Set the values in such a way that 4mA 5V 20mA 5V 4 Select End The setting will be registered and the screen display returns to 2 Refer to Timing Charts for details on I O timings p 222 Analog Terminals RS 232C Scn 0䂯䇭 Set䂯 Output 4mA 5V 20mA 5V 䋺 䋺 䋺 OUT0䂯 20 000000 mm 20 000000 mm End ...

Page 190: ...he settings are enabled for all outputs 1 Enter the Set mode and select Output The selections appear 2 Select Terminals The setting screen for output data appears 3 Make the settings for each item 4 Select End The setting will be registered and the screen display returns to 2 Scn 0䂯䇭Set䂯 Image Detect set Meas set Extra set Meas mode Output Analog Terminals RS 232C Scn 0䂯䇭Set䂯 䋺 䋺 䋺 䋺 judge output ...

Page 191: ...me delay that allows the external device to receive the result The off delay time is obtained by multiplying the value set here by 9 96 ms GATE ON delay 1 to 1000 0ms Set to 1 ms by default setting Set the time delay from when the result is output to the terminal block to when the GATE signal is turned on This is the time to wait until stable output data can be obtained Set this time so that it is...

Page 192: ...ed for OUT0 To cancel the force zero function turn this terminal on for at least 1 second When the force zero function is executed the zero value is determined using the latest measurement value even if the hold output or logging output is specified DI1 Force zero is performed for all outputs To cancel the force zero function turn this terminal on for at least 1 second When the force zero function...

Page 193: ... least one of the registered outputs is ERROR This can be used to identify that an error has occurred Note that the off delay does not function for this output RUN DO18 Turns on during measurement Will be turned off while the scene is changed or set BUSY DO19 Turns on from the start of the measurement to the completion of the profile data output if Meas mode is set to Trg External or Trg RS 232C R...

Page 194: ...UT0 OK NG DO0 OK PASS Turns off NG HIGH LOW ERROR Turns on OUT1 OK NG DO1 OUT2 OK NG DO2 OUT3 OK NG DO3 OUT4 OK NG DO4 OUT5 OK NG DO5 OUT6 OK NG DO6 OUT7 OK NG DO7 Not used DO8 to DO15 Not used ALL PASS DO16 Turns on if the results of all the registered outputs are PASS This can be used for comprehensive judgment Note that the off delay does not function for this output ERROR DO17 Turns on if the ...

Page 195: ...s a PC via RS 232C Commands can be input only when the Controller is in the Run mode Do not use the terminal blocks for input or output during command execution At least 100 ms is required to output a measurement result after receiving a command via RS 232C Input command Execute command Output result Receive result Measurement is stopped during command execution Run Mode Host device ...

Page 196: ...e and select Output The selections appear 2 Select RS 232C The setting screen for output data appears 3 Make the settings for each item Refer to the next page for the details 4 Select End The setting will be registered and the screen display returns to 2 Scn 0䂯䇭Set䂯 Image Detect set Meas set Extra set Meas mode Output Analog Terminals RS 232C Scn 0䂯䇭 Set䂯 䋺 䋺 䋺 Command䂯 Measurement䂯 OUT0䂯 End Form...

Page 197: ...ter a data acquisition command e g MEASURE or JUDGE Data Measurement Default setting Measurement values are output to RS 232C The output method is the same as for the MEASURE command Result Judgment results HIGH PASS LOW ERROR are output to RS 232C The output method is the same as for the JUDGE command Measmt Result The judgment result is output first followed by the measurement value Output OUT0 ...

Page 198: ...same as on the PC side Note that 57600 bps and 115200 bps can be used only when the following conditions are met In other cases 38400 bps is the upper limit The measurement mode is Trg External The profile transmission format is XMODEM The communication direction is only from the Controller to the external device Data length 7 bits 8 bits default setting The settings must be the same as on the PC ...

Page 199: ... End data Data interval Data size Data unit End Scn 0䂯 System䂯 Xmodem 0 1023 1 3Byte mm Item Option Setting range Meaning Out data Text The profile data is transmitted in text format The post processing will be simple but the communication time becomes longer as the amount of data is large XMODEM Default setting The profile data is converted to binary format and then transmitted The number of data...

Page 200: ...MODEM transmission 1 to 1024 Set to 1 by default setting Specify the interval at which lines are skipped in the XMODEM communication When the data is transmitted the number of lines specified here is skipped for each line sent Data size Valid only during XMODEM transmission 3 bytes default setting 2 bytes Select the data size used in the XMODEM transmission 3 bytes Transmitted in 1 µm units 2 byte...

Page 201: ...f the sensor turns off the laser or changes gradations ZERO Executes or cancels force zero 208 Command Function Page CAPTURE Performs measurement once and obtains the profile data Can only be performed when the measurement mode is Trg RS 232C 209 JUDGE or J Obtains the most recent judgment result 213 MEASURE or M Obtains the most recent measurement value 214 TREND or T At hold output Obtains data ...

Page 202: ...l be output with all of them closed to the right Example 1 In the case of 20 000000 Example 2 In the case of 20 000000 JUDPARA Output Parameter 1 Specify the corresponding values for items enclosed with 2 Place a space between items A space is not necessary before 3 Enter at the end of a command Delimiter Delimiter Delimiter 1 2 3 Decimal portion Sign Integer portion Delimiter Spaces Delimiter 20 ...

Page 203: ... correctly ER Example Function 2 Changes the averaging number The only numbers that can be input are 1 2 4 8 16 32 64 128 and 256 AVE Number Command executed correctly OK Command not executed correctly ER Example Input Delimiter Output Delimiter Delimiter AVE 4 The averaging number is 4 Input Delimiter Output Delimiter Input Delimiter Output Delimiter Delimiter AVE 8 OK The averaging number is cha...

Page 204: ...lue Command not executed correctly ER Example The judgment upper limit and judgment lower limit for the currently displayed scene are obtained using this command Display the required scene before execution Output Meaning 0 OUT0 1 OUT1 2 OUT2 3 OUT3 4 OUT4 5 OUT5 6 OUT6 7 OUT7 Parameter Meaning H Judgment upper limit L Judgment lower limit Input Delimiter Output Delimiter Delimiter JUDPARA 0 H Obta...

Page 205: ...etting range is 999 999999 to 999 999999 Command executed correctly OK Command not executed correctly ER Example The judgment upper limit and judgment lower limit for the currently displayed scene are changed using this command Display the required scene before execution Output Meaning 0 OUT0 1 OUT1 2 OUT2 3 OUT3 4 OUT4 5 OUT5 6 OUT6 7 OUT7 Input Delimiter Output Delimiter Delimiter JUDPARA 0 10 0...

Page 206: ...pecify a scene between 0 and 15 Command executed correctly OK Command not executed correctly ER Example It is not possible to switch scenes using RS 232C commands if Environment Scene in the System mode is set to Terminals ER is output Input Delimiter Output Delimiter Delimiter SCENE 4 Scene 4 is being displayed Input Delimiter Output Delimiter Input Delimiter Output Delimiter Delimiter SCENE 2 OK...

Page 207: ... from the lower limit to the upper limit Set the values so that the lower limit is equal to or less than the upper limit If the same value is set for the lower limit and upper limit the sensitivity will be fixed at that level If both the lower limit and upper limit are set to 0 the laser will be turned off However a measurement error will be generated Specify a value in the range between 120 and 2...

Page 208: ...fy either 0 or 1 for the priority item Command executed correctly Sensitivity lower limit sensitivity upper limit Command not executed correctly ER Priority item Meaning 0 Priority on dynamic range 1 Priority on sampling period default selection when setting is omitted SENS 17 The optimum sensitivity is 17 SENS 15 19 170 OK The sensitivity level is automatically adjusted in the range between 15 an...

Page 209: ...0 the laser will be turned off However a measurement error will be generated Specify a value in the range between 120 and 220 for gradations as the target value of sensor sensitivity adjustment Specify 170 under normal circumstances The total delay time for turning the laser off can be shortened more with input from the terminal block If the laser must be turned off instantaneously use the LD OFF ...

Page 210: ...If this setting is omitted the offset value that was set previously will be used Command executed correctly OK Command not executed correctly ER Example When the force zero function is executed the zero value is determined using the latest measurement value even if the hold output or logging output is specified Output Meaning 0 OUT0 1 OUT1 2 OUT2 3 OUT3 4 OUT4 5 OUT5 6 OUT6 7 OUT7 8 All zero Input...

Page 211: ...ts Can only be performed when the measurement mode is Trg RS 232C CAPTURE In case of text transmission Command executed correctly Number of measurement values Profile data transmission start line Profile data transmission end line Profile data transmission step Inclination compensation status Measurement value of the start line Measurement value of the end line OK Other errors ER LD OFF LDOFF Inpu...

Page 212: ...ne 2 or 3B OK Other errors ER LD OFF LDOFF Item Output value Meaning Inclination compensation status 0 Indicates that the inclination compensation has not been set or the inclination compensation has been set and compensation has been completed normally 1 Indicates that the inclination compensation has been set but compensation has not been completed normally CAPTURE 1024 Number of measurement val...

Page 213: ...cates the number of samples contained in the profile data to be output Dummy 0 Fixed value Has been added in order to adjust the data length XMODEM transmission size 0 Indicates that it is set to 3 bytes 1 Indicates that it is set to 2 bytes Inclination compensation status 0 Indicates that the inclination compensation has not been set or the inclination compensation has been set and compensation h...

Page 214: ...CK 128 bytes of data BK No 2 128 bytes of data BK No 24 EOT OK No response when C is sent 1 packet 128 1024 bytes CRC check performed 1 In the case of 1024 lines for each line represented by three bytes of data the measurement data is sent as 25 packets 1024 lines x 24 bits 128 bytes 24 plus 1 header packet 25 2 The flow will be the same when profile data is output via XMODEM transmission in the c...

Page 215: ...ible RST The following judgment results will be output from the Controller The last value measured is output if hold output is specified Values according to the hold setting are output at logging output Example Output Meaning 0 OUT0 1 OUT1 2 OUT2 3 OUT3 4 OUT4 5 OUT5 6 OUT6 7 OUT7 8 OUT0 to 7 Output Meaning 0 PASS 1 HIGH 2 LOW 3 ERROR Input Delimiter Output Delimiter Delimiter Delimiter Delimiter ...

Page 216: ...FF LDOFF Measurement not possible RST Example The most recent result of the measurement performed for the currently displayed scene is output The last value measured is output if hold output is specified Values according to the hold setting are output at logging output Output Meaning 0 OUT0 1 OUT1 2 OUT2 3 OUT3 4 OUT4 5 OUT5 6 OUT6 7 OUT7 8 OUT0 to 7 Input Delimiter Output Delimiter Delimiter Deli...

Page 217: ... that will be output can be calculated using the formula below In the case of hold output Measurement period Measurement time Number of measurements Number of measurements Measurement coefficient Number of data items output The number is rounded up to the nearest integer In the case of logging output Measurement period Measurement time Sampling interval Number of measurements Number of measurement...

Page 218: ... under the following circumstances At startup When clearing a scene When switching a scene When loading scene data When loading system data At initialization When changing trigger settings When the measurement period is changed If the measurement is paused e g when changing to the Set mode logging data is maintained but the data accumulated by the external trigger and self trigger is cleared Setti...

Page 219: ...t is the same as for the CAPTURE command Refer to the explanation of the CAPTURE command p 209 Assuming the measurement period is 1000 ms one sampling period is 9 96 ms and the total number of outputs is 2 TREND 0 2 Obtains the measurement result of OUT0 50 Number of measurement values 253 531112 497 575653 369 978239 OK Input Delimiter Output Delimiter Delimiter Delimiter Delimiter Delimiter 50 m...

Page 220: ...een 0 and 15 If the argument is omitted data is loaded into the scene being displayed The data transfer is performed using the XMODEM CRC or SUM protocol The XMODEM 1K protocol is not supported The Controller sends a READY signal to the host device when it has completed its initialization Wait for the READY signal to be received at the host device before starting the data transfer Command executed...

Page 221: ...ata Command executed correctly OK Command not executed correctly ER Example SYSLOAD Function Loads system data from the host device into the Controller SYSLOAD The data transfer is performed using the XMODEM CRC or SUM protocol The XMODEM 1K protocol is not supported The Controller sends a READY signal to the host device when it has completed its initialization Wait for the READY signal to be rece...

Page 222: ...otocol is not supported The Controller sends a READY signal to the host device when it has completed its initialization and then starts to transfer data Command executed correctly OK Command not executed correctly ER Example SYSLOAD This example loads the system data from the host device OK Input Delimiter Output Delimiter Input Delimiter Output Delimiter Delimiter SYSSAVE This example saves the s...

Page 223: ...evices Other VERGET Function Obtains the system s version information VERGET Command executed correctly Version information Command not executed correctly ER Example Input Delimiter Output Delimiter Delimiter VERGET Z550 MC10 M VerX XX S VerX XX F X XX Input Delimiter Output Delimiter ...

Page 224: ...put External trigger Self trigger Continuous measurement Timing Chart 1 p 222 Timing Chart 2 p 223 Timing Chart 3 p 224 Timing Chart 4 p 225 Trigger measurement External Timing Chart 5 p 226 Timing Chart 6 p 227 Timing Chart 7 p 228 Timing Chart 8 p 229 Trigger measurement RS 232C Timing Chart 9 p 230 Timing Chart 10 p 231 Timing Chart 11 p 232 Timing Chart 12 p 233 Measurement mode Hold Logging C...

Page 225: ...output at the timing when hold is set 3 Profile data for which arithmetic processing has been completed when the PROFILE command is received is transmitted Measurement mode Hold Logging Continuous measurement Hold External Image acquisition Measurement time Calculation processing Terminal block output 2 Analog output OUT for which hold is set PROFILE command received by Controller PROFILE data sen...

Page 226: ... are always output at the timing when hold is set 3 Profile data for which arithmetic processing has been completed when the PROFILE command is received is transmitted Measurement mode Hold Logging Continuous measurement Hold Self Image acquisition Measurement time This result matches with the trigger condition Calculation processing Terminal block output 2 Analog output OUT for which hold is set ...

Page 227: ...ich arithmetic processing has been completed when the PROFILE command is received is transmitted Measurement mode Hold Logging Continuous measurement Logging Image acquisition Measurement time Calculation processing Terminal block output Analog output OUT for which hold is set PROFILE command received by Controller PROFILE data sent by Controller Accumulated data OUT for which hold is set Accumula...

Page 228: ...RG signal of the terminal block is turned on and the results are output Measurement mode Hold Logging Trigger measurement External Free TRG of terminal block Measurement time Up to 10 ms Calculation processing Image acquisition Terminal block output Analog output PROFILE data sent by Controller PROFILE data RUN output OFF ON OFF ON BUSY output OFF ON ...

Page 229: ...der to set it to three times the measurement time 2 ALL PASS and ERROR outputs are always output at the timing when hold is set Measurement mode Hold Logging Trigger measurement External Hold External Terminal block output 2 Analog output OUT for which hold is set PROFILE data sent by Controller Terminal block output Analog output OUT for which no hold is set Measurement time internal signal OFF O...

Page 230: ...ime is 100 ms in order to set it to three times the measurement time 2 ALL PASS and ERROR outputs are always output at the timing when hold is set Measurement mode Hold Logging Trigger measurement External Hold Self Image acquisition Calculation processing Terminal block output 2 Analog output OUT for which hold is set PROFILE data sent by Controller Terminal block output Analog output OUT for whi...

Page 231: ...put at the timing when no hold is set 2 The GATE output does not function at logging Measurement mode Hold Logging Trigger measurement External Logging Image acquisition Calculation processing Terminal block output Analog output OUT for which hold is set PROFILE data sent by Controller Terminal block output 1 Analog output OUT for which no hold is set TRG of terminal block OFF ON GATE output 2 OFF...

Page 232: ...ommand of RS 232C is entered and then the results are output Measurement mode Hold Logging Trigger measurement RS 232C Free CAPTURE command received by Controller Measurement time Calculation processing Image acquisition Terminal block output Analog output PROFILE command received by Controller PROFILE data RUN output OFF ON BUSY output OFF ON CAPTURE command ...

Page 233: ... to set it to three times the measurement time 2 ALL PASS and ERROR outputs are always output at the timing when hold is set Measurement mode Hold Logging Trigger measurement RS 232C Hold External Terminal block output 2 Analog output OUT for which hold is set PROFILE data sent by Controller Terminal block output Analog output OUT for which no hold is set Measurement time internal signal OFF ON TR...

Page 234: ...to set it to twice the measurement time 2 ALL PASS and ERROR outputs are always output at the timing when hold is set Measurement mode Hold Logging Trigger measurement RS 232C Hold Self Image acquisition Calculation processing Terminal block output 2 Analog output OUT for which hold is set PROFILE data sent by Controller Terminal block output Analog output OUT for which no hold is set GATE output ...

Page 235: ...at the timing of no hold is set 2 The GATE output does not function at logging Measurement mode Hold Logging Trigger measurement RS 232C Logging Terminal block output Analog output OUT for which hold is set PROFILE data sent by Controller Terminal block output 1 Analog output OUT for which no hold is set Accumulated data OUT for which no hold is set GATE output 2 OFF ON RUN output OFF ON BUSY outp...

Page 236: ...234 SECTION 6 Timing Charts Z550 Operation Manual SECTION 6 Communication with External Devices MEMO ...

Page 237: ...SECTION 7 Troubleshooting and Maintenance 235 Z550 Operation Manual SECTION 7 Troubleshooting and Maintenance Troubleshooting 236 ...

Page 238: ... settings for measurement items If Meas set has already been set verify that the settings are correct Reason Changing the Height Pos correct Reference setting may affect the specification of Meas set Operation p 70 Too many items to register Perform registration after deleting unnecessary items Perform settings after deleting unnecessary items Reason The number of measurement points exceeds the al...

Page 239: ... that the span and offset are within the range for which compensation is possible Reason The span and offset are beyond the range for which compensation is possible and calibration cannot be performed Operation p 100 Communication error Stop operating the Controller and turn the power supply off then attempt to operate it again after confirming the following items Is the cable wired correctly Are ...

Page 240: ...ber on the front cover of the manual The following table outlines the changes made to the manual during each revision Page numbers refer to the previous version Revision code Revision date Revised content 01 October 2003 First edition 02 May 2005 Page 198 Corrected nm to µm in table Revision code Cat No Z190 E1 02 ...

Reviews: