


Replace the caching module - AFF A220 and FAS2700
You must replace the caching module in the controller module when your system
registers a single AutoSupport (ASUP) message that the module has gone offline; failure
to do so results in performance degradation.
• You must replace the failed component with a replacement FRU component you received from your
provider.
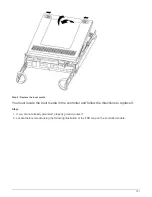
Step 1: Shut down the impaired controller
You can shut down or take over the impaired controller using different procedures,
depending on the storage system hardware configuration.
Option 1: Most configurations
To shut down the impaired node, you must determine the status of the node and, if
necessary, take over the node so that the healthy node continues to serve data from the
impaired node storage.
About this task
If you have a cluster with more than two nodes, it must be in quorum. If the cluster is not in quorum or a healthy
node shows false for eligibility and health, you must correct the issue before shutting down the impaired node.
+
ONTAP 9 System Administration Reference
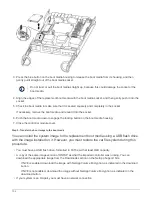
You might want to erase the contents of your caching module before replacing it.
Steps
1. Although data on the caching module is encrypted, you might want to erase any data from the impaired
caching module and verify that the caching module has no data:
a. Erase the data on the caching module:
system controller flash-cache secure-erase run
b. Verify that the data has been erased from the caching module:
system controller flash-cache
secure-erase show -node node_name
The output should display the caching module status as erased.
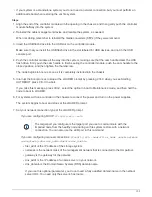
2. If the impaired node is part of an HA pair, disable automatic giveback from the console of the healthy node:
storage failover modify -node local -auto-giveback false
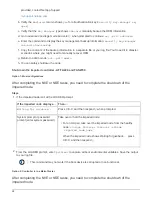
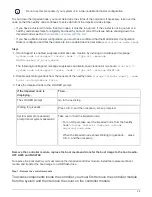
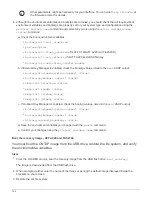
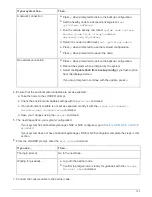
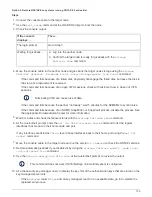
3. Take the impaired node to the LOADER prompt:
If the impaired node is
displaying…
Then…
The LOADER prompt
Go to the next step.
Waiting for giveback…
Press Ctrl-C, and then respond
y
when prompted.
112
Summary of Contents for AFF A700
Page 4: ...AFF and FAS System Documentation 1...
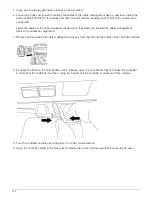
Page 208: ...3 Close the controller module cover and tighten the thumbscrew 205...
Page 248: ...2 Close the controller module cover and tighten the thumbscrew 245...
Page 308: ...Power supply Cam handle release latch Power and Fault LEDs Cam handle 305...
Page 381: ...Power supply Cam handle release latch Power and Fault LEDs Cam handle 378...
Page 437: ...1 Locate the DIMMs on your controller module 434...
Page 605: ...602...
Page 1117: ...3 Close the controller module cover and tighten the thumbscrew 1114...
Page 1157: ...2 Close the controller module cover and tighten the thumbscrew 1154...
Page 1228: ...Power supply Cam handle release latch Power and Fault LEDs Cam handle 1225...
Page 1300: ...Power supply Cam handle release latch Power and Fault LEDs Cam handle 1297...
Page 1462: ...Installing SuperRail to round hole four post rack 1459...
Page 1602: ...1599...
Page 1630: ...1627...
Page 1634: ...Orange ring on horizontal bracket Cable chain 1631...
Page 1645: ...Guide rail 1642...
Page 1669: ...Attention LED light on 1666...