4-46 System Configuration
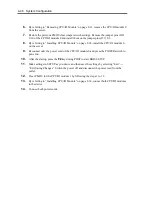
6.
By referring to “Removing CPU/IO Module” on page 8-11, remove the CPU/IO module 0
from the server.
7.
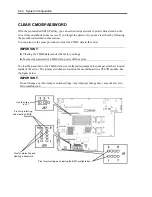
Restore the previous CMOS clear jumper switch settings. Remove the jumper pins (J20)
9-10 of the CPU/IO module 0 and install them on the jumper pins (J57) 2-3.
8.
By referring to “Installing CPU/IO Module” on page 8-14, install the CPU/IO module 0
on the server.
9.
Reconnect only the power cord of the CPU/IO module 0 and press the POWER switch to
power on.
10.
After the startup, press the
F2
key during POST to start BIOS SETUP.
11.
Make settings in SETUP as you desire and then save the settings by selecting “Exit”
→
“Exit Saving Changes.” Switch the power off and disconnect the power cord from the
outlet.
12.
Clear CMOS for the CPU/IO module 1 by following the steps 3 to 12.
13.
By referring to “Installing CPU/IO Module” on page 8-14, connect both CPU/IO modules
to the device.
14.
Connect both power cords.
Summary of Contents for Express5800/320Fd-MR
Page 13: ...v Appendix B I O Port Addresses This appendix lists factory assigned I O port addresses...
Page 19: ...xi THIS PAGE IS INTENTIONALLY LEFT BLANK...
Page 43: ...2 10 General Description Rear View...
Page 47: ...2 14 General Description CPU IO Module CPU IO module...
Page 67: ...2 34 General Description This page is intentionally left blank...
Page 79: ...3 12 Windows Setup and Operation 3 Confirm that RDR of the disk is cancelled...
Page 106: ...Windows Setup and Operation 3 39 This page is intentionally left blank...
Page 198: ...4 92 System Configuration This page is intentionally left blank...
Page 370: ......
Page 371: ...This page is intentionally left blank...
Page 389: ...6 18 Maintenance 3 Stop of PCI module 1 4 Start of PCI module 1...
Page 391: ...6 20 Maintenance This page is intentionally left blank...
Page 465: ...System Upgrade 8 31 board must not be mixed with N8804 005 or N8803 035...
Page 480: ......
Page 483: ......


