Operation Panel
4-114
3
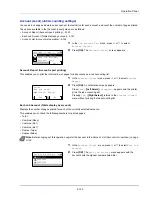
Enter the port number using the numeric keys.
4
Press
[OK]
. The port number is registered and the
Netwk Auth.
Set
menu reappears.
Domain Name (Selecting of Domain Name)
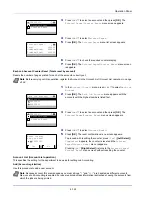
Enter the domain name for the authentication server.
1
In the
Netwk Auth. Set
menu, press
U
or
V
to select
Domain
Name
.
2
Press
[OK]
. The
Domain
screen appears.
3
Press
U
or
V
to select the domain name for the authentication
server, and press
[OK]
. The domain is registered and the
Netwk
Auth. Set
menu reappears.
If the domain has not been set, select the number where
--------
--------
is displayed and press
[Menu]
(
[Right Select]
).
4
Press
U
or
V
to select
Edit
.
5
Press
[OK]
. The
Domain
screen appears.
6
Enter the domain name using the numeric keys.
7
Press
[OK]
. The
Domain
menu reappears.
8
Check if the entered domain name is selected, press
[OK].
The
domain name is registered and the
Netwk Auth. Set
menu
reappears.
NW User Property (Obtain the network user property)
This setting is to acquire user information from the LDAP server.
1
In the
User Login Set.
menu, press
U
or
V
to select
NW User
Property
.
Note
If the port number is registered as a blank field, the
default port number will be enabled.
Note
This setting is only displayed when
NTLM
or
Kerberos
has been set as the
Server Type (Server type
selection) on page 4-113
.
Domain:
----------------
Menu
03
Domain 02
02
01
Domain 01
*
Domain:
Text
ABC
Note
Up to 256 characters can be entered. For details on
entering characters, refer to
Character Entry Method on page
A-2
.
Note
This setting is only displayed when
Netwk Authentic.
has been set as the
Login Type (Enabling of User
Login Administration) on page 4-112
and
NTLM
or
Kerberos
has been set as the
Server Type (Server type
selection) on page 4-113
.
Summary of Contents for ECOSYS P4040dn
Page 1: ...ECOSYS P4040dn PRINT OPERATION GUIDE ...
Page 16: ...xii ...
Page 22: ...Machine Parts 1 6 ...
Page 58: ...Preparation before Use 2 36 ...
Page 66: ...Printing 3 8 ...
Page 202: ...Operation Panel 4 136 ...
Page 250: ...Maintenance 7 12 ...
Page 273: ...8 23 Troubleshooting 3 Close the rear cover 4 Open and close the top cover to clear the error ...
Page 274: ...Troubleshooting 8 24 ...
Page 306: ...Appendix A 32 ...
Page 315: ......
Page 318: ...Rev 1 2014 12 2P7KDEN001 ...


