


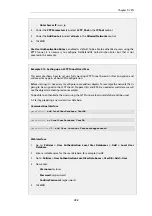


Now, we will setup the IPsec Tunnel which will later be used with L2TP. As we are going to use
L2TP, the Local Network is the same IP as the IP that the L2TP tunnel will connect to, wan_ip. In
addition, the IPsec tunnel needs to be configured so that routes are not defined statically or add
dynamically when the tunnel is established.
B. Continue setting up the IPsec Tunnel:
Command-Line Interface
gw-world:/> add Interface IPsecTunnel l2tp_ipsec
LocalNetwork=wan_ip
RemoteNetwork=all-nets
PSK=MyPSK
IKEAlgorithms=Medium
IPsecAlgorithms=esp-l2tptunnel
EncapsulationMode=Transport
AutoInterfaceNetworkRoute=No
IPsecLifeTimeKilobytes=250000
IPsecLifeTimeSeconds=3600
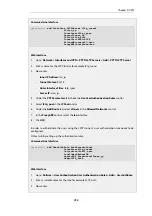
Web Interface
1.
Go to: Network > Interfaces and VPN > IPsec > Add > IPsec Tunnel
2.
Enter a name for the IPsec tunnel, for example
l2tp_ipsec
3.
Now enter:
a.
Local Network: wan_ip
b.
Remote Network: all-nets
c.
Remote Endpoint: none
d.
Encapsulation Mode: Transport
e.
IKE Algorithms: High
f.
IPsec Algorithms: esp-l2tptunnel
4.
Enter
3600
for IPsec Life Time seconds
5.
Enter
250000
for IPsec Life Time kilobytes
6.
Under the Authentication tab, select Pre-shared Key
7.
Select
MyPSK
as the Pre-shared Key
8.
Under the Advanced tab, deselect Add route statically
The option Add route statically should also be deselected.
9.
Click OK
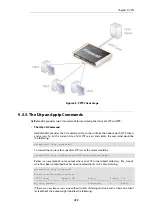
Next, set up the L2TP Server. The inner IP address should be a part of the network which the
clients are assigned IP addresses from, in this lan_ip. The outer interface filter is the interface that
the L2TP server will accept connections on, this will be the earlier created l2tp_ipsec. ProxyARP
also needs to be configured for the IPs used by the L2TP Clients.
C. Setup the L2TP Tunnel:
Chapter 9: VPN
733
Summary of Contents for NetDefendOS
Page 30: ...Figure 1 3 Packet Flow Schematic Part III Chapter 1 NetDefendOS Overview 30 ...
Page 32: ...Chapter 1 NetDefendOS Overview 32 ...
Page 144: ...Chapter 2 Management and Maintenance 144 ...
Page 284: ...Chapter 3 Fundamentals 284 ...
Page 392: ...Chapter 4 Routing 392 ...
Page 419: ... Host 2001 DB8 1 MAC 00 90 12 13 14 15 5 Click OK Chapter 5 DHCP Services 419 ...
Page 420: ...Chapter 5 DHCP Services 420 ...
Page 573: ...Chapter 6 Security Mechanisms 573 ...
Page 607: ...Chapter 7 Address Translation 607 ...
Page 666: ...Chapter 8 User Authentication 666 ...
Page 775: ...Chapter 9 VPN 775 ...
Page 819: ...Chapter 10 Traffic Management 819 ...
Page 842: ...Chapter 11 High Availability 842 ...
Page 866: ...Default Enabled Chapter 13 Advanced Settings 866 ...
Page 879: ...Chapter 13 Advanced Settings 879 ...