Advanced Guide
Troubleshooting
Contents
>
Routine Maintenance
>
Replacing an Ink Tank
> Replacing Procedure
Replacing Procedure
When the ink tanks run out of ink, follow the procedure below to replace them.
Important
Handling ink
To maintain optimal print quality, we recommend the use of specified Canon brand ink tanks. Refilling
ink is not recommended.
If you remove an ink tank, replace it immediately. Do not leave the machine with ink tanks removed.
Use new ink tanks for replacement. Installing used ink tanks may cause the nozzles to clog.
Furthermore, with such ink tanks, the machine will not be able to inform you when to replace the ink
tanks properly.
To maintain optimal print quality, install ink tanks in the machine within the date indicated on the
package box. And also use ink tanks within 6 months of first use. (We recommend you to put down
the date when installing them.)
Note
Color ink may be consumed even when printing a black-and-white document or when black-and-
white printing is specified.
Every ink is also consumed in the standard cleaning and deep cleaning of the Print Head, which
may be necessary to maintain the machine's performance. When an ink tank is out of ink, replace it
immediately with a new one.
1.
Make sure that the power is turned on, and open the Paper Output Tray gently.
2.
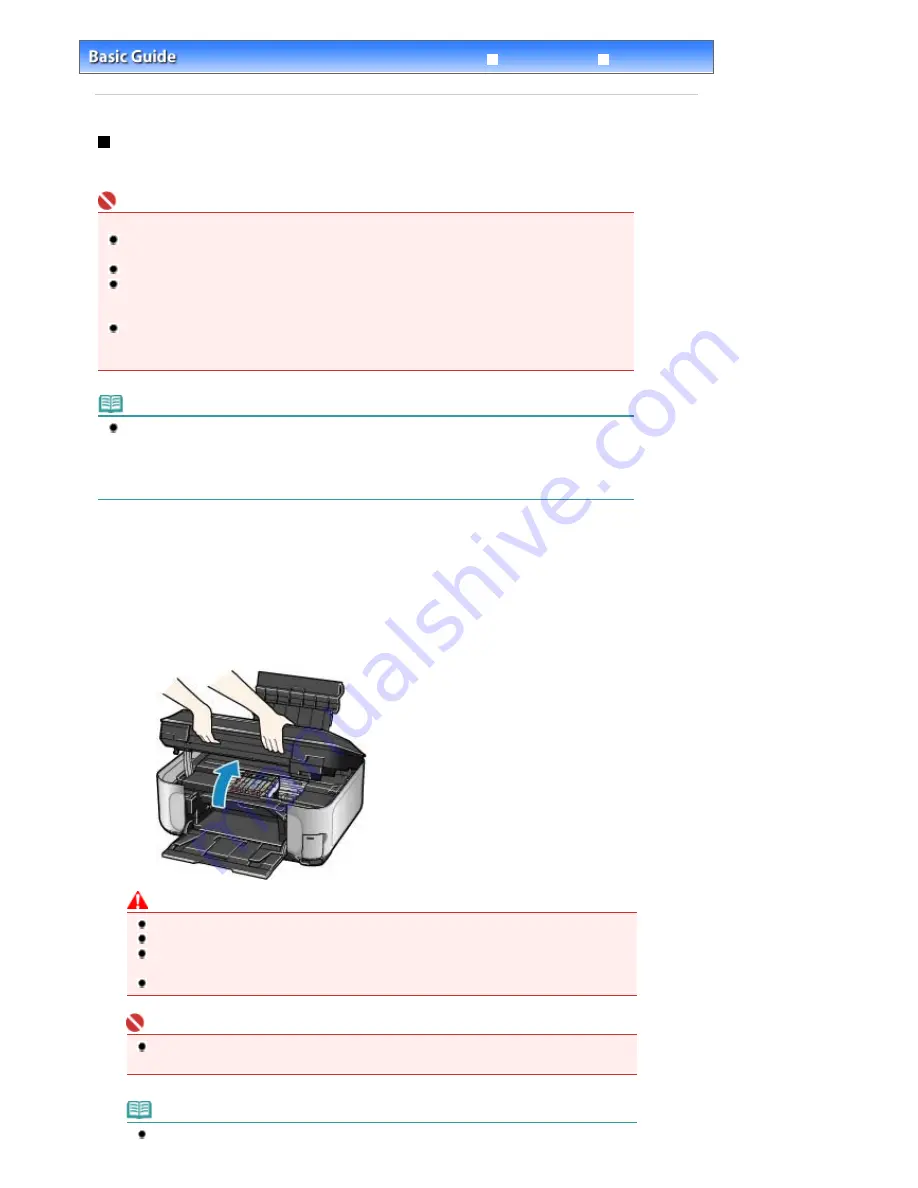
Lift the Scanning Unit (Cover) until it stops.
The Print Head Holder moves to the replacement position.
Caution
When opening the Scanning Unit (Cover), lift it with the Document Cover closed.
Do not hold the LCD or the Operation Panel.
Do not hold the Print Head Holder to stop or move it forcibly. Do not touch the Print Head Holder
until it stops completely.
Do not touch the metallic parts or other parts inside the machine.
Important
If the Scanning Unit (Cover) is left open for more than 10 minutes, the Print Head Holder moves
to the right. In this case, close and reopen the Scanning Unit (Cover).
Note
The machine may make operating noise when the Print Head Holder moves to the replacement
Page 95 of 947 pages
Replacing Procedure
Summary of Contents for MP980 series
Page 18: ...Page top Page 18 of 947 pages Printing Photos Saved on the Memory Card ...
Page 29: ...Page top Page 29 of 947 pages Making Copies ...
Page 62: ...Page top Page 62 of 947 pages Printing Documents Macintosh ...
Page 75: ...Page top Page 75 of 947 pages Loading Paper ...
Page 100: ...Page top Page 100 of 947 pages When Printing Becomes Faint or Colors Are Incorrect ...
Page 103: ...Page top Page 103 of 947 pages Examining the Nozzle Check Pattern ...
Page 105: ...Page top Page 105 of 947 pages Cleaning the Print Head ...
Page 107: ...Page top Page 107 of 947 pages Cleaning the Print Head Deeply ...
Page 159: ...Page top Page 159 of 947 pages Selecting a Photo ...
Page 161: ...Page top Page 161 of 947 pages Editing ...
Page 163: ...Page top Page 163 of 947 pages Printing ...
Page 240: ...Page top Page 240 of 947 pages Attaching Comments to Photos ...
Page 244: ...See Help for details on each dialog box Page top Page 244 of 947 pages Setting Holidays ...
Page 317: ...Page top Page 317 of 947 pages Setting Paper Dimensions Custom Size ...
Page 332: ...Page top Page 332 of 947 pages Printing with ICC Profiles ...
Page 468: ...Printing Photos Sending via E mail Editing Files Page top Page 468 of 947 pages Saving ...
Page 520: ...taskbar and click Cancel Printing Page top Page 520 of 947 pages Print Document Dialog Box ...
Page 746: ...Page top Page 746 of 947 pages Printing with Computers ...
Page 780: ...Page top Page 780 of 947 pages If an Error Occurs ...
Page 870: ...Page top Page 870 of 947 pages Before Printing on Art Paper ...
Page 882: ...Before Installing the MP Drivers Page top Page 882 of 947 pages Installing the MP Drivers ...


