Resolution. % can be specified for up to 19200 dpi (the maximum available output
resolution).
Paper Size (L, etc.) & Monitor Size (1024 x 768 pixels, etc.)
Width, height and scale cannot be specified. The preview image will be cropped according to the
selected output size and resolution. The portion within the cropping frame will be scanned at the
size of the selected paper/monitor size. You can drag the cropping frame to enlarge, reduce or
move it while maintaining the aspect ratio.
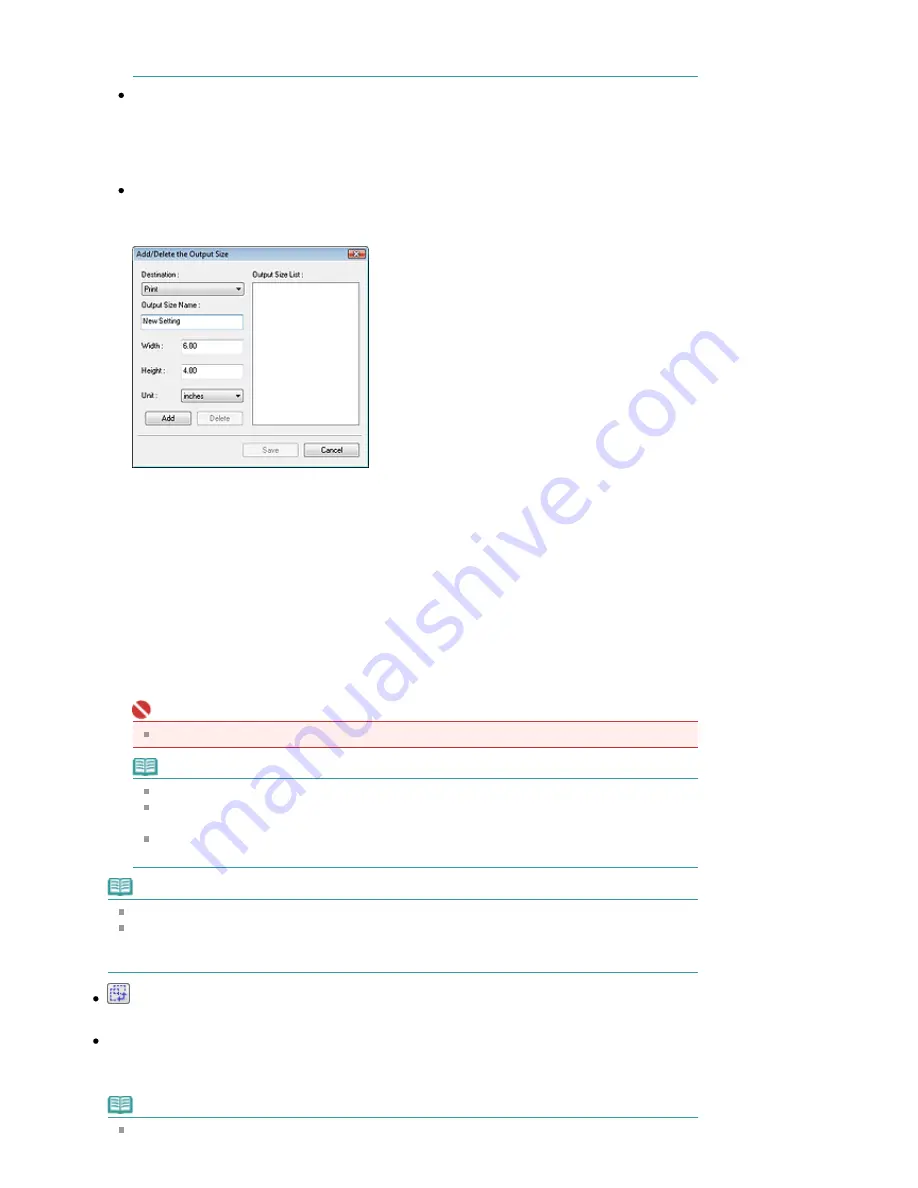
Add/Delete...
Open the Add/Delete the Output Size dialog box, in which you can save/delete custom output
sizes.
In the Add/Delete the Output Size dialog box, you can specify multiple output sizes and save them
at one time. Saved items appear in the Output Size list along with the predefined items.
Add
To add a size, select Print or Image display for Destination, then enter Output Size Name, Width,
and Height then click Add. The name of the added size appears in Output Size List.
Click Save to save all the added items. Click Cancel to cancel all items that were added after you
opened the Add/Delete the Output Size dialog box.
Delete
To delete an item, select it in Output Size List and click Delete. The deleted items will disappear
from Output Size List.
When you click Save, the items that disappeared from Output Size List will be deleted. When you
click Cancel, they will not be deleted.
Important
You cannot delete predefined output sizes such as A4 and 1024 x 768 pixels.
Note
Save up to 10 output sizes to Output Size List for each destination.
An error message appears when you enter a value outside the setting range. Enter a value
within the range displayed in the message.
Unit varies by Destination. For Print, select mm or inches. For Image display, the unit is
pixels.
Note
See "
Adjusting Cropping Frames
" for details on cropping frames.
Whether or how the cropping frame is initially displayed on a preview image can be specified on
the Preview tab of the Preferences dialog box. See Cropping Frame on Previewed Images in "
Preview Tab
."
(Switch Aspect Ratio)
Rotate the cropping frame 90 degrees. Click again to return it to the original orientation.
Data Size
An image file is created when the preview image is scanned. Its size when saved in BMP format is
displayed.
Note
When the file size is 100 MB or more, the value appears in red. In that case, a warning message
Page 627 of 947 pages
Output Settings
Summary of Contents for MP980 series
Page 18: ...Page top Page 18 of 947 pages Printing Photos Saved on the Memory Card ...
Page 29: ...Page top Page 29 of 947 pages Making Copies ...
Page 62: ...Page top Page 62 of 947 pages Printing Documents Macintosh ...
Page 75: ...Page top Page 75 of 947 pages Loading Paper ...
Page 100: ...Page top Page 100 of 947 pages When Printing Becomes Faint or Colors Are Incorrect ...
Page 103: ...Page top Page 103 of 947 pages Examining the Nozzle Check Pattern ...
Page 105: ...Page top Page 105 of 947 pages Cleaning the Print Head ...
Page 107: ...Page top Page 107 of 947 pages Cleaning the Print Head Deeply ...
Page 159: ...Page top Page 159 of 947 pages Selecting a Photo ...
Page 161: ...Page top Page 161 of 947 pages Editing ...
Page 163: ...Page top Page 163 of 947 pages Printing ...
Page 240: ...Page top Page 240 of 947 pages Attaching Comments to Photos ...
Page 244: ...See Help for details on each dialog box Page top Page 244 of 947 pages Setting Holidays ...
Page 317: ...Page top Page 317 of 947 pages Setting Paper Dimensions Custom Size ...
Page 332: ...Page top Page 332 of 947 pages Printing with ICC Profiles ...
Page 468: ...Printing Photos Sending via E mail Editing Files Page top Page 468 of 947 pages Saving ...
Page 520: ...taskbar and click Cancel Printing Page top Page 520 of 947 pages Print Document Dialog Box ...
Page 746: ...Page top Page 746 of 947 pages Printing with Computers ...
Page 780: ...Page top Page 780 of 947 pages If an Error Occurs ...
Page 870: ...Page top Page 870 of 947 pages Before Printing on Art Paper ...
Page 882: ...Before Installing the MP Drivers Page top Page 882 of 947 pages Installing the MP Drivers ...


