


754
Brocade Network Advisor SAN User Manual
53-1003154-01
Steps for connecting to a KMIP-compliant SafeNet KeySecure
20
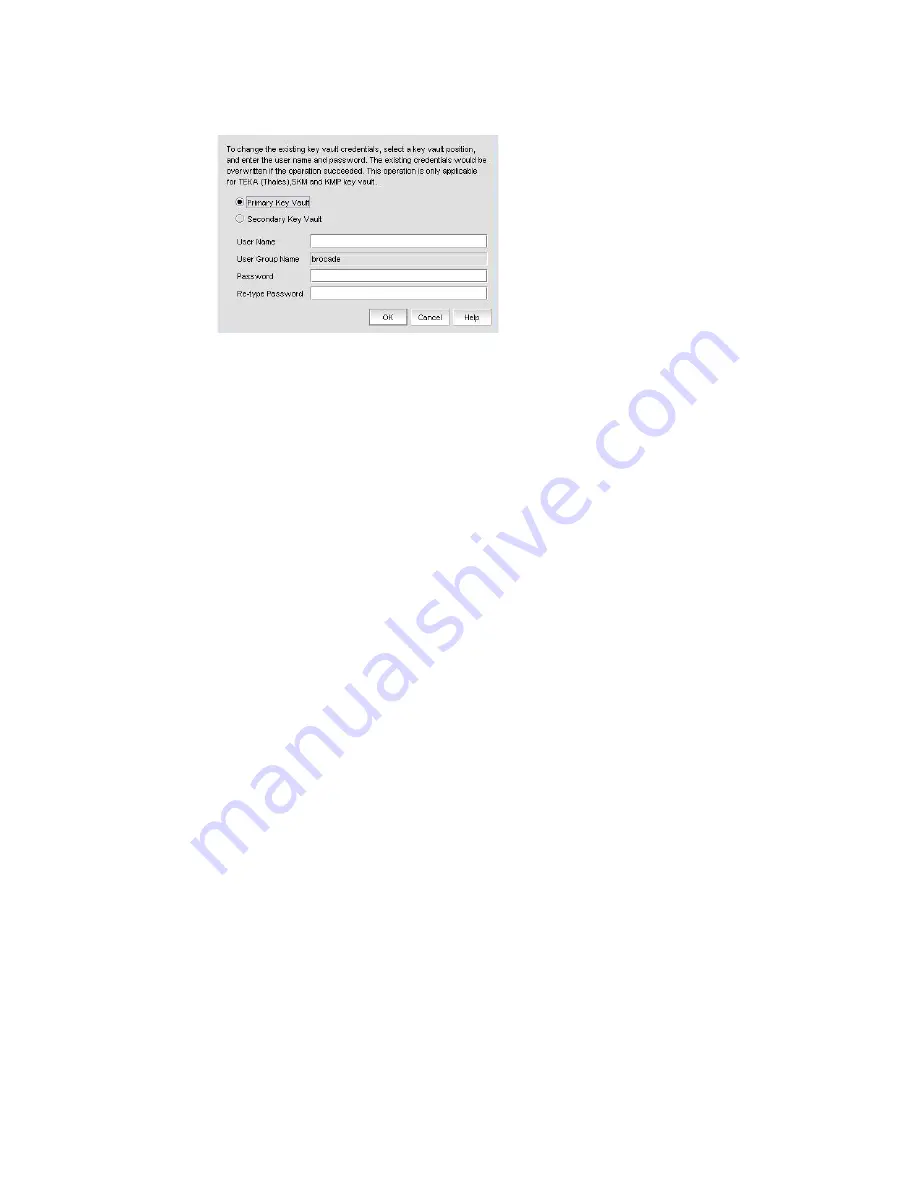
FIGURE 302
Key Vault Credentials dialog box
The dialog box contains the following information:
•
Primary Key Vault: Primary Key Vault is preselected. KMIP key vaults are clustered, so only
one set of credentials is needed.
•
Secondary Key Vault:
(TEKA key vault only)
. Shown as inactive.
•
User Name: Enter a user name for the group leader.
•
User Group Name: Displays the selected User Group Name.
•
Password: Enter a password for the group leader.
•
Re-type Password: Re-enter the password for verification.
3. Enter the Brocade user name and password, then re-enter the password for verification.
4. Click OK.
Signing the encryption node KAC CSR on KMIP
The KAC certificate signing request generated when the encryption node is initialized must be
exported for each encryption node and signed by the Brocade local CA on KMIP. The signed
certificate must then be imported back into the encryption node.
1. Select Configure > Encryption from the menu task bar to display the The Encryption Center
dialog box. (Refer to
Figure 266
on page 694.)
2. Select a switch from the Encryption Center Devices table, then select Switch > Export
Certificate, from the menu task bar.
The Export Switch Certificate dialog box displays.
3. Select Public Key Certificate Request (CSR), then click OK.
You are prompted to save the CSR, which can be saved to your SAN Management Program
client PC, or an external host of your choosing.
Alternatively, you may select a switch, then select Switch > Properties. Click the Export button
beside the Public Key Certificate Request, or copy the CSR for pasting into the Certificate
Request Copy area on the KMIP Sign Certificate Request page.
4. Launch the KMIP administration console in a web browser and log in.
5. From the KeySecure Management Console, select the Security tab, then select CAs & SSL
Certificates > Local CAs.
Summary of Contents for Network Advisor 12.3.0
Page 4: ...iv Brocade Network Advisor SAN User Manual 53 1003154 01...
Page 86: ...34 Brocade Network Advisor SAN User Manual 53 1003154 01 Uninstalling a patch 2...
Page 190: ...138 Brocade Network Advisor SAN User Manual 53 1003154 01 Fabric tracking 4...
Page 216: ...164 Brocade Network Advisor SAN User Manual 53 1003154 01 User profiles 5...
Page 612: ...560 Brocade Network Advisor SAN User Manual 53 1003154 01 Exporting Host port mapping 13...
Page 620: ...568 Brocade Network Advisor SAN User Manual 53 1003154 01 Exporting storage port mapping 14...
Page 720: ...668 Brocade Network Advisor SAN User Manual 53 1003154 01 Security configuration deployment 17...
Page 744: ...692 Brocade Network Advisor SAN User Manual 53 1003154 01 Configuring Virtual Fabrics 19...
Page 1068: ...1016 Brocade Network Advisor SAN User Manual 53 1003154 01 Removing thresholds 24...
Page 1098: ...1046 Brocade Network Advisor SAN User Manual 53 1003154 01 Swapping blades 25...
Page 1176: ...1124 Brocade Network Advisor SAN User Manual 53 1003154 01 SAN connection utilization 28...
Page 1378: ...1326 Brocade Network Advisor SAN User Manual 53 1003154 01 Event logs 32...
Page 1448: ...1396 Brocade Network Advisor SAN User Manual 53 1003154 01 Upload failure data capture 34...
Page 1490: ...1438 Brocade Network Advisor SAN User Manual 53 1003154 01 SAN shortcut menus A...
Page 1494: ...1442 Brocade Network Advisor SAN User Manual 53 1003154 01 Call Home Event Tables B...
Page 1524: ...1472 Brocade Network Advisor SAN User Manual 53 1003154 01 About Roles and Access Levels D...
Page 1552: ...1500 Brocade Network Advisor SAN User Manual 53 1003154 01 Regular Expressions F...
Page 1920: ...1868 Brocade Network Advisor SAN User Manual 53 1003154 01 Views H...


