7-5
SRW-5000/5500
7-2-3. Drum Phase Adjustment
Alignment tape:
HR2-1B
n
Rewind the alignment tape to the tape beginning in
advance.
1.
Activate the ALT MAINTENANCE menu, and
display the ALT SERVO ADJUST menu.
(HOME menu
→
[SFT]
+
[DIAG]
→
[SFT]
+
[F8]
→
[ALT]
→
[F4]
→
[ALT]
→
ALT SERVO AD-
JUST menu)
(For the ALT SERVO ADJUST menu, refer to Section
3-4-2.)
2.
Press the
[F5]
(RF SW POS) key to display the RF
SW POSITION menu.
3.
Press the
[SET]
key.
4.
Insert the alignment tape HR2-1B rewound to the tape
beginning.
.
Adjustment is executed automatically when the
alignment tape is inserted.
.
The message “Auto Adjust Complete” will be
displayed and the alignment tape will be ejected
automatically when this automatic adjustment is
completed normally.
n
The automatic adjustment may be failed even in
normal condition. If it is failed, turn off the power of
the unit once, and perform the adjustment again.
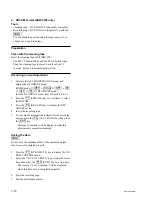
Saving the Data
5.
Press the
[F1]
(NVRAM CTL) key to display the NV-
RAM CONTROL menu.
6.
Select the “SAVE ALL DATA” by pressing the cursor
keys, then press the
[F10]
(EXIT) key to saving data.
.
The message “Save Complete” will be displayed
when this data save is completed normally.
7.
Press the
[F10]
(EXIT) key two times to exit the ALT
SERVO ADJUST menu. (Display the ALT MAINTE-
NANCE Menu.)
8.
Perform the next adjustment (Section 7-2-4).
7-2-4. HDCAM SR DT System Adjustment
Alignment tape:
HR5-1B
m
.
Cue up the alignment tape to the time code 00:10:00:00
in advance.
When using the alignment tape not located to the time
code 00:10:00:00, exit the maintenance mode and cue it
up. Then eject the alignment tape once.
.
When performing this adjustment continuously from
Section 7-2-3, start this adjustment from step 2.
1.
Activate the ALT MAINTENANCE menu.
(HOME menu
→
[SFT]
+
[DIAG]
→
[SFT]
+
[F8]
→
[ALT]
→
ALT MAINTENANCE menu)
2.
Press the
[F5]
(DT/SAT ADJ) key.
(For the DT/SAT ADJUST menu, refer to Section 3-4-
3.)
3.
Press the
[F2]
(HDSR DT) key to display the HDSR
DT ADJUST menu.
4.
Press the
[SET]
key.
5.
Insert the alignment tape located to the time code
00:10:00:00.
.
Adjustment is executed automatically when the
alignment tape is inserted.
.
The message “Auto Adjust Complete” will be
displayed and the alignment tape will be ejected
automatically when this automatic adjustment is
completed normally.
Saving the Data
6.
Press the
[F1]
(NVRAM CTL) key to display the NV-
RAM CONTROL menu.
7.
Select the “SAVE ALL DATA” by pressing the cursor
keys, then press the
[F10]
(EXIT) key to saving data.
.
The message “Save Complete” will be displayed
when this data save is completed normally.
8.
Perform the next adjustment (Section 7-2-5).
Содержание SRW-5000
Страница 4: ......
Страница 12: ......
Страница 16: ......
Страница 58: ...1 42 SRW 5000 5500 d l l S G L 6 6 d d 4 8 3 7 2 6 0 1 5 9 ...
Страница 78: ......
Страница 194: ......
Страница 376: ......
Страница 398: ......
Страница 438: ...Printed in Japan Sony Corporation 2005 2 08 B P Company 2004 SRW 5000 SY SRW 5500 SY E 9 968 022 03 ...


