GE
D
IRECTION
5573152-100, R
EV
. 2
LOGIQ E9 S
ERVICE
M
ANUAL
Chapter 8 Replacement procedures
8 - 137
8-6-6
OP Panel Knobs replacement
8-6-6-1
Operator Panel Knobs removal
8-6-6-2
Operator Panel Knobs installation
Table 8-88 Manpower / Time and Tools
Manpower /
Time
Tools
One person /
15 minutes
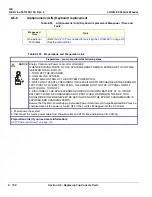
No tools are needed for this procedure,
Table 8-89 Preparations
Preparations
No preparations needed for this procedure.
Table 8-90 Operator Panel Knobs removal
Step
1.
Carefully pull the knobs, one by one, to remove them.
Table 8-91 Operator Panel Knobs installation
Steps
Corresponding Graphic
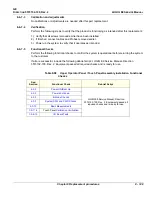
1.
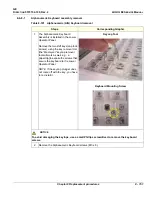
NOTE: The Operator Panel knobs are
concentric knobs, the center shaft has a D
shape. Replace the outer knobs first then
the inner ones.
Install the knobs, one by one in their
respective positions.
OP Panel Knobs
P2
P3
P4
Auto
Depth
Steer
Width
R
L
B
P1
3D/4D
Measure
Comment
Clear
Zoom
CHI
CF
PDI
CW
M
X
Y
Z
PW
Contrast
V Nav
Εlasto
Logiq
View
Freeze
L O G I Q
L O G I Q
1
2
Содержание LOGIQ E9
Страница 1: ...12 13 18 GEHC_FRNT_CVR FM LOGIQ E9 SERVICE MANUAL VERSION R6 Part Number 5573152 100 Revision Rev 2 ...
Страница 2: ......
Страница 11: ...GE DIRECTION 5573152 100 REV 2 LOGIQ E9 SERVICE MANUAL xi ZH CN KO ...
Страница 140: ...DIRECTION 5573152 100 REV 2 LOGIQ E9 SERVICE MANUAL 4 50 Section 4 8 Site Log This page was intentionally left blank ...
Страница 753: ......
Страница 754: ......


