Exinda Network Orchestrator
4 Settings
|
365
4 Settings
Learn how to configure Exinda Appliance to meet your requirements.
4.1 Network settings
Learn how to configure the network setting for your Exinda Appliance(s).
4.1.2 IP address configuration
4.1.4 DNS and domain names configuration
4.1.5 HTTP proxy configuration
4.1.8 Integrate with Active Directory
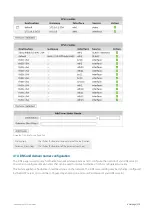
4.1.10 Overview of QoS by host
4.1.1 NIC configuration
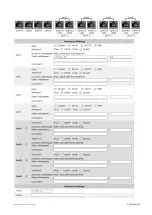
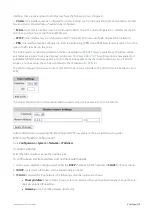
The NIC settings page is used to set the speed, duplex, and MTU of the System NICs, to set the behavior of the bridges
in the event of an appliance failure (for example, fail to wire), and to set the behavior of the second port in a bridge pair
when the first port goes down (for example, link state mirroring).
Interface Settings
You need the Exinda appliance and devices that are connected to the appliance to have the same speed and duplex
settings for their network interfaces. In most cases the default settings will work as the Exinda is setup to auto-negotiate.
However, some equipment is not compatible with this.
If the appliance and connected devices are using different speeds and duplex settings, the devices may not
communicate and traffic may be dropped. In this case, you may notice collisions, errors, packet loss, and network delays
Содержание EXNV-10063
Страница 98: ...Exinda Network Orchestrator 2 Getting started 98 6 Click New The New Virtual Hard Disk wizard opens ...
Страница 99: ...Exinda Network Orchestrator 2 Getting started 99 7 Select VHDX as the Disk Format type and click Next ...
Страница 130: ...Exinda Network Orchestrator 2 Getting started 130 Screenshot 35 The life cycle of configuration status ...
Страница 369: ...Exinda Network Orchestrator 4 Settings 369 ...
Страница 411: ...Exinda Network Orchestrator 4 Settings 411 Screenshot 168 P2P OverflowVirtualCircuit ...
Страница 420: ...Exinda Network Orchestrator 4 Settings 420 Screenshot 175 Students OverflowVirtualCircuit ...
Страница 451: ...Exinda Network Orchestrator 4 Settings 451 ...

