Exinda Network Orchestrator
4 Settings
|
406
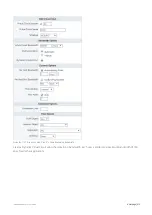
Name
: Example 3
Bandwidth
:
1024kbps
Direction
: Both
Network Object
:
Internal Users
Dynamic Virtual
Circuits Enabled
:
Yes
Per Host
Bandwidth
: 64kbps
Per User Max
Bandwidth
: 50%
Host Location
:
Internal
Max Hosts:
16
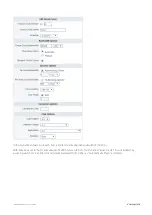
Internal Users is a Network Object that defines all hosts on the LAN side of the Exinda appliance:
If there is 1 user, the user gets 64kbps and can burst up to 512kbps.
If there are 16 users, they each get 64kbps and can burst up to 512kbps (if the other users are not using
their guaranteed 64kbps).
If there are 30 users, the first 16 users each get 64kbps and can burst up to 512kbps (if the other users are
not using their guaranteed 64kbps). The remaining 14 users will not match this VC.
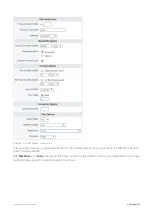
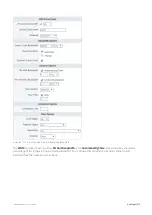
Name
: Example 4
Bandwidth
:
1024kbps
Direction
: Both
Network Object
:
Internal Users
Application
: Citrix
Dynamic Virtual
Circuits Enabled
:
Yes
Per Host
Bandwidth
: 64kbps
Per User Max
Bandwidth
: No
Host Location
:
Internal
Max Hosts
: 16
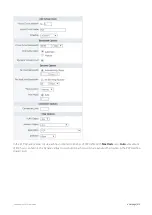
Internal Users is a Network Object that defines all hosts on the LAN side of the Exinda appliance. "Citrix" is an
Application that defines Citrix traffic. This VC will match all Internal User's Citrix traffic:
If there is 1 user, the user gets 64kbps for their Citrix traffic and cannot burst.
If there are 16 users, they each get 64kbps for their Citrix traffic and cannot burst.
If there are 30 users, the first 16 users each get 64kbps for their Citrix traffic and cannot burst. The remain-
ing 14 users will not match this VC.
Specify when multi-queue is activated
The Exinda Appliance enables greater system throughput, up to 10GB, by using multiple queues to handle the traffic.
Configure the appliance to switch from using a single-queue to using multiple queues when the specified bandwidth is
reached.
1.
On your browser, open the Exinda Web UI (
https://UI_IP_address
).
2.
Key-in the
User Name
and
Password
.
3.
Click
Login
. The Exinda Web UI appears.
4.
Click
Configuration > System > Tools > Console
.
5.
Type the appliance username and password at the prompts. Do one of the following:
To enter privileged EXEC (enable) mode, at the prompt run the command:
hostname > enable
The
hostname #
prompt appears.
To enter configuration (config) mode, at the prompt run the commands:
hostname # configure
terminal
The
hostname (config)#
prompt appears.
7.
Ensure the bridge and policy-based routing interfaces use auto-license mode.
Auto-license
is the default mode.
(config)# bridge <bridge-name> mq mode auto-license
Содержание EXNV-10063
Страница 98: ...Exinda Network Orchestrator 2 Getting started 98 6 Click New The New Virtual Hard Disk wizard opens ...
Страница 99: ...Exinda Network Orchestrator 2 Getting started 99 7 Select VHDX as the Disk Format type and click Next ...
Страница 130: ...Exinda Network Orchestrator 2 Getting started 130 Screenshot 35 The life cycle of configuration status ...
Страница 369: ...Exinda Network Orchestrator 4 Settings 369 ...
Страница 411: ...Exinda Network Orchestrator 4 Settings 411 Screenshot 168 P2P OverflowVirtualCircuit ...
Страница 420: ...Exinda Network Orchestrator 4 Settings 420 Screenshot 175 Students OverflowVirtualCircuit ...
Страница 451: ...Exinda Network Orchestrator 4 Settings 451 ...


