Exinda Network Orchestrator
4 Settings
|
381
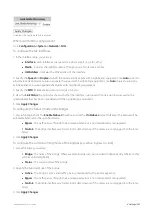
3.
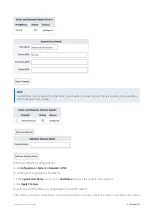
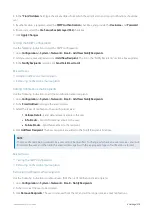
Type the
Community
string for the SNMP trap sink server.
4.
Select the appropriate SNMP trap type to send to the sink server.
5.
Click
Add New Trap Sink
.
4.1.8 Integrate with Active Directory
NOTE
You can configure the options in the Active Directory tab only after the Exinda AD Connector is installed and
configured on a designated network server that has access to the Active Directory Server. You will see the Active
Directory Server details on this tab only when the configuration is completed successfully.
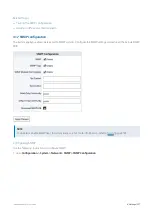
Configuring Active Directory allows the Exinda Appliance to accept network users and groups from Active Directory (e.g
logins, IP address, group membership) resulting in the ability to:
Expose Active Directory usernames in monitoring and reporting, no longer having to view users as IP addresses.
Use Active Directory groups and usernames in optimization policies, thereby implementing QoS and Optimization
Polices based on individual users or entire groups.
To configure Active Directory, you need to install the Exinda AD Connector on a designated network server, configure
various settings, and then proceed to configure the port and password settings on the Active Directory tab on
eachExinda Appliance.
How Active Directory Integration Works
Active Directory integration allows you to expose AD usernames within monitoring and reporting on the Exinda
Appliance, rather than viewing the default IP Addresses. You can also use AD groups and usernames within optimization
policies, allowing you to implement QoS and Optimization Policies based on individual users or entire groups.
Integration requires a proprietary Exinda AD Connector service installed onto a server in the network that has access to
the Active Directory server. After configuration, the Connector functions as a gateway between the Active Directory
Server and the Exinda Appliances to supply user and group information. As each user logs in using their Active Directory
credentials, the information is gathered by the Connector and passed to the Exinda Appliances. Within the Monitor
reports, IP Addresses are replaced by the user and group names where obtained from Active Directory.
Integration Process
Complete the following tasks to connect the Exinda AD Connector to the Active Directory server, and to select the
individual Exinda Appliances that will receive the AD information
NOTE
Each installation of the Active Directory Connector can have a maximum of 20 Exinda Appliances connected to it.
If there are more than 20 Exinda Appliances, you will need to install the connector on multiple Windows servers and
divide the appliances across multiple instances of the Active Directory Connector. The instructions below step you
through configuring a single Connector. Repeat these instructions if you are installing more than one instance of
the Active Directory Connector.
1.
Install the Exinda AD Connector.
For more information, refer to
Install the Exinda AD Connector
a.
Add the Exinda Appliances to the Exinda AD Connector.
For more information, refer to
Содержание EXNV-10063
Страница 98: ...Exinda Network Orchestrator 2 Getting started 98 6 Click New The New Virtual Hard Disk wizard opens ...
Страница 99: ...Exinda Network Orchestrator 2 Getting started 99 7 Select VHDX as the Disk Format type and click Next ...
Страница 130: ...Exinda Network Orchestrator 2 Getting started 130 Screenshot 35 The life cycle of configuration status ...
Страница 369: ...Exinda Network Orchestrator 4 Settings 369 ...
Страница 411: ...Exinda Network Orchestrator 4 Settings 411 Screenshot 168 P2P OverflowVirtualCircuit ...
Страница 420: ...Exinda Network Orchestrator 4 Settings 420 Screenshot 175 Students OverflowVirtualCircuit ...
Страница 451: ...Exinda Network Orchestrator 4 Settings 451 ...

