


Exinda Network Orchestrator
4 Settings
|
374
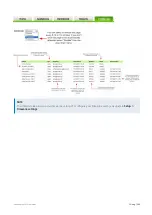
Dynamic means it was configured by the DHCP server.
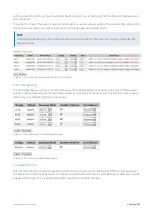
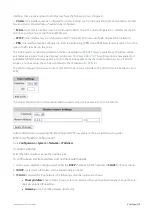
To configure the location of the DNS servers
1.
In the
System Host Name
section, type the IP addresses of your DNS servers in one or more of the
Primary DNS
field,
Secondary DNS
field, and
Tertiary DNS
field.
2.
Click
Apply Changes
. The IP addresses entered will appear in the Static and Dynamic Name Servers section as con-
figured.
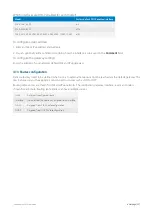
To add a domain name
1.
In the
Add New Domain Name
area, type the new domain name.
2.
Click
Add New Domain Name
. The domain name is added to the Static and Dynamic Domain Names list. All manu-
ally added domain names are static.
To remove a domain name
1.
In the
Static and Dynamic Domain Names
list, select the domain to remove. Only manually added domain names
can be removed.
2.
Click
Remove Selected
.
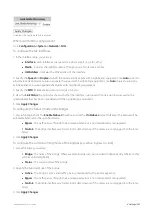
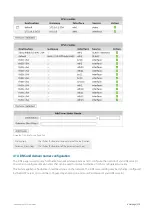
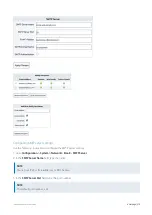
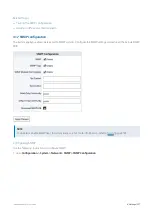
4.1.5 HTTP proxy configuration
Specify a HTTP proxy if you would like the appliance to access Exinda's server via HTTP proxy. Access to Exinda's HTTP
server is required for firmware updates, license updates, and Anonymous Proxy updates. If you have SDP enabled, please
ensure your proxy supports HTTPS.
Where do I find this configuration?
Go to
Configuration > System > Network > HTTP Proxy
.
To configure access to Exinda's server via HTTP proxy
1.
Specify the hostname or IP address and HTTP proxy port of the HTTP proxy. IPv4 or IPv6 addresses can be specified.
2.
Select the type of authentication for the HTTP proxy.
3.
Type the
Username
and
Password
for the HTTP proxy.
4.
To verify SSL certificates, clear the
Do not verify SSL certificates
checkbox.
5.
Click
Apply Changes
.
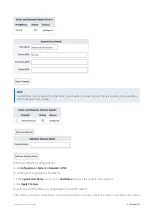
4.1.6 Email configuration
An SMTP server is required for sending email from the Exinda appliance. The appliance can email scheduled reports,
system alerts, and auto-support notifications. Initially, you must configure the connection to the SMTP server, and then
manage the users who receive the system notifications.
Содержание EXNV-10063
Страница 98: ...Exinda Network Orchestrator 2 Getting started 98 6 Click New The New Virtual Hard Disk wizard opens ...
Страница 99: ...Exinda Network Orchestrator 2 Getting started 99 7 Select VHDX as the Disk Format type and click Next ...
Страница 130: ...Exinda Network Orchestrator 2 Getting started 130 Screenshot 35 The life cycle of configuration status ...
Страница 369: ...Exinda Network Orchestrator 4 Settings 369 ...
Страница 411: ...Exinda Network Orchestrator 4 Settings 411 Screenshot 168 P2P OverflowVirtualCircuit ...
Страница 420: ...Exinda Network Orchestrator 4 Settings 420 Screenshot 175 Students OverflowVirtualCircuit ...
Страница 451: ...Exinda Network Orchestrator 4 Settings 451 ...


