18
2
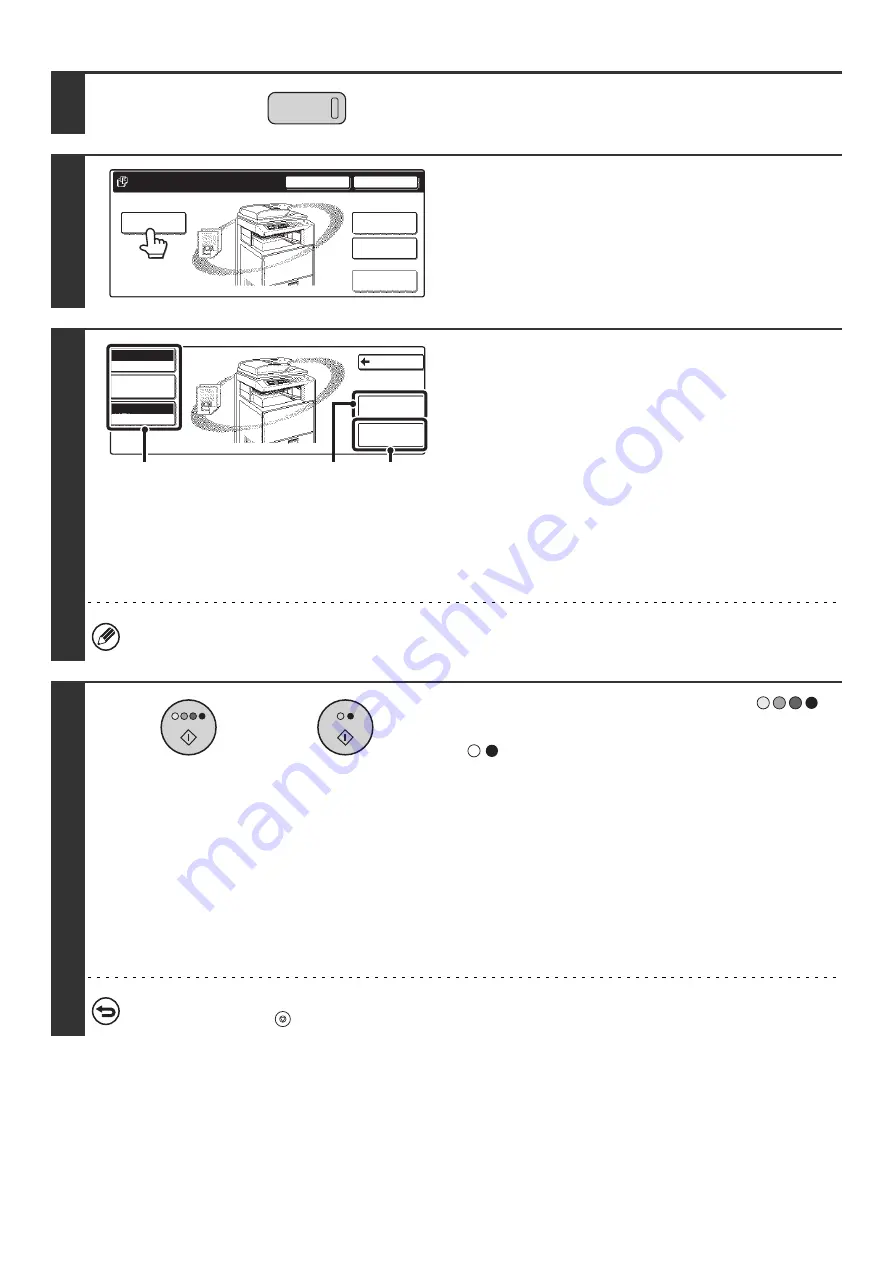
Press the [DOCUMENT FILING] key.
3
Touch the [Scan to HDD] key.
4
Select Scan to HDD settings.
If you do not wish to select settings, go to the next step.
(1) Select the color mode, job detail settings,
and the original size.
ORIGINAL SETTINGS FOR "Scan to HDD"
" (page
(2) Touch the [Special Modes] key.
Special modes screen for Scan to HDD
(3) Touch the [File Information] key.
The settings are the same as for "File". See "
" (page 15).
If the original is 2-sided, be sure to touch the [Original] key and then touch the [2-Sided Booklet] key or the [2-Sided
Tablet] key as appropriate for the original.
5
Press the [COLOR START] key (
)
or the [BLACK & WHITE START] key
(
).
Scanning begins.
• If you inserted the original pages in the document feeder
tray, all pages are scanned.
A beep will sound to indicate that Scan to HDD is completed.
• If you placed the original on the document glass, scan each
page one page at a time.
When scanning of one page finishes, replace it with the next
page and press the [START] key.
Repeat until all pages have been scanned and then press
the [Read-End] key.
A beep will sound to indicate that Scan to HDD is completed.
To cancel scanning...
Press the [STOP] key (
).
DOCUMENT
FILING
File
Folder
Quick File
Folder
External Data
Access
Scan to HDD
HDD Status
Search
File Retrieve
File Store
Back
Mono2/Auto
Color Mode
Auto 8 X11
Original
Special Modes
Job Detail
Settings
File
Information
1
/
2
(2)
(1)
(3)
or
Summary of Contents for MX-2300N Guide
Page 1: ...User s Guide MX 2300N MX 2700N MODEL ...
Page 67: ...System Settings Guide MX 2300N MX 2700N MODEL ...
Page 192: ...Copier Guide MX 2300N MX 2700N MODEL ...
Page 361: ...Printer Guide MX 2300N MX 2700N MODEL ...
Page 421: ...Scanner Guide MX 2300N MX 2700N MODEL ...
Page 552: ...Facsimile Guide MX FXX1 MODEL ...
Page 741: ...Document Filing Guide MX 2300N MX 2700N MODEL ...


