4. In the
Format:
box, use the pull-down box to select the
format
that determines how the OIT interprets
the value in the PLC register. Select from:
Format
Range
Size
(Bits)
Description
Unsigned
0 to 65535
16
unsigned 16 bit format
0 to 4294967295
32
unsigned 32 bit format
Signed
-32768 to +32767
16
signed 16 bit format
-2147483648 to +2147483647
32
signed 32 bit format
Hexadecimal
0000 to FFFF
16
hexadecimal 16 bit format
00000000 to FFFFFFFF
32
hexadecimal 32 bit format
BCD
0000 to 9999
16
BCD 16 bit format
00000000 to 99999999
32
BCD 32 bit format
5. In the
Size:
box, use the pull-down box to select
16 bit
or
32 bit
register.
6. Click the
Show State Table
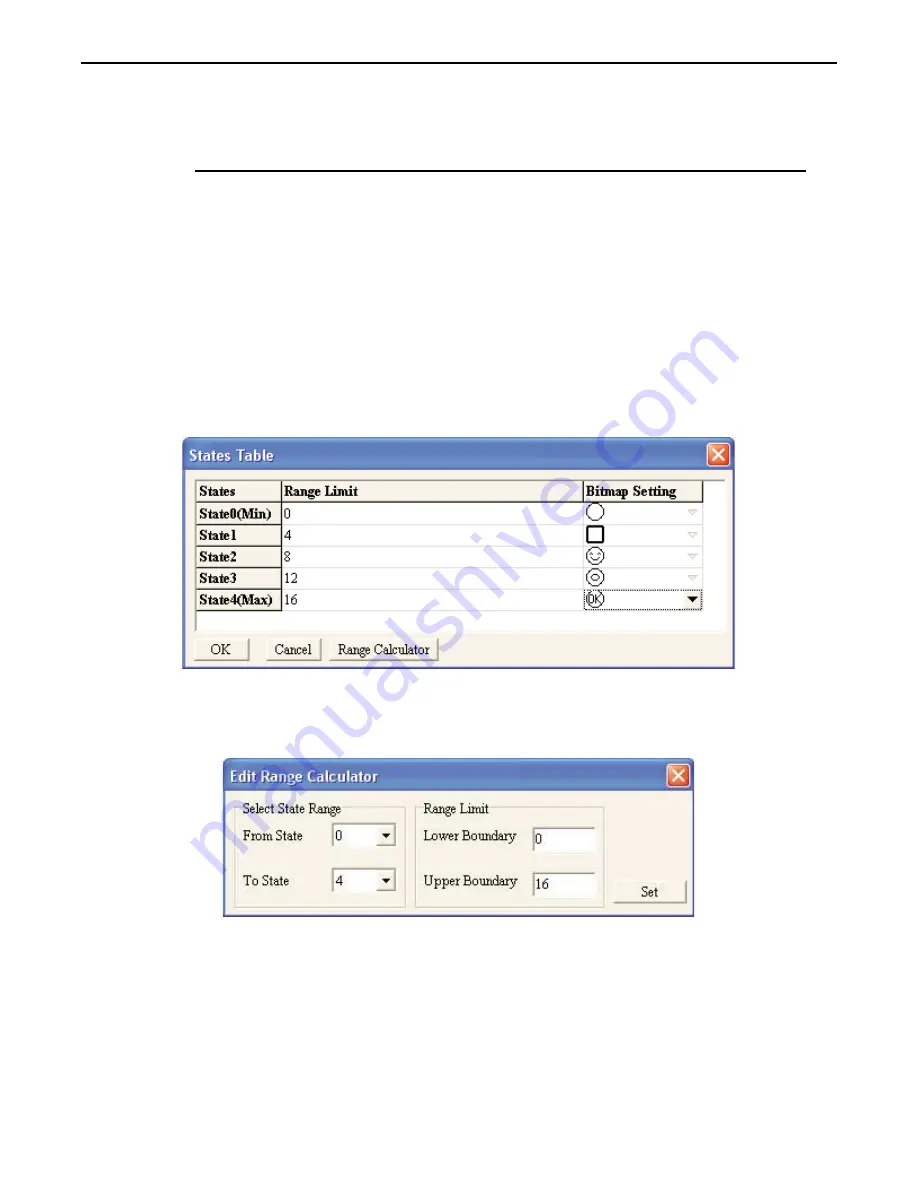
button to display the Edit Word Lamp State Table dialog box:
7. For each State, enter the
Range Limit
that determines if that state’s bitmap is to be displayed. The
range limit number entered must be larger than the prior state and smaller than each successive state, as
shown in the example above. You can also click the
Range Calculator
button to display the Range
Calculator:
8. The Range Calculator is a tool to help you easily determine the ranges. By setting the minimum value
to be represented (lower boundary) and maximum value to be represented (upper boundary), the
calculator will evenly divide the range for each state. Click the
Set
button to go back to the prior dialog
box.
9. In the
Bitmap Setting:
box select a
bitmap
for each state. There are eighteen predefined bitmaps from
which to select from (to use a custom bitmap or text labels, you must use the Multi-State Bitmap
w/Label object). Click
OK
to accept the settings and go back to the Edit Word Lamp Object dialog
box.
10. Click
OK
. The Word Lamp Object is displayed on the main screen of BlueLeaf with the appropriate
bitmap displayed. If necessary, use the mouse to drag the part to the location on the window that you
want it. Note: the Word Lamp object is always preset to 16x16 pixels in size and cannot be changed.
1010-0300, Rev 02
86
Blue Series Installation & Operation Manual


