b. Choose
Timed Interval
, then enter, or use the up/down arrow keys, to select an interval from
1-200 minutes that will save the project at that interval.
3. Click
OK
to accept changes or
Cancel
to cancel any changes made.
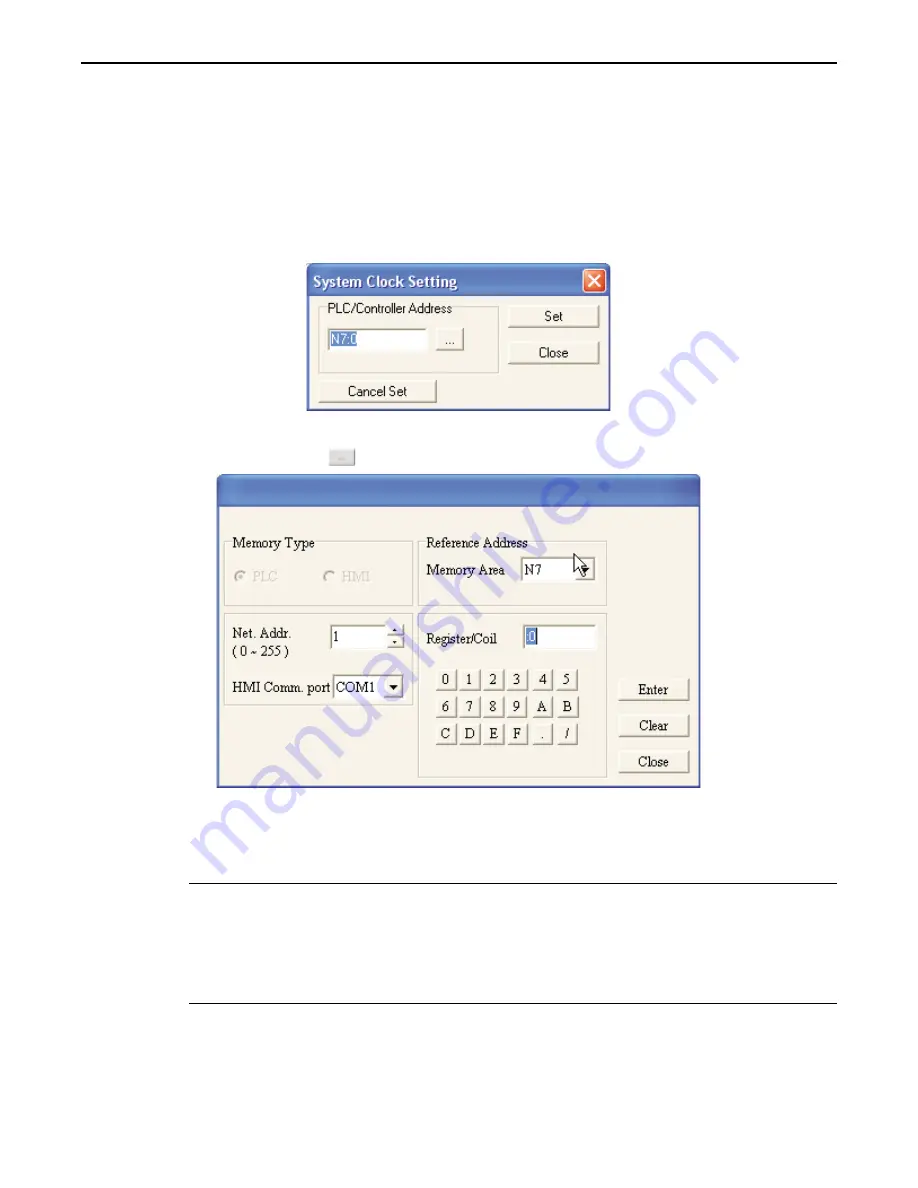
System Clock Setting
The System Clock Setting is used to write the time and date of the OIT to a register in the PLC/Controller.
4
To configure the System Clock Setting
1. On the Global Settings menu, click
System Clock Setting.
The System Clock Setting dialog box will
appear.
2. In the PLC/Controller Address frame, enter the
PLC register address,
or click the PLC/Controller
Address button
to display the address dialog box:
3. Click the pull-down box to select the
target PLC memory area.
Use the numeric keypad to enter the
specific
PLC memory address.
Select the
PLC Network Address
(if applicable) and
HMI
communications port.
Click
Enter
to go back to prior dialog box.
4. Click
Set
to accept changes,
Close
to cancel any changes made, or
Cancel Set
to cancel a previously
set System Clock Setting.
*
The time/date will be written to the OIT in the following format (Dn is the first register
-Dn
Year (example: 20077 is displayed as "7"
-Dn+1
Day (Monday = 1, Tuesday = 2, Wednesday = 3, etc.)
-Dn+3
Month (example: May is displayed as "8")
-Dn+4
Hours (24 hour clock)
-Dn+5
Minutes
-Dn+6
Seconds
Power On Macro Setting
The Power On Macro Setting is used to Write a constant to a PLC/Controller register or to set/reset a coil in the
PLC/Controller.
1010-0300, Rev 02
60
Blue Series Installation & Operation Manual


