


2. Edit the text on the different screens as desired, by double clicking the text and modifying the
attributes in the Edit Text Object dialog box. (
Consult Chapter 6 - Creating Graphics Objects...Using
Text for more information)
3. To save changes made to system screens, on FILE menu, click
Save
, or click the
Save
icon in the
Standard toolbar.
4. On the TOOLS menu, click
Write System Screens to BLU300
to download the changed system
screens to the OIT.
4
To exit BlueLeaf software
1. On the
FILE
menu, click
Exit
or click on the standard windows
Close
icon in the upper right corner.
2. If any changes have been made prior to your last save, a dialog box appears asking if you would like to
save the changes.
Printing Projects
4
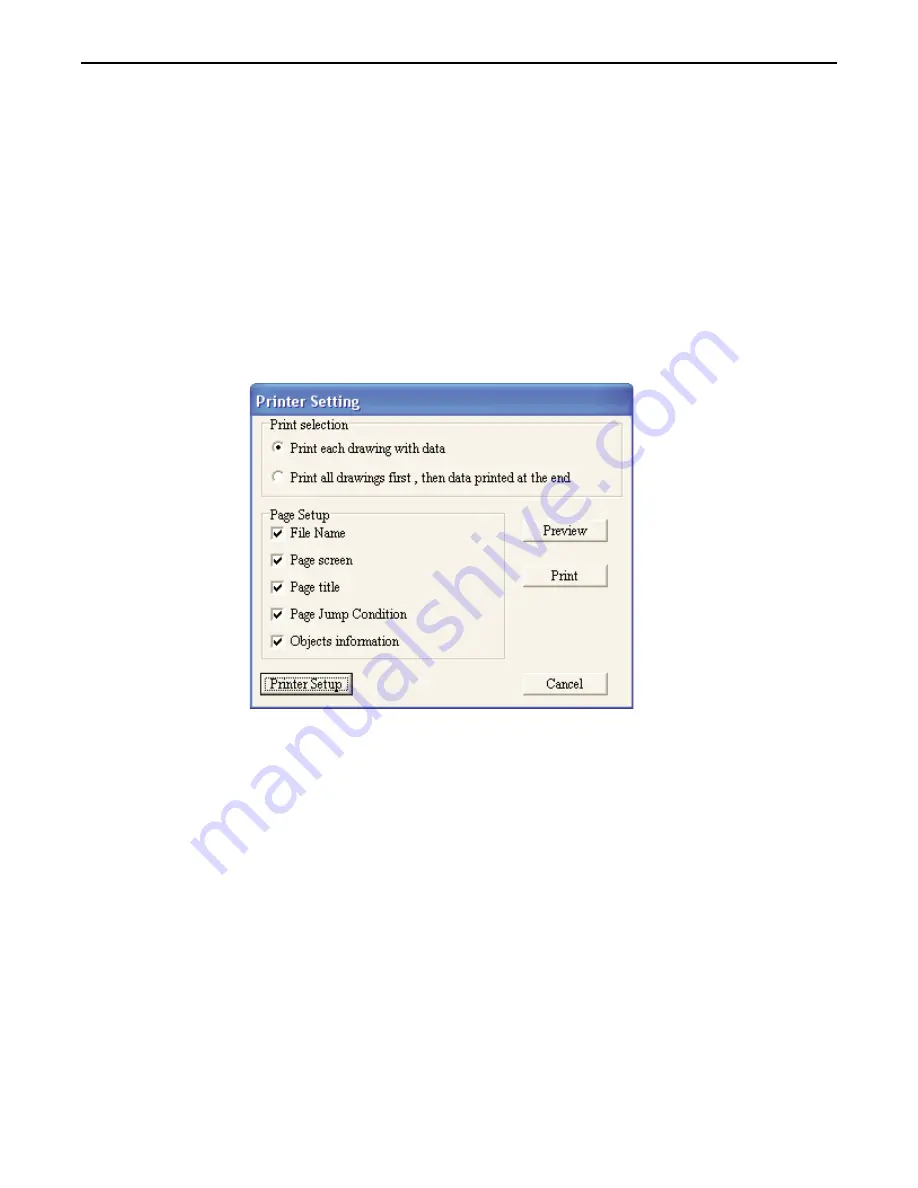
To print an existing project
1. On the
FILE
menu, click
or click the
icon in the Standard toolbar.
2. The Printer Setting dialog box appears:
3. Select the format that you want to print the project, and then click
. For an onscreen preview of
data that is to be printed, click the
Preview
button.
Editing and Creating Screen Objects
This section shows how to manipulate graphics objects that are placed onto the work area of BlueLeaf. We will use
examples from a sample project that is included with the BlueLeaf software: SAMPLE.MPL Please load this project file and
have BlueLeaf ready before you begin this section.
We will refer to Screen_1 of the project. To display Screen_1 on BlueLeaf, perform the following steps.
Display Options
Before we begin describing some of the commands that can be used to edit graphics objects, there are a few commands that
apply to the general work area of BlueLeaf.
BlueLeaf provides a
Screen Manager
that can be used to easily maneuver between screens of a project.
1010-0300, Rev 02
32
Blue Series Installation & Operation Manual


