


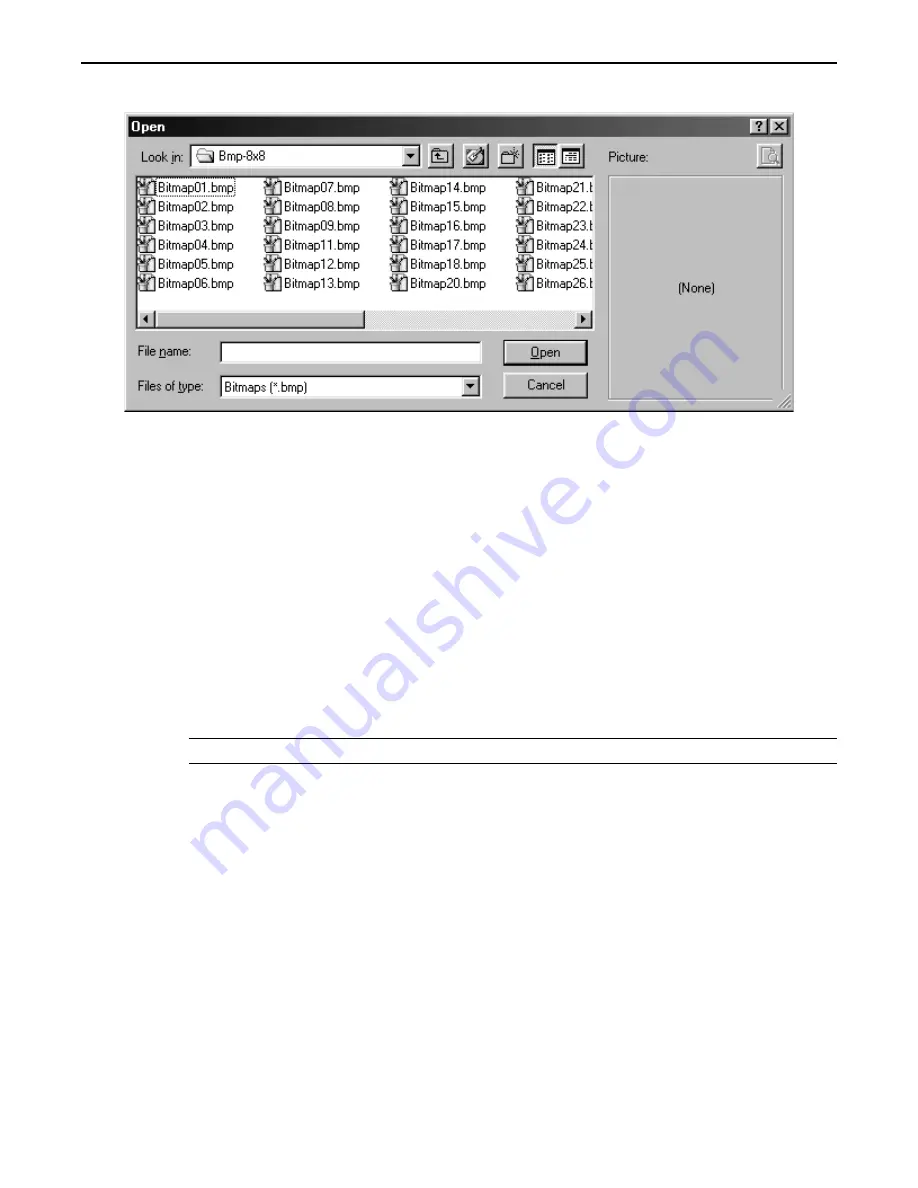
4. Double-click on any of the libraries to open that folder and display the bitmaps within that library:
5. Click on any of the bitmap files and use the Preview Box to view the bitmap. To select the bitmap,
click
Open
.
6. The bitmap will now appear on the main screen of BlueLeaf software, highlighted with small white
boxes around the perimeter.
7. Move the bitmap to the location desired by clicking and dragging the object.
8. The bitmap cannot be resized. To change the size of the bitmap, you must vary the size using some
other graphics design software.
Creating Custom Bitmaps
Custom bitmaps can be created using Microsoft® Paint or an other graphics-design software. To create a bitmap using
Microsoft Paint, perform the following steps.
1. Open Paint.
2. On the VIEW menu, point to
Zoom
, and then click
Custom.
3. Under
Zoom to,
click 800%, and then click
OK.
4. On the
View
menu, point to
Zoom
, and then click
Show Grid.
5. Create your bitmap with any of the tools.
6. Save the bitmap to the
BmpGroup
folder in the
BlueLeaf
directory.
*
The BLU300M display is only 128 x 64 pixels and only displays black or white.
1010-0300, Rev 02
82
Blue Series Installation & Operation Manual


