


Factory Configuration
Each OIT arrives from the factory without a project file in the OIT. To use the OIT, you must first create a project , then
download the project to the BLU300. Please follow the directions enclosed in
Chapter 2, Creating Your First Project
, to
configure your OIT for the PLC that you are using.
Each OIT has local setup menus that allow you to adjust some of the settings of the BLU300. Use the local setup menu to:
• Set OIT comm port settings
• Adjust the contrast setting of the LCD display
• Set a time interval for the back light saver
• Set the internal clock
• Enable the internal buzzer
• Select language
• Assign a password to prevent unauthorized access of the local setup menus
• Assign the startup screen
The BLU300 comes with a CR2032 battery for the built-in clock. If the battery needs replacing, please follow the steps
below:
4
To change the clock battery
:
1. Use a small screwdriver to remove the battery cover on the back enclosure of the OIT.
2. Push the metal side lever to spring the battery loose.
3. Install a new lithium battery (CR2032) into the battery socket, ensuring the + side of the battery is
facing up.
4. Snap the battery cover onto the back enclosure of the OIT.
5. Reset the time, day of week, and date of the clock by entering the local setup menus (see
Chapter 4:
Basic Operation of the BLU300
).
1010-0300, Rev 02
16
Blue Series Installation & Operation Manual
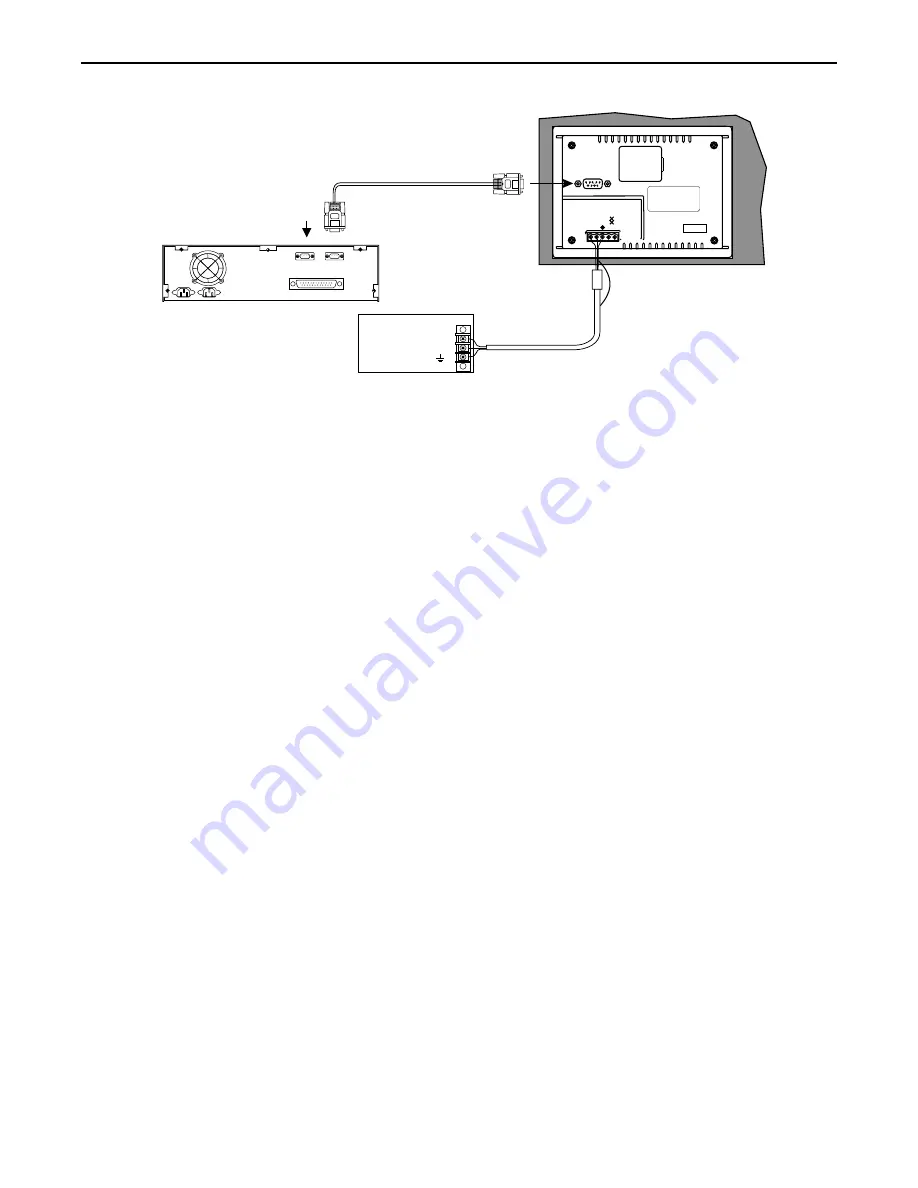
OIT Power Supply
Output
FG
DC Output -V (Gnd)
DC V (+24V)
PC
Com2 Com1
Printer
Maple Systems OIT
programming cable,
P/N 7431-0102
(If mouse is using
Com 1, use Com2)
Shielded DB9P
male connector
+24V
0V
+ -
BATTERY
EXTENSION
PORT
RS
-485
BLU300M
Connecting the BLU300M to a PC
Shield
(outside ferrite core)


